How to keep your wig fresh

• First and foremost, as you as you buy a suitable wig (lace wig, full lace wig) for your personality, you need to buy the proper accessories for caring your wig such as wig comb, wig brush, wig shampoo, wig stand, and conditioner.

• Making your wigs tables-free, spray conditioner on it and brush it. Also, you need to comb your wigs starting at the ends, not the roots.

• As wigs are delicate, store it in a closet or in a closed space. Keep them on a wig stand at room temperature for its long durability.

• To make your wigs stylish by using hair spray formulated.

• When you spray your wigs with cool water and brush with a wig brush, the volume of the wigs get reduced.

• If you have a synthetic hair wig, it is necessary not to use any heat sources like a blow dryer, a curling iron, or a hot roller.

• Always wash your wigs after 12/15 wearings. Guidelines vary for washing your wig. Generally, it should be washed every 30 wearings or four to six weeks, but it also depends on your lifestyle. If you’re around heavy smoke, perfume or strong odors of any kind, you should wash it more often.

HOW TO STYLE YOUR WIG

In our world today, a wig is a common accessory. Many women wear wigs for different reasons. Styling the wig is next to wearing them. There so many ways one can style wigs. You can make it straight, curly, braid it or pack it into a ponytail. To some people, this is a Herculean task, but it is not supposed to be so because unlike a human head, wigs are flexible; you can place the wig on the mannequin and style it yourself. Also, getting your wig styled by yourself before the event proper would not just save costs for you. This article would clearly explain how you can style your wigs whether synthetic other human hair without having to visit the stylist.

To style your wig, you need to first ascertain the origin of the wig: some wigs of some particular origin would be best styled in a particular way. Synthetic hair would not be styled the same way as the human hair.

human hair
human hair

Human hair wigs

For styling your human hair wig, you need the wig, a mannequin head, hair rollers or curling iron and a wig brush or comb.

The following steps would guide you in styling your human hair wig:

  • Wear the wig over the mannequin head and arrange it until you get a perfect fit as it would be on a human head.
  • Cut off the excess lace that comes out at the front of the wig. The lace must be trimmed to achieve a natural look. Take extra care in cutting off the lace so you do not trim the wig. For the process to be achieved, there is need for your hand to be steady while working with a good pair of scissors.
  • While on this, cut a small portion at a time. This requires a lot of patience to get a perfect work done. Trying to cut off all the parts of the lace may not come out well.
  • After cutting off the lace, define the parting. If you would want it to be parted at the centre or side of the hair, use your fine-toothed comb to do the parting neatly. Keep reinforcing the separation with the comb.
  • Wet the hair to make for easy styling. Wetting the hair is best for achieving hairstyles like perm rod sets or rollers sets. You can apply hair lotion or styling foam to make the hair smooth. Remember to be gentle while handling the hair.
  • For a curly hairstyle, use hair rollers to roll the hair and set it with a hair spray or diluted setting lotion. The setting lotion would keep the hair moist and makes the hair adhere to the effect of the roll when the hair dries.
  • If you have rough and fuzzy edges, use your wet hands to smoothen the edges and apply a good hair oil, shea butter is recommended. The oil gives the hair a natural shine. If you would want to bring out the baby hair, it is at this stage that you pick the front hair and brush it in the direction of your choice while applying edge control.
  • When you are done with the above step, air dry the wig. Do not use a blow dryer to dry your wig. Blow dryer would dry out the wig and subsequently damage it.
  • Remove the rollers when the hair is properly dried. The curls would remain.
  • Apply a shinning spray to the wig to add to its shine.

Human hair wig can be restyled using a flat iron, curling iron, blow dryer or electric rollers on medium heat. It can also be dyed, bleached or straightened to look like the natural hair. Only make sure to use a good conditioner to extend the life span of the wig.

synthetic hair
synthetic hair

Synthetic wigs

It doesn’t take much effort to maintain synthetic wigs. This is because they come with their styles. You can buy and use your wig for a long period of time without having to restyle it. It holds the style for a long time. When synthetic wigs are washed, the styling is not lost. It bounces back to the way it was once it is dried. This implies that you do not need to worry too much about styling your synthetic wigs as you would do to the human hair wigs.

Despite the fact that you do not need style to your synthetic wig often, there are simple procedures you can follow to make your wig looking new. To style your synthetic wig, you need a leave-in condition, wig shampoo, wide-toothed comb, a wig stand, a towel, a mannequin head, a spray bottle filled with water, and a blow dryer.

These steps would help you in styling your synthetic wigs:

  • Wash and dry the wig

Detangle the hair with a wide-toothed comb. Wash the wig properly and dry it on the wig stand. Any other tall item around the house can serve, if you do not have a wig stand.  Do not wring the wig and as it may cause tangling.  Do not comb the wig fully in the wet state; it may stretch and tangle the wig when it dries. Allow the wig enough time to dry so that the wig cap can dry as well.

  • Styling

When the wig is properly dried, place it on a mannequin head and secure it tightly. Using this tool would help you concentrate on the sides of the heads as you would do to a real head. Use your fingers to arrange the hairs the way you would want and hold down the style with a shaping cream. You can part the hair if your top wig is a monofilament and has not been parted before. Use a wide-toothed comb to make the part while spraying some water.

  • Use a blow dry on a low heat setting to dry the root toward the styled direction. Make sure not to over heat the blow-dry else, it burns the fibre.
  • Use your toothed comb to detangle once again. There may be need to carry the comb along with you so you would detangle the hair once the need arises especially if your wig is a long one.

Do not use styling tools like curling iron or straightener on your synthetic wigs as they are not meant to withstand a hot temperature.

Now you can style your wigs, feel free to carry out the experiments.

WHAT HAIR TYPE DO I HAVE?

I bet you already know that there are so many hair types but you are unsure of the type of hair you have. This piece would solve the mystery for you. It would uncover the different types of hair and how to identify them making it easier to determine your hair type without stress. Most times, hair types are not discussed because no matter the individual’s hair type, there are certain things she must do to take good care of her hair.

There are different hair typing systems such as LIOS, Andre Walker Hair typing system and FIA’s hair typing system. Of all the typing systems, Andre Walker’s tying system is the most popular and commonly used. Note that this does not imply that her typing system is the best. This article would touch the different hair typing systems

• Andre Walker Hair Typing System
In his book titled “Andre Talks Hair”, Andre established his hair typing system. She defined four hair types:

Type 1: Straight hair
Generally, Type 1 hairs are straight in nature. Andre further classifies them into three segments:

Type1A – the straight hair type that is very thin, fine and very soft. Its shine is also very noticeable.
Type 1B – this type of straight hair has a medium texture. It also has more volume than type 1A
Type 1C – this straight hair resists curly styling. It also has a coarse feel as compared to types 1A and B.

Type 2: The wavy Hair
Type 2 hairs are moderate in oil content. They are not too oily and not very dry. They are in between the Type 1 and Type 3.

The categories include:
Type 2A: This wavy hair is not just thin but fine. It accepts any styling – you can easily curl or straighten it.
Type 2B: The waves of this hair type assumes the shape of the head and sit that a well-fitted crown.
Type 2C: This wavy hair is coarse and tends to frizz easily.

Type 3: The curly hair
Type 3 hair is curly and the hair texture is a clear “S” shaped curl pattern. It is also noticeable in this hair type that it doesn’t shine as the Type 2 or Type 2 hairs. It has its categories as:

Type 3A – This curly hair is shiny and loose.
Type 3B – The amount of curl it has is at a moderate level ranging from bouncy ringlets to tight corkscrews.
Type 3C – This curly hair has tight coils or curls that look like the corkscrews.

Type 4: The Kinky hair
This is a full tightly curled hair otherwise known as kinky. It is extremely curled and fragile. Most times, kinky looks coarse but the truth is that it is strands of fine hair densely packed together. This is the type of hair commonly found in African Americans’ hair. It is further classified as:

Type 4A- this kinky has full tight coils. When you stretch it, it has a visible “S” pattern just like type 3 curly hair.
Type 4B – this kinky does not have a well-defined pattern like Type 4A. The face appearance is like the letter “Z”. That has sharp angles at its bends.

• The LIOS Hair Typing System
It wouldn’t be a falsehood if you say that LIOS Hair Typing System is dying slowly even though many naturals advocate for it more than the popular Andre Walker Hair Typing System.
The LIOS hair typing system is used by many because of its simplicity.

This hair typing system defined hair using these three attributes
1. Hair pattern
2. Hair strand size
3. Hair texture

Hair pattern
The pattern of the hair is defined by the letters LOIS:
L – You are said to be pattern “L” if your hair has so many right angles and bends almost without a curve.
O – You are said to be pattern “O” if the coils or curls on your hair are very significant and look like the letter “O”.
I – If there is no visible curves or bends on your hair and the hair lies flat on your head, you are a pattern “I”.
S – Those with pattern “S” have their hair strands as “S” shapes waves or curls.
Note that it is possible for one to have more than one LOIS hair pattern. In this case, you can combine the LOIS letters that define your hair to determine the hair pattern.

Hair Strand Sizes
This means identifying the size of your hair strand using a strand of thread. It is classified as:
Thin hair strand – when your strand is smaller than a piece of sewing thread
Medium hair strand – When your strand is the size of the piece of sewing thread
Thick hair strand – when the strand of your hair is larger than the piece of the sewing thread.

Hair texture
The hair texture can be any of the following:
Thready – This has a bright shine but with a low sheen. This hair texture easily gets wet and doesn’t frizz easily.
Wiry – This texture has a glossy appearance but little shine. It is difficult for the hair to get fully wet.
Cottony – This texture frizz easily. it has a low sheen and shines brightly.
Silky – This also has a low sheen but with a bright high shine. It gets wet easily.
Spongy – this hair texture has a high sheen but a low shine. It absorbs water easily just like a sponge.
Note that to accurately depict your LIOS hair type, you must wash your hair thoroughly to ensure that no hair products are left on the hair. Alternatively, you can remove a strand from your hair, wash and rinse it in cold water. Allow it to dry without touching it and get your LOIS hair type with it.

• Fia’s Hair Typing System
This typing system seems to spread through Andre Walker Typing system and incorporates some of the LOIS Hair Typing system as well.

FIA’s Hair Typing system is classified into three
1. Curls definition – this is the same as in Andre Walker system’s Types 1 – 4.
2. The general appearance of most of the hair stands – this is similar to the hair strand sizes in the LOIS. The difference is the terminology.
3. The volume of the hair – this checks the volume of the hair. To test this, tie your hair in a ponytail and measure the circumference using a soft tape.

If the circumference is less than 2 inches, you have a thin volume
Circumference between 2 – 4 inches depicts a normal volume
Circumference greater than 4 inches has a thick volume.

With the above information, it would be a piece of cake to figure out your hair type using any of the given typing systems.

Are Hair Transplants Worth It?

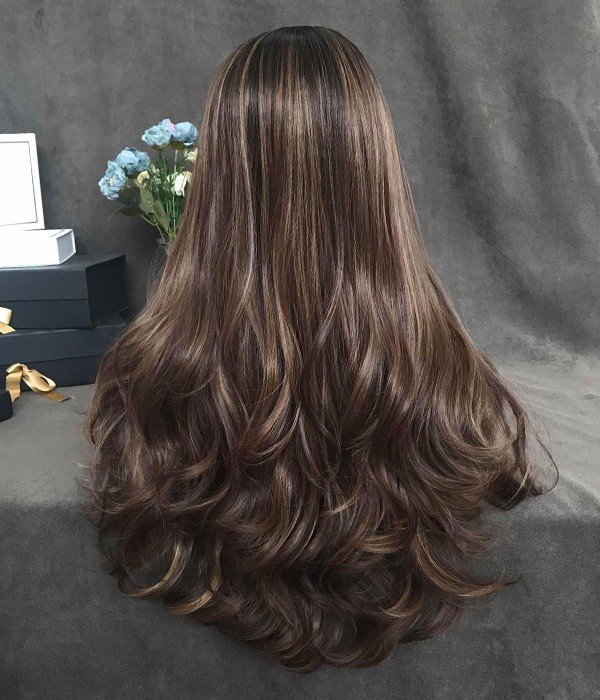
Growing hair occurs almost effortlessly for some while others have to go through so much stress which includes hundreds of hair appointments, dozens of hair products and of course dealing with hair aestheticians who all claim to have the holy grail of hair growth serums. Hence, if you’re dissatisfied with your hair texture, volume or length, and looking for a remedy, you’re likely to spend a fortune on products whose effectiveness is somewhat relative. It may seem unfair but rather than sulk, you can now explore other options that don’t include over-the-counter products. However, despite common hair conditions like breakage, thinning or balding which could span from lifestyle choices, the inability to grow hair could be as a result of a health condition. This is evident in the case of alopecia, congenital aplasia, and even cancer.

Hence, with cases like these, there’s little effect any hair growth serum, product or treatment could have. With that being said, it may be time to fish for other solutions like hair transplants. This may sound extreme to some, but if you’re gravely unhappy with the appearance or nature of your hair, you might want to consider this as a restorative solution. Luckily, we’re going to analyze this particular solution concerning certain factors to determine its worth.

Just to be clear, hair transplants are restorative procedures that involve the surgical reattachment of hair follicles retrieved from one part of the patient’s body (donor site) and implanted on the recipient area or balding spot. Certain techniques are used to harvest the donor hair which we’ll also be getting into in a minute. But, before consenting to this life-changing procedure, there are factors worth considering. These factors include the risks, cost, effectiveness, side effects, and of course the procedure’s working principle. Let’s begin with the ‘Hows’ of the trade.
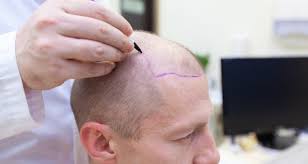
How it’s done

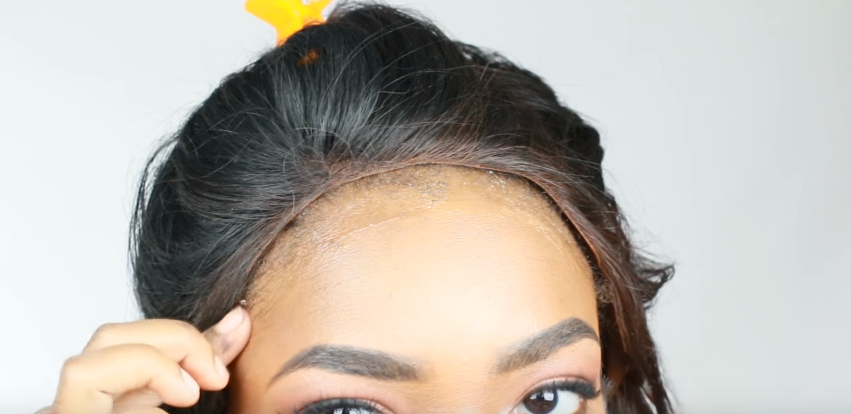
Simply put, a hair transplant is the transfer and installation of hair from one body part to another. Typically, the donor site is mostly the back of one’s head, unless your doctor thinks otherwise. As expected, before this procedure your doctor must have sterilized and numbed both areas with a local anesthetic or even a sedative if you’re up for that. Next, your surgeon will commence the procedure by using either the Follicular Unit Transplantation (FUT) or the Follicular Unit Extraction (FUE). The difference between both methods is the extraction method. While one involves the removal and reimplantation of a piece of scalp, the other has to do with hair extraction and follicle implantation.

Does it work?

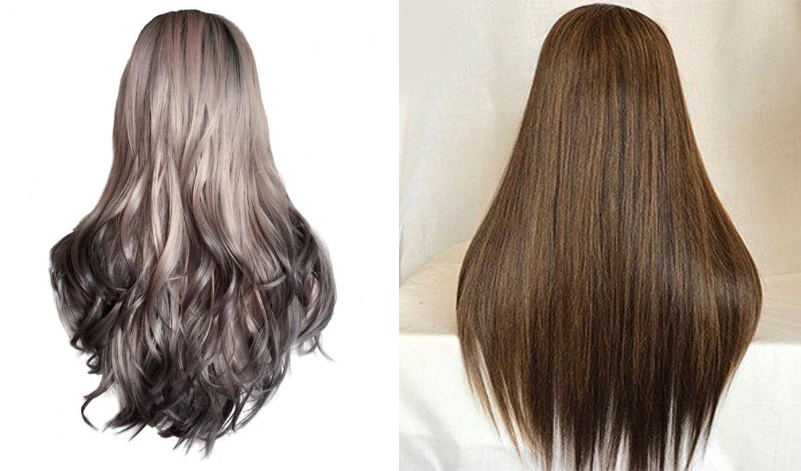
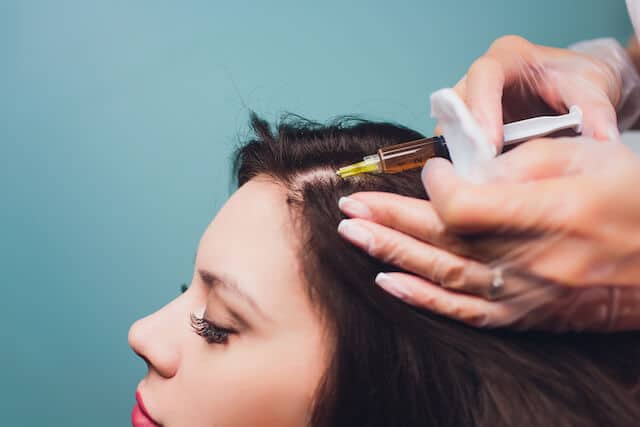
While hair products have a somewhat volatile effect on hair growth, hair transplants are known to be highly effective. The procedure works better than any over-the-counter product could ever. But, before celebrating your victory here’s what you should know. Experts claim that once implanted, about 10-80% of the transplanted hair will grow back in no less than 3-4 months, so it may take a little while before results are visible. Also, the transplanted hair was extracted from you, it’s your existing hair and it’s still likely thin over time, depending on how you care for it. Lastly, this procedure may not work as well for everyone. This is because it is a selective restorative one that can only be used to increase hair volume due to balding, thinning or hair loss stemming from injury. Therefore, if your balding or thinning is widespread, if your hair loss is due to chemotherapy or if your scalp scar is thick owing to injury, this procedure may not be as effective for you.

How much it costs

It’s important to note that hair transplants are classified under ‘cosmetic’ procedures hence your health insurance package will most definitely not cover it. Now, the price of this procedure varies depending on your location’s availability of surgeons, the adapted surgical technique, surgeon’s experience, recovery medications and of course the extent of your condition. Adding these figures together, this procedure could range from $4,000 to $15,000. Seems like a lot of money to grow hair, but can you really put a price on the accrued confidence of having full, voluminous hair? No.

Recovery

Either of the FUT or FUE procedures could take some hours or days to complete. It just depends on the commitment of your surgeon. However, once the procedure is complete, the bandages will be removed and you may notice swelling and feel pain. To help with the swelling, pain, soreness, and redness you may be prescribed analgesics like ibuprofen as well as antibiotics, anti-inflammatories, as well as hair stimulating medications. Regardless of this, you may not be able to brush your hair for another three weeks but you should feel good enough to function normally in three days.

Possible Side effects

Every procedure has risks and potential side effects and for hair transplants, one thing you should definitely expect is scarring. It is somewhat inevitable for any surgical procedure. However, on the flip side, other side effects include bleeding, numbness around affected areas, scalp pain, itching, infection, swelling, hair loss if the patient is still balding. This is just a handful of the side effects from the actual procedure, others could be prior to the medication. Nevertheless, these side effects could be minimal for some patients and they could be gruesome for others. Hence, it’s important to seek your physician’s opinion before embarking on this procedure just to ensure your health can take it.

Conclusion

The human hair is a critical part of the body. When damaged, deteriorating or balding it can create severe damage to the bearer’s psychological health as in the case of low self-esteem or it could even nullify one’s confidence thus affecting how such an individual carries out his/her daily activities. Now, a lasting solution in the form of hair transplantation can turn things around for such individuals, but with the price, side effects, and overall fear of the procedure a lot might be discouraged. Nevertheless, this doesn’t take away the fact that hair transplantation is singly the most effective hair restorative procedures available today and it is definitely worth the try.

How to Style Wigs with Bangs

“Every girl’s best accessory” has changed over time and for this decade, it is undoubtedly the wig. Different styles with different colors and lengths have flooded the world’s market and can be found in the room of every girl who is considered stylish. And if you are not on this train, really, what are you waiting for?

Maybe you do not have so much of a variety of wigs, but you want to look different at every event. Why not? This is very possible when you style your wigs; creating new looks from what you believe is a limited number. Different styles can be made but this article is focused on styling your wigs with bangs.

Why should you style with bangs?
The most obvious reason is that bangs are always in style. Think back to all the movies you have watched for at least the past 2 decades; actresses, celebrities and everyone in between have worn bangs at some point and totally killed it. Bangs have had their peak seasons but one thing is certain; they have always been and would always remain stylish. So, depending on the shape of your face, you can always find the right size and style of bangs to fit and accentuate your facial features.

Reasons to style your wigs with bangs
We have agreed that bangs are stylish and special, but why should you style them on your wigs? There are a couple of reasons actually, but we would be looking at just a few of them
• Bangs are known to help frame, shape and accentuate the face.
• They are used to cover up forehead and facial skin issues e.g. pimples, acne, and reactions.
• They remove the need for a frontal lace and would make your wig look as natural as possible.
• In fact, most people believe that bangs provide a younger look as it was most common with teen idols in the ’90s who needed to always look young and appealing.

Procedure for styling your wigs with bangs
To style your wig with bangs, a couple of steps must be taken. It is essential to have your selected wig ready and decide on one of the 3 popular styles; the side-swept bang, the curtain bangs and the most common which is the straight bang. Each of them has different ways to make and can be more specific to different facial shape (more on this later).
The only common thing with all three styles is that you need to wear your wig and pack up your hair in a bun before you begin. Also, remove the hair from the bundle gradually, rather than all at once so you can fit it nicely and gradually into the style you want. Ensure you have a mirror and sharp scissors so your work can go on smoothly.

1) For the side-swept bang

side-swept bang
side-swept bang

The side-swept bang is a one-sided bang with your front hair made to be arched at a particular angle on the face. After doing the procedure stated above, you should

• Use a small-sized comb (e.g. the rat tail comb) to comb and straighten the hair in front.
• Choose between your right and left side for the bangs to be at. This is a personal decision and should be determined by your more photogenic side, better eyesight, etc. (Note: your bangs should cover your non-flattering side).
• Next, pull your bangs on the side you want them to be at, hold them in place and make a cut at an angle, preferably around 45 degrees. Continue to comb and snip until you achieve your desired result. Watch out for any uneven ends.

2) For the curtain bangs

curtain bangs
curtain bangs

The curtain bangs are unique from the side-swept bang as they are usually longer, not angular and you might not be particular about achieving even ends on either side. Following the basic steps already stated, you also need to

• Comb the hair you plan to use for the bang, straighten it up and then cut up to the length that you desire.
• Make a defined parting either at the center or any point across the bang and sweep each half to its side.
The advantage of this style is that you can change the “curtain” by increasing the amount on either side depending on your preference.

3) For the straight bangs

straight bangs
straight bangs

This is the most popular style and there are a lot of reasons why it is so; it is a simple look and extremely flattering. Even though it looks simple, it requires as much effort as the other types but may be properly packed into an updo if need be too. So, it acts as a 2-in-1 style. Besides, it is the style that makes wigs look as real as human hair and is the most protective of the forehead while covering receding hairlines and messy eyebrows. The procedure for this style includes

• Comb the bang and make sure it is as straight as possible.
• Place the hair between your fingers and cut the hair in tiny snips (This would ensure that you have the opportunity to quickly correct an error if it arises).
• Continue combing and snipping and ensure the bang is as straight and even as possible.

Tips for choosing the right bangs

1) Side swept bangs
This style helps to cover up unflattering sides of the face and may also add length to the face. Therefore, they are ideal for shapes that are fuller in the middle e.g. round, square, heart and diamond-shaped faces.

2) Curtain bangs
Curtain bangs are also very flattering and lengthening for short shaped faces. If your face shape is a good fit for the side-swept look, then congratulations, the curtain bangs are also a great option for you. So, the round, square, diamond and heart-shaped faces can enjoy the curtain bangs too.

3) Straight bangs
While the former styles soften the facial features, the straight bangs tend to make the face even more angular. For example, a triangle-shaped face would be best suited for the straight bang so that there would be less focus on the lower side of the face and also give the needed width to the top of the face.

Overall, bangs are beautiful hairstyles that always seem to trend. So why not use this knowledge to style your wigs as such and beautify yourself in the process?

Best Wig Glue

Wigs can be a magical tool for anyone looking to temporarily change their style, experiment with bangs, or dye their hair without damage (or the occasional regret). However, if you don’t have the right glue for your lace front wig, you risk spending your day worrying about sudden removal and sweat.

Adhesive, also known as glue, cement, mucilage, or paste, is any non-metallic substance applied to one or both surfaces of two separate items (Wig and frontal) that binds them together and resists their separation.

Wigs are a great way to get a natural look and at the same time have celebrity hair at an affordable price. Using an adhesive on your lace front wigs makes it look more natural and helps the lace blend with your skin. The types of glue you select will be determined by your lifestyle and how often you would like. One of the most important questions you should ask yourself is how long you want your application to last. How long an application last depends on the following factors

1. The type of adhesive used for the lace front wig application.

2. How well you follow the application instructions.

3. How oily your skin is.

4. How physically active you are.

5. The type of climate you reside in.

There are different types of lace front wigs glue and lace font wigs tape to suit each lifestyle.

wig glue
wig glue

Ultra hold glue
Ultra hold glue is perhaps the most popular lace front wigs glues available. It can give you a stronghold for three to four weeks. It is recommended for people that have not had any luck with other types of glues.

Invisibond glue
Invisibond is a water-based glue that will give you about 2 to 3 weeks hold. It comes as a white liquid but dries on clear to give you a waterproof strong bond. Invisibond is especially recommended for people new to lace front wigs glue and do not know which one to go with. Invisibond is also great for sensitive skin or skin that is prone to breakouts.

Lace front wigs tape
There are many different types of lace front wigs tape that you can use to apply and attach your lace front wig. Most people like tape because it is easy to use and easy to take off. The clean up for tape is extremely easy and getting a great looking application that looks professionally done is easy with tape.

Vapon No Tape Glue
It comes as a clear liquid. It also dries clear also to give you a strong waterproof bond. It should be used with extreme care as it hardly allows any room for mistakes. It is great glue for people that sweat a lot.
Super Lace Glue has been specially formulated to bring you an invisible, long lasting and worry free bonding sensation to make it feel like your hair. If you had problems getting a long lasting glue to last long, then you will love the strength and security offered by Super Lace Glue.

Usage
Cleanse skin with alcohol to remove all dirt and oils. Use the applicator nozzle tip with a brush and wooden stick to apply a thin coat of glue on the hairline evenly. Make sure the glue is dried before applying an additional coat for strength. While the glue is still sticky, apply lace wig onto the hairline and press for 1 minute or until firmly in place. Wait 15 minutes before you begin to style.

Why or why not glue for frontal
To use wigs, you cannot just fix wigs on your head without the frontal. The frontal cannot also just stick to your head without the glue. The essence of the glue is to make the frontal stick to your head and make installation and removal so easy. Frontals need to be attached through sewing, tape or glue. Glue usage is our focus.

The glue is usually white and requires several thin layers spread on the edge of your cap and a little of your skin. After repeated for stability, your stylist will sew down the back of your wig, or your bundles may later be installed and lay the frontal gently across your head until she firmly presses the frontal’s lace against the glue and smoothes in place with fingers or a rattail comb.

Can you bleach human hair wigs and how to protect them

There are two basic types of wigs that people can choose to wear: those made from natural human hair and those that are made from synthetic fibres. Both varieties have apparent advantages – human hair wigs can give you a very natural look while synthetic wigs are a lot easier on the budget.

However, it’s not always that simple when you have to choose a wig for your personal use. There are many other pros and cons to each option that you would need to consider carefully to end up with a hairpiece that is perfect for you.

human hair & synthetic hair

One of the most important questions that you would need to answer is what the benefits of human hair wigs are? Some of these wigs are selling for a great deal more than synthetic wigs, sometimes even costing thousands of dollars per piece. It is therefore natural for an interested buyer to wonder about what makes these wigs so expensive.

Well, as mentioned earlier, there is nothing better than a human hair wig if you are looking for a completely natural appearance. The hair feels soft and real because it is indeed real. You can style it any way you like and even dye it if you so choose. In other words, you can treat it just like you would your hair. Of course, it is still not recommended that you subject a wig, whether it is made from hair or otherwise, to excessive styling and dyeing because it can sustain irreparable damage over time.

Nowadays, all the girls who want to change their hairstyle quickly without any effect on their real hair. Synthetic wigs are a much more affordable alternative to human hair wigs. Unfortunately, because of this, they don’t last as long as human hair wigs and are also more limiting as far as shape and style options. They also require extra care to keep them looking clean and smelling fresh. However, with proper maintenance and use, synthetic wigs are an efficient and affordable option, whether you need a wig for personal or professional use. Unfortunately, they cannot be lightened. In this article, let’s explore can you bleach human hair wigs and some tips to protect your extensions.

How To & Tips
How To & Tips

We can dye or bleach hair to change human hair colour, lots of women wear a full lace wig and lace front wig every day. Hair just like they dress clothes themselves, they spend more time wearing human hair wigs than on makeup. But do you know what to do when you tired of the same old hair colour, day in and day out?

Anytime you want lighter hair; you should slightly bleach human hair wig with care like not ruin the wig. Thankfully, changing the colour of the lace wig is as simple as colouring your natural hair, the only issue being the delicate knots that attach the hair to the lace. When changing wig hair to a lighter colour, you will also need to bleach the knots for human hair wig. This process should be done with care just like not ruin your daily friend.

Human hair wigs are very versatile, and you can use them for different purposes. They can be maintained easily and have a long lifespan. You can treat them like your hair. To retain their natural look, you can wash, shampoo and dye them in the ways you like. You can create different and fashionable hairstyles by using them effectively. Wigs with small clips can be attached to the existing hair very quickly and will be very stable, so you do not need to worry about them getting slipped.

Office ladies also prefer human hair wigs, because these wigs can not only help them achieve great looks but also boost confidence when you feel great about how you look, your self-confidence increases.

Bleach and highlights remove the colour from your hair by the process of oxidation. “Oxidation decolorizes the pigment in your hair shaft, which is why bleach will turn your hair almost white if it’s left on for too long. Very bleached hair often gains a yellow tint, because keratin (the protein your hair is made of) is naturally a pale yellow,” says Cuannane Phillips. “Hair needs to be tinted as well as bleached for the platinum blond look. It’s impossible to make your hair a lighter shade without the help of a bleaching agent — all of which are called ‘oxidizing agents.'”

Semi-permanent: or temporary hair colour gives you more natural colour and is also easier to use. You can use semi-permanent dyes straight from the applicator as they don’t have to be pre-mixed. Cuannane Phillips adds, “They last for about six weeks and tend to fade progressively. As temporary colours don’t contain bleach, they can’t lighten your natural shade. Temporary dyes fade with shampooing and exposure to air. This means they need to be frequently reapplied, which can be damaging.”

Permanent hair dyes: are also known as “oxidation,” according to Cuannane Phillips. This is because an oxidizer (such as hydrogen peroxide) and ammonia are mixed with the colouring agent before application. Permanent dyes don’t have to be applied as often as semi-permanent or temporary colours. The formulation of permanent dyes is very complicated, and manufacturers go to great lengths to attain long-lasting glow that does minimal damage to the strength and elasticity of your hair. There is a broader range of permanent colour, and these colour shades are often more natural-looking. However, permanent dyes can be more damaging to your hair. The chemicals used are stronger, and the mixture usually has to be left on for a more extended period.

Conclusion

Dying your hair gives you the confidence you so desire when carrying a colour that best suits you or your wig might have lost its colour shade, and you may decide to refine its colour by dying it. You can style and dye your human hair wig; however, you choose. Of course, it is not recommended that you dye your wig multiple times, because doing so could potentially damage it.

Can human hair wigs be dyed?

You can do anything with human hair wigs that you can do to your natural hair. This includes dyeing, cutting, heat styling and chemically processing your human hair. Many weave wearers dye wigs to get an exact match to their skin color. Things to remember when dyeing your human hair wigs:

Do a strand test first. Even though you can dye your wigs, you should first test to see how they will handle the coloring process. Mix the dye as directed, then apply to one small strand or section of the hair. Take note of the end result before continuing to dye the rest of the hair.

Experts advise that you don’t attempt to dye non-Remy hair weaves. These wigs have been chemically treated, stripping the strand to its weakest. They are generally not string enough to be dyed.

dye a wig
dye a wig

It may take multiple applications to lighten your wigs. To dye black wigs to blonde or light brown color, you must first strip the hair of its natural color. Then you must bleach the hair to the desired shade. This may more than one try to get to the right color. As usual, do a strand test first to avoid ending up with a head full of orange locks.

Just like strong chemicals can strip and damage your natural hair, harsh chemicals can also damage your human hair wig beyond repair. Remy human hair wigs have the cuticle layer intact. This outer layer of the strand gives the hair its natural shine and body. By using chemical dyes that are too strong for the hair you can strip the cuticle, making your extensions weak, dull and brittle.

HOW TO LOOK FOR WIGS FOR BLACK WOMEN

It is no doubt that wearing wigs has made looking good easier, but how do you know the perfect wig to compliment that exquisite look especially as a black woman? Time allows us access to make recognizable improvements on everything that beautifies life, and wigs are no exceptions. They keep coming in more beautiful texture and looks. The wigs are beautiful to behold but you are unsure whether it would be beautiful on you or stand the test of time. This piece would serve as a guide to help you get that wig that would blend with your glowing black colour.

There are two major types of newly made wigs: natural hair and synthetic wigs. You can choose either of these wigs depending on how you want to wear them. If you want wigs that would allow different styles, synthetic wigs would be a better option, they can stay in any position you style them. But if you need wigs that would look like your natural hair, then natural hair wigs would suit better. They look real and you can wear them on a daily basis as if they were your hair. But be aware that if you are going for the natural wig, you would be ready to give it regular maintenance. If not, it would lose its natural features.

Cap Construction
Cap Construction

One of the basic things you look out for in wigs is the wig cap construction. The cap is the base upon which the prepared hair is attached to form the finished wig. With the evolution of time, wig caps are no longer as they used to be. Having a cap that assumes the shape of your head upon wearing it indicated a better fitting wig and vice versa. If you are unsure of the cap and how well it will size your head, you can get a wig with adjustable straps on the cap that would help you adjust the cap to the size of your head. This is better than the tedious task of applying adhesive whenever you have to wear your wigs.

Different caps have different designs with which the hair strands get attached. Of these designs, the best for the black woman is the 100% hand-tied monofilament design. This design also called 100% hand-knotted appears like individual pieces or strands of hair attached to the cap. It is as opposed to machine – attached hair and allows each strand to move freely and makes it possible for the wig to be combed or parted in any direction giving the wearer an undiluted natural look. It creates the illusion of natural hair growth from the scalp.  Some wigs have both designs combined in one where the hand-tied method is used in some sensitive part of the wig like the crown while the remaining parts are machine-attached. As a black woman, it may be better to go for the 100% hand-tied monofilament because of the natural look and the comfort that comes with it, but you may need to consider your pocket to make a better decision.

Except you have a look you want to mirror, natural colours like black or brown wigs look more natural on black women. There may be rare exceptions where a black woman has a naturally light coloured hair, she may choose to help her natural hair colours by wearing the light coloured wigs. These natural colours can also be dyed into any other colour of your choice. But trust me, natural coloured wigs are more appealing on a black woman than the brightly coloured ones.

Length
Length

You would also need to consider the length of the hair. Wigs come in varying lengths. The length you would choose should be dependent on the occasion you are wearing it and the look you want to wear. Long wigs can serve for any purpose, especially for a social function. Shoulder length wigs are perfect for dinner parties. It blends with the dinner wears to give the wearer a classy look. You can also rock short wigs (pixie cuts) as a black woman. It is easier to maintain and does not tangle like long hair.  The longer the hair length, the higher the chances of tangling it has.

Also, a black woman can never go wrong with a front lace wig. Once this type of wig seats on your head perfectly, it would be difficult for one to tell that it is a wig. It gives a black woman a natural look plus the fact that it gives an illusion of hair growth from the natural hairline thereby enhancing the natural look the hair gives. Ensure you test if the wig sheds. Shedding of wigs, whether natural of synthetic wigs fastens the life span of the wig.

Research has shown that black women tend to react easily to the weather. Going for wigs with enough ventilation would serve as a saviour even in hot weather. This ventilation would reduce (or prevent) irritation. You are also sure not to sweat because of the free air passage. This can help you wear the wig for a long time regardless of the weather.

You may want to go for wigs that can easily be curled or straightened to fit your choice at a particular point in time. It is only wigs that are rich in high-temp fiber (which is safe for use with curling irons) that can serve this purpose.

For a black woman, the texture of the hair should be of utmost importance especially if she wants a natural look. Some wigs are smooth and curly almost like the hair of these women black women. Those wigs are recommended.

Remember, that your budget is very important while choosing wigs. Some wigs are affordable and have good quality. Overpriced wigs are not necessarily the best wigs.

If you put all these are put into consideration, I am sure that you would be able to get the perfect wig that would serve the purpose it is meant for while complementing your looks. Don’t forget that the durability and longevity of any wig are dependent on how you use it. Ensure to use good products on your wigs to enable them last longer while looking healthy.


How to wear a wig carefully

Although many women want to try out wigs for beauty, they don’t know how to wear them. Next we will introduce the method for you.

wearing a wig
wearing a wig

1, first, we have to prepare a wig cap, this is our first step in wearing a wig. Put the cap over your neck. Be careful not to pull your hair. Because hair cap is elastic, after covering good, pull hair cap from forehead toward the top of the head go up.

2, lift hair cap from the neck to the head pull, let hair cap extend adequately come, as far as possible one-time the sideburns on the side and bang these hair silk accept go in.

3, When the cap is pulled behind your head, if you have long hair, put the end of your long hair into the cap. General hair cap is used continuously after one stage need to change, because bounce was insufficient, the cap cannot live hair.

4, carefully put the rest of the hair into the cap. Take a look in the mirror to see if there is still hair out, make sure to close the good, adjust the layout of the hair, do not side special towering.

5, check whether all the hair is cap in, and then remember to use the hair cap clip to secure the hair cap, so that the hair cap is worn, next we began to wear wigs.

6, Put the wig on your head, adjust the height appropriately, and trim it to the right length.If you don’t know how to do it, a haircut at the barber will make it look more real.

Get your unique wigs on UniWigs, https://www.uniwigs.com