Step by Step tutorial on How to install Lace closure

This all began when I started thinking about my next hairstyle. I knew I wanted a sewin, but I did not want to sit for long periods of time to do it. I looked on YouTube and saw that a lot of youtubers were making U-part wigs. I wanted to try my hand at making one, so I went to the beauty supply store to pick up some materials and I saw a Remy lace closure. I always wanted to try a lace closure, so I thought instead of making a U-part wig I could add the lace closure so that I would not have to leave a lot of my hair out.

Whenever I do my sewin it literally takes me forever and a day lol, plus my leave out gets slightly damaged from flat-ironing it so much (I don’t like a HAIR out of place!). I find that with this wig, I only spend 30 minutes to sew it down around the perimeter of my head, it lays flatter than my sewins, and I don’t leave as much of my hair out.

    – Hair ( 2 packs of Natural Yaki Remy hair and a lace closure)
    – Comb (preferably a rattail comb)
    – Sewing needle
    – Thread
    – Wig Cap (I purchased my wig cap from Sally’s Beauty Supply for about $4. It comes with adjustable straps in the back, which helps the wig fit more snug on your head)
    – Scissors
    – White makeup pencil
    – Styrofoam mannequin head (optional, but I highly recommend as it makes the process easier. I purchased mine from Sally’s for about $4)
    – Tacs (helps to pin the wig cap in place on the mannequin)
    – First I tweezed the part of the closure to make it a little bit wider than it was when I received it because it didn’t look as natural as I wanted it to look
    – Next I tried on the wig cap to see how it fit and placed the lace closure on top of the wig cap to see where I wanted to place it
    – I took a white pencil to outline the lace closure on the wig cap to use as a guideline for where I wanted to sew the lace closure onto the cap
    – Take the lace closure and wig cap off, place the wig cap on the mannequin (be sure to stretch the wig cap further than the size of the mannequin head and pin it in place with the tacs. I did this because my head is bigger than my mannequin head and when I put the wig on after sewing the hair to it, I didn’t want to pop the thread by stretching it)
    – Put lace closure into a ponytail to make it easier to work with, then place the lace closure on the wig cap within the guidelines that you drew
    – Sew the lace closure to the wig cap
 – Next sew hair on to the wig cap starting from the nape and working your way up towards the lace closure (try not to cut the weft much, as this helps to reduce shedding)
    – When sewing hair onto wig cap, make sure that you space the hair just enough so that you don’t have too much hair in one spot, but be careful not to space hair so much that when you run your fingers through it you can see the spaces lol
    – Also another tip is to curve the tracks when you get to the front perimeter of the wig cap because it looks more natural if you decide to pin your hair back.
    – I left a little bit of my hair out in the front of my head because I didn’t want my closure to look unnatural. Behind my leaveout, I cornrowed my hair.
    – I placed the wig on my head and sewed it down along the cornrows that were around the perimeter of my head.
    – The wig cap that I purchased has adjustable straps, so after sewing the wig in, I pulled the adjustable straps so that the wig would fit snug on my head.
    – Since this is my first lace wig application, I had to go through a trial and error phase. As a result, initially my closure did not lay as flat as I would have liked it to because I did not sew the front of the lace closure to my wig cap so that I would not ruin the lace. So I purchased some Ultra Hold from the beauty supply store and glued the lace wig to the lace cap.
    – Since I did not bleach the knots on the closure, I took my Black Opal Stick Foundation in “Truly Topaz” and applied a little bit of that on my closure as well as my real part to make sure that my part looked more natural. Then I lightly blended it in with my finger.

PHEWWW!!! That was a lot lol. But I love the results. It obviously will not look as natural as your real hair, but in my opinion it comes pretty darn close to it.

I think that this is a great protective style if you are trying to go natural because you really don’t need to leave any of your hair out in the front. I chose to leave hair out in the front because I don’t have as much experience with lace closures and wigs, so I went the easy route and left hair out in the front. I have received a lot of compliments on this wig, especially when I tell people this is a wig that I made and not a sewin lol. Secretly I am becoming ADDICTED to closures!

How to Properly Take Care of a Full Lace Wig

If you haven’t checked out the full wigs that are made from Indian human hair on our site, you definitely need to! A lace wig is made by hand and is tied on a lace base one strand at a time. As our site mentions, you can enjoy tangle free Indian Remy hair by purchasing a high quality Full Lace Wig. A wig will give you complete hair coverage and features silky straight Indian hair that you’ll love.


Since a full lace wig looks great while being worn, it’s important to learn how to take proper care of it so that it will stay in great condition. Thankfully full lace wigs are rather easy to take care of. You can gently wash your lace wig if you’ve used hair products on it, such as hair spray (which we don’t recommend by the way). You also can store your wig on a wig head with T-pins to keep it in ready-to-put-on shape before heading out with your full lace wig on.


Here are some more tips that are a bit more detailed so that you will learn how to take care of your full lace wig:
Keep it Away from Extreme Heat
Like all hair, exposing any hair locks to extreme heat will only damage the ends and dry out your cuticles. So if you place your wig on a wig head, be sure to keep it away from heat. Obviously don’t place your wig near a fire, heat vent, or anywhere else where it may be damaged from heat over time. Also, when you are wearing your wig don’t expose your locks to heat for a long time either. This means don’t sit close to a fire and definitely do not use a hair dryer on your lace wig. It will dry out your hair and cause damage that’s hard to repair.
Gently Comb it Out
Like all hair extensions, full lace wigs are very much the same. Except with full lace wigs you need to be extra careful when combing out the hair on the wig. Even though the hair is pretty secure in the lace base, it’s still important to be cautious. In order to prevent any hair from getting loose, you’ll want to start brushing the hair from the ends to the top, without getting too close to the lace base.
Use a Spray Bottle with Luke Warm Water to Wash it
Since your wig isn’t attached to your head, you’ll need to wash it while it is on the mannequin head. We recommend adding a tablespoon of shampoo to a small spray bottle and filling it with lukewarm water.
After you’re done making your mixture you can place your actual wig in cool water and while you’re doing this, you will need to spray the wig with the shampoo and warm water combination. Next distribute the shampoo throughout the wig and use a wide-tooth comb to work through your hair.
After the shampoo is evenly dispersed through your wig, it’s time to rinse it. Rinse your hair under the cool water and get ready to apply conditioner to the wig next. Now it’s time to add a tablespoon of conditioner to a new spray bottle or you can rinse out the shampoo out of the spray bottle and use that instead if that’s easier. In the same way you worked through your wig with the shampoo, you’ll need to do this with the conditioner.
Once you’re done with washing your wig with both shampoo and conditioner, gently rinse it out again for a third time under cool water. Use a towel and gently dry the hair, and afterwords you’ll want to let it to dry naturally after you’ve gotten most of the water out. Don’t rub the hair strands against one another – pat dry the hair to prevent any hair breakage from happening.
We hope these tips have helped you understand how to care for your full lace wig. If you take care of it properly it will last you a long time! So be gentle and loving with your perfect locks! 😉
 

Who Dare to Rock Rainbow Hair

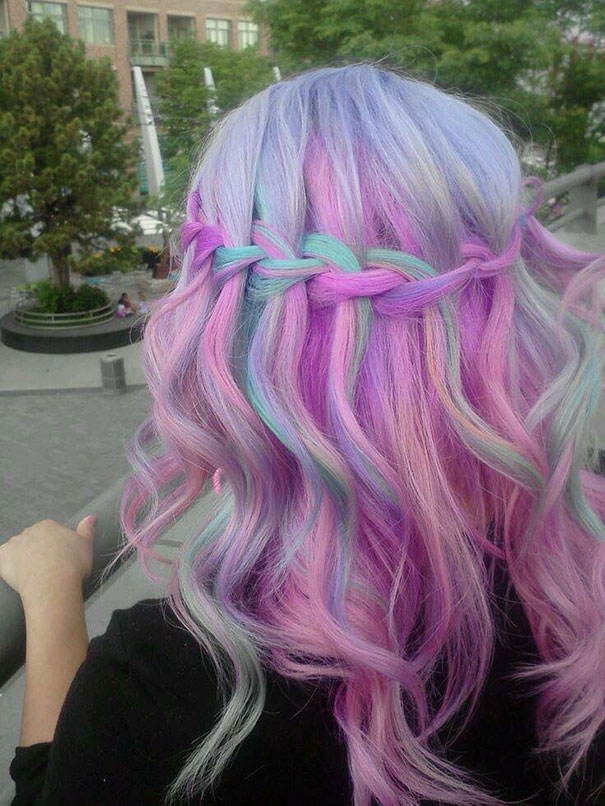
Rainbow hair, a cool and colorful response to granny hair, is becoming a more and more popular trend. While previously the domain of punk rockers, celebrities like Nicki Minaj, Christina Aguilera, and Katy Perry have now embraced this style as well.Women aiming for senior roles in big companies and firms, however, should stick to their natural color, reports dnainfo. But if you’d like to see how you’d look in fuchsia, this neat web-app can be your magic mirror. Or, you can vote on your favorite photo below.


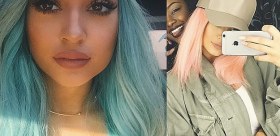
Kylie Jenner Has Long, Turquoise Hair for Coachella: See Her Bold Look!

It’s the circle of life: When one Kardashian family member changes her hair, it’s usually a domino effect and others quickly follow suit. So while Kim Kardashianwent back to her long, brunette roots for a trip to Armenia, her little sister Kylie Jenner decided to kick off her trip to the desert (for Coachella!) with turquoise hair.
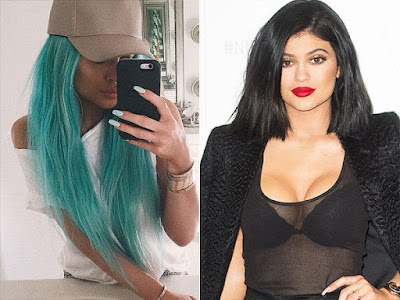
In her second bold move of the week (the first would be those nipple piercings she hinted at on Snapchat), Kylie transformed her look, wearing what looks to be long blueish-green extensions (possibly from her Bellami line?) or maybe even a full-on wig. “The road trip begins,” the 17-year-old star captioned her colorful hair reveal selfie on Instagram, sporting blue nails to match her new look. (Was she inspired by Hilary Duff’s mermaid hair? Unclear, but it’s a similar vibe.)
RELATED PHOTOS: Kylie vs. Kendall: Which Jenner Has Made More Headlines This Year?
This definitely isn’t the first time Kylie experimented with bright hair color. In fact, she loved her dip-dyed turquoise ends so much, they actually lasted a long time. Her big sister also loved them. Kim told PEOPLE that she wants to try her sister’s look one day. (We know, it’s like some magical Kylie-meets-Kim style supernova.)
Create the Look with Uniwigs lace front synthetic trendy wigs.
Turquoise is the one for you! The lace front creates a natural looking hairline and allows for styling hair off the face. And the wefting in the cap creates better air ventilation, which provides more coolness on the scalp. It’s breathable for a more comfortable fit.
RELATED PHOTOS: Celeb Hair Makeovers: Better Before or After?
Stay tuned for more hair happenings from Kylie over the weekend — we have a feeling this won’t be her only Coachella mane change. What do you think of Kylie’s new look? Do you think it will be short-lived for festival season? Share your thoughts below.