How to Install Lace Frontal?

Understanding the proper application of a lace frontal is essential to aesthetics and safety. Otherwise, the process may lead to hair loss and skin and/or wig damage. Unlike traditional wigs a lace frontal, commonly referred to as a “lace front wig,” features a mesh of Swiss or French lace constructed along its front perimeter. The hair along the perimeter of the wig is hand-tied onto the lace, allowing it to emulate a natural hairline. In addition, specially made adhesives are applied directly beneath the hairline of the wig in order to secure the lace frontal closure along the scalp.

lace frontal
lace frontal

1. Secure your hair so it lies flat underneath the wig. This can be achieved by two methods:
Cornrow braid your hair. Take the tooth end of your rat tail comb and part your hair into vertical sections one by one. Part in a straight line beginning from the middle of your hairline on back to the nape of your neck (how small you want your braids is determined by the width or amount of hair in between each part). Take three sections of hair left in between these parts and braid the hair into a cornrow. Repeat the process until all your hair is securely braided. Place the wig cap over your hair.
Tightly gather your loose hair. Comb or brush the hair back flat and away from your face. Pin the hair as you see fit. Place the wig cap over your hair. Tuck any loose strands of hair underneath the wig cap.

2. Wet a gauze pad generously with rubbing alcohol. Rub it along your hairline wherever adhesive will be applied so as to cleanse away dirt, oil and debris that may be on your skin. Allow the skin to air dry completely.

3. Apply scalp protectant as directed along your hairline wherever hair adhesive will be applied on the skin. Allow it to air dry completely.

4. Trace lightly where you would like the lace front wig to rest, using a makeup pencil, as you do not want the edge of the human hair lace front wig to lie directly over the hair at the hairline. To reasonably recreate the appearance of a natural hairline, trace no further than 1/2 inch away from your actual hairline.

5. Trim off any excess lace left around the hairline of the lace front wig carefully, using scissors. Cut all the lace off directly up to the hairline of the lace frontal.

6. Apply a thin coat of adhesive bond along the edge of the wig cap (this prevents wig cap from slipping backward while underneath the wig), in between the actual and traced hairlines, and along the nape of the neck. Do not apply the lace front on wet glue or it won’t secure properly. Allow “soft bond” adhesives to set or get “tacky” to the touch. However, “hard bond” adhesives do not require drying time as they dry immediately upon application.
To use adhesive tape cut the tape to the desired length. Firmly press the tape directly beneath the hairline of the lace front wig along your forehead and the nape of your neck. Allow small gaps in between the strips of tape so moisture can escape. Allow the tape to set for 5 to 10 minutes. Peel off the back of the tape to expose the adhesive.

7. Position the lace front wigs human hair on your head starting from the back and it lifting forward over your head. Keep the wig slightly elevated over the scalp so the wig won’t slide down onto the adhesive once you’ve reached your forehead. Line up the perimeter edge of the wig over the desired hairline or tape. Glue users press down along the entire perimeter of the lace frontal so as to secure it in place. Tape users press and hold the entire perimeter of the lace frontal for up to one minute.

8. Tie the scarf securely around your hairline to allow the wig to thoroughly bond to the adhesive on your skin. If the lace front is made of human or heat resistant hair you may sit under a dryer as long as needed to assist the bonding process — this is optional. Do not wash or vigorously manipulate the lace front wig for 24 hours.

Lady Gaga’s Hair At Grammys — Get Her Exact Look For Date Night

Lady Gaga, 28, had all eyes on her when she walked the red carpet for the 57th Annual Grammy Awards! She looked extra sexy in a long, silver dress with a VERY plunging neckline! We love how her sliver hair matched her outfit — talk about making a statement! And the best part? We have the EXACT hair look for you down below! Keep reading!
Lady Gaga platinum carefree hairstyle. Specially layered wave silver lace wig for your sexy dream. Specially designed for fashion lady.
Lady Gaga rocked a stunning silver platinum hair! Her platinum wave hair was amazing and unexpected! Uniwigs Star Lace Wigs provide you human hair with an actual look just like natural growing hair from your scalp, creating the gorgeous appearance just like lady gaga on 2015 grammys.
SPECIAL FEATURES
Heat Friendly Fiber – Giving you longer lasting beauty with high quality materials that are heat resistant up to 350 degrees.
Lace Front– Creates the appearance of a natural hairline and allows for styling away from the face.
Cap Design – Cool comfortable design for all day wearing.
Adjustable Straps – allows you to loosen or tighten the cap up to a half inch.

silver lacefront ☁️ beautiful gift from @uniwigs ☁️ YouTube showcase coming soon! This style is inspired by @ladygaga’s silver haired look!

always heart breakin’ but never heart broken SLAY or NAY? |

@uniwigs grey lace front

Video Show of this wig:


POPULAR BENEFITS OF A CUSTOM MADE LACE WIG UNIT

1.reason to go custom is proper fit: this eliminates being forced to glue or tape the unit to unwanted areas such as your own fine baby hairs of which is the #1 cause of hair loss when wearing lace units & frontals. It’s important to remember that lace wigs are not one size fit all.  When choosing a stock unit DO NOT base your fit off of the circumference size alone.  The circumference can be exact, however the remaining 5 measurements need to be within at the least 1/2 of an inch smaller than that of a stock unit to ensure that a sufficient amount of skin is available for liquid and or tape adhesion without compromising your natural hairline if present.  For example if your front to nape measurement beginning from your natural hair in the front to the edge of your natural hair at the nape is 14″,  then the front to nape of the wig should be 14.5.  Click here for detailed measurement instructions.

2.Create and submit a Head/Hairline template: Do you have protruding temple points? Does your natural hairline recede at any point? For some, creating and submitting a hairline template at the least will result in the most natural looking unit or frontal piece. A template allows your unit to be created to mimic the unique natural curvatures present with your own natural hairline and or shape of head.  Having a hairline that mimics that of your own may yield a more realistic look for some.  It’s definitely an option to consider.

3.Customize your density:We’ve already created density formulas to create the most natural appearance for most, paying special attention to the hairline, however you have the option to choose one of our preformulated density levels or create one more specific to your needs by using the density chart to specify desired density levels in specific areas to meet your needs.

4.Choose cap styles specific to your needs or lifestyle:Looking to achieve and even more realistic scalp appearance without the use of stocking caps, knot bleaching, makeup and other tricks? Try the hidden knots options. Having trouble getting a lasting hold in the nape area? Try full lace with thin skin at the nape( indicate in special instructions box of chosen form)

5.Color choice:You have the option of choosing specific colors, highlightstwo toned colors (ex: #1b roots fading to #4) or even mix colors to create your own unique blend.  View color chart

6.Length:Get your unit as long as you want. (Hair is measured from crown to tips, this is usually approximately 2″ shorter than what you may have experienced with weft/track hair. Hair is measured before curl/wave patterns are added please measure accordingly. If you want a 20″ curly unit order a 22″ to achieve the desired length.

7.Hairline: Have a widow’s peak? This is yet another option when ordering a custom lace unit or frontal.

click here to customize wig from uniwigs.

Going into Blonde in One Minute

Want to get a different Look, but don’t want to damage your own hair? Now you can get a long, blonde, beautiful look in just minutes!

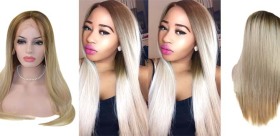
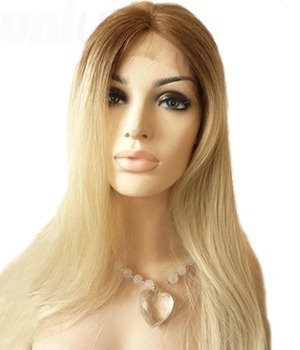
The color of this beautiful blonde wig is ombre brown to perfectly ashy blonde. It is really long, about 20”, extremely thick, soft and silky just as natural human hair. Both suitable for daily wearing and costume parties, especially Halloween costume
because it can create a witch envy feeling.
Heat Resistant
Synthetic Hair Fiber
Pre-styled, ready-to-wear and can be styled with heat tools, it looks and feels like natural hairwe recommend you keep your heat tools at a setting between 250-275 degrees. Do not exceed 350 degrees. .
Lace Front – Ready-to-wear and virtually invisible, creating a natural looking hairline that gives you amazing off-the-face styling versatility and contours to the shape of your head. It will still look incredible natural and look like growing out of the scalp. This Sweety Futura wig does not have any fringe and it is totally depend on the lace front to give a natural looking.
Three combs inside the wig. One in the front and two in the side to make sure incredibly security on your head. It also has adjustable straps at the back so you can make it larger or smaller to suit the size of your head.
 

Spare wig combs are provided to help security and place in case of any issues with the one comes with the wig.

What to Try Your First Lace Front Wig?

clip_image002

Are you still struggling about the hairstyles? Should you dye it, straighten it, perm it or whatever? Girls all love being beautiful and love different and gorgeous appearance. Instead of just damaging your natural hair, wigs are a good option for you! Want to start your first lace front wig? Let the youtube popular beauty gurus to tell you how the following ombre long synthetic wig feel.

clip_image003

Click to buy

Q: How do you like the this Sweety Futura Synthetic Lace Front Wig?

A: I love it very much. Because it is lace front, it does give you a natural looking hairline and you can part it at multiple places. In the photos I post wearing it on intragram lots of people assume that I dye my hair blonde again and so it really does look incredible natural. It probably is one of the most natural wigs out of the old ones I own and I really like how they did the effect makes the hair look incredibly natural.

Q:What is a lace front wig?

A: Lace front means that the front inch or so of the wig are individual hairs glued onto lace. This means that it really resembles natural human hair growing out of skin. Lace front wigs are harder to make and thus cost a bit more. Lace front wigs not only look far more natural, but you can part them in multiple places, much like normal human hair. So if you’re someone that wears wigs on a daily basis or if you want a super realistic cosplay, lace front is the way to go.

Q: Why You need a Wig?

A:I wear wigs because it’s an instant and zero damage way to change how you look for cosplay or even just for every day. If I wanted my natural hair to be this length it would take roughly 5 years of growing, then I’d have to bleach it to match that blonde color, and then I’d have to straighten it. With a wig it’s two minutes to brush it and put it on properly. That’s it. Two minutes vs 5 years.