How to Install Lace Frontal?

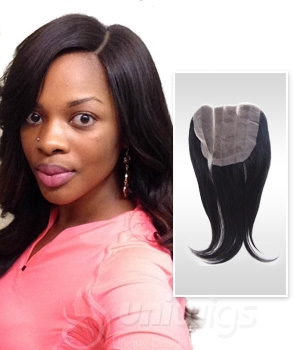
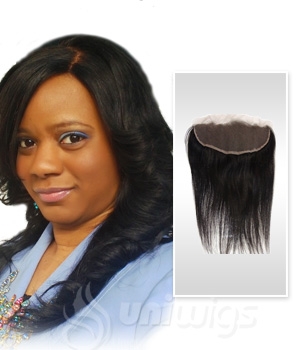
Understanding the proper application of a lace frontal is essential to aesthetics and safety. Otherwise, the process may lead to hair loss and skin and/or wig damage. Unlike traditional wigs a lace frontal, commonly referred to as a “lace front wig,” features a mesh of Swiss or French lace constructed along its front perimeter. The hair along the perimeter of the wig is hand-tied onto the lace, allowing it to emulate a natural hairline. In addition, specially made adhesives are applied directly beneath the hairline of the wig in order to secure the lace frontal closure along the scalp.

lace frontal
lace frontal

1. Secure your hair so it lies flat underneath the wig. This can be achieved by two methods:
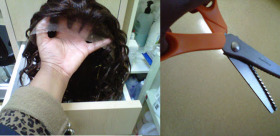
Cornrow braid your hair. Take the tooth end of your rat tail comb and part your hair into vertical sections one by one. Part in a straight line beginning from the middle of your hairline on back to the nape of your neck (how small you want your braids is determined by the width or amount of hair in between each part). Take three sections of hair left in between these parts and braid the hair into a cornrow. Repeat the process until all your hair is securely braided. Place the wig cap over your hair.
Tightly gather your loose hair. Comb or brush the hair back flat and away from your face. Pin the hair as you see fit. Place the wig cap over your hair. Tuck any loose strands of hair underneath the wig cap.

2. Wet a gauze pad generously with rubbing alcohol. Rub it along your hairline wherever adhesive will be applied so as to cleanse away dirt, oil and debris that may be on your skin. Allow the skin to air dry completely.

3. Apply scalp protectant as directed along your hairline wherever hair adhesive will be applied on the skin. Allow it to air dry completely.

4. Trace lightly where you would like the lace front wig to rest, using a makeup pencil, as you do not want the edge of the human hair lace front wig to lie directly over the hair at the hairline. To reasonably recreate the appearance of a natural hairline, trace no further than 1/2 inch away from your actual hairline.

5. Trim off any excess lace left around the hairline of the lace front wig carefully, using scissors. Cut all the lace off directly up to the hairline of the lace frontal.

6. Apply a thin coat of adhesive bond along the edge of the wig cap (this prevents wig cap from slipping backward while underneath the wig), in between the actual and traced hairlines, and along the nape of the neck. Do not apply the lace front on wet glue or it won’t secure properly. Allow “soft bond” adhesives to set or get “tacky” to the touch. However, “hard bond” adhesives do not require drying time as they dry immediately upon application.
To use adhesive tape cut the tape to the desired length. Firmly press the tape directly beneath the hairline of the lace front wig along your forehead and the nape of your neck. Allow small gaps in between the strips of tape so moisture can escape. Allow the tape to set for 5 to 10 minutes. Peel off the back of the tape to expose the adhesive.

7. Position the lace front wigs human hair on your head starting from the back and it lifting forward over your head. Keep the wig slightly elevated over the scalp so the wig won’t slide down onto the adhesive once you’ve reached your forehead. Line up the perimeter edge of the wig over the desired hairline or tape. Glue users press down along the entire perimeter of the lace frontal so as to secure it in place. Tape users press and hold the entire perimeter of the lace frontal for up to one minute.

8. Tie the scarf securely around your hairline to allow the wig to thoroughly bond to the adhesive on your skin. If the lace front is made of human or heat resistant hair you may sit under a dryer as long as needed to assist the bonding process — this is optional. Do not wash or vigorously manipulate the lace front wig for 24 hours.

How To Cut Extra Lace

Creating a lace front wig is a long, meticulous process that can take several hours to several days. Once the wig is complete, the excess lace that hangs over the forehead must be trimmed back into the wig for the most natural look. This is a delicate process that takes a steady hand, a good pair of scissors and a lot of patience. Since a lace front wig does not reach all the way around to the nape of the neck, this process will be shorter and a little easier than a full wig.

Instructions
1.Find the center of the front of the lace wig and slide the thin hair clip vertically to mark the position. There should be two even lace pieces on each side of the clip.

2. Clip the hair on either side of the center-marking clip back using the two large hair clips. This will keep any stray hairs from being cut.

3. Cut away about a quarter-inch of the lace all around the front and sides of the wig. Do this using long, fluid scissor strokes to avoid jagged edges. It is best to cut away small portions of lace instead of all of it at once, since cutting away too much lace will ruin the wig.

4. Remove the center-marking clip. Keep the hair clipped back, adjusting the clips as necessary.

5. Cut the lace back towards the beginning of the hairline in the front. The lace that is on the forehead will be the most visible, so it should be cut back all the way to the hairline. Pull the lace tight with your fingers while cutting to ensure even, smooth strokes.

6. Trim the sides of the lace front wig so that only about an eighth-inch of lace protrudes out from under the hairline. It is not necessary to cut the lace all the way back on the sides, since this part is not as visible as the forehead area.

7. Double check the trimmed lace to ensure that there are no jagged edges. Make sure the lace is cut completely even, especially around the forehead area.

The excess lace is your what is known as “Your box is your guarantee’. Should your new wig not have the excess lace on, please do not accept it as it might not be new. You are only to cut off the extra lace once you have made sure the the unit fits your head perfectly and that there are no bald patches and tears in your unit. Only whilst it still has the lace on can it be returned. You cut off the excess lace as close to the hairline as possible taking effort not to cut off any of the babyhairs, if you get one or two that is fine, but be very careful.

Click to Buy

Human hair Lace front Wig

Human hair full lace Wig 

Synthentic Lace front Wig 

Divalicious Service. Fast delivery

Lace Closure Vs. Lace Frontal

As lace closure is almost the same except that they come in different sizes, and they come in different styles like free part, middle part and three part (also known as three way), so how to define them? Here we bring you the definitions and the pics showing what they are respectively.


Lace closure: This is used at the crown of your head and is sewn in with approximately 4-5 bundles of hair and the front is usually adhered with glue or other adhesive. They come in size 4″ x 5″ or 4″ x 4″ or 4″ x 3.5″ or 5″ x 5″. Lace closures are made using lace which gives the illusion of a natural scalp.

Natural Straight Three Part Lace Closure


Lace frontal: This is a half wig which goes from ear to ear and is sewn with approximately 3-4 bundles of hair. The size is 13″ across and 4″ back. The frontal can be held in different styles and you can hold the hair back whereas the closure cannot be held back.

Natural Straight Free Part Lace Frontal


Wanna get to know what middle-part and three part lace closure and lace frontal are? Why not check out this video below to get a close look at the difference of them? Oh, never forget to shop high quality top hairpieces at UniWigs.com~