The Ultimate Guide to Washing and Caring for Your Hair Toppers: A Step-By-Step Tutorial

Maintaining your hair toppers is essential to keep it looking its best and ensure its longevity. In this comprehensive guide, we’ll walk you through a step-by-step tutorial to help you wash and care for your hair topper with ease and expertise.

1. Brushing and Preparation of Hairpieces

Before embarking on the washing process, it’s crucial to give your hair topper a good brush. We advise brushing through the topper to remove any tangles or knots. This initial step helps prevent further tangling during the washing process.

Brushing and preparation are fundamental steps in the care and maintenance of hairpieces, ensuring they look their best and remain tangle-free. Begin by gently brushing through your hairpiece using a brush with soft bristles. Start from the ends and work your way up to the roots, being cautious not to pull or snag the hair fibers. This helps in removing any knots, tangles, or loose hairs, making the rest of the maintenance process more manageable.

Brushing your hairpiece is not only about detangling but also about evenly distributing the hair’s natural oils and preventing matting. It’s essential to perform this step regularly, especially before washing or styling your hairpiece. By taking the time to prep and brush your hairpiece, you’ll ensure that it not only looks its best but also remains in optimal condition for longer, ultimately saving you time and effort in the long run.

2. Creating a Soapy Solution

The next step involves creating a soapy solution for washing your hair topper. We recommend using a bowl of cool water and adding two squirts of high-quality shampoo. The choice of shampoo can significantly impact the outcome of your topper’s wash. Opt for a gentle, sulfate-free, and pH-balanced shampoo to prevent any damage to the hair fibers or the base of the topper. You can choose a brand called UniWigs, but feel free to choose a shampoo that suits your preferences and needs.

Creating a soapy solution is a crucial step in the process of washing and caring for your hair topper. This solution serves as the cleansing agent that will help remove accumulated dirt, oils, and styling products from the topper. We recommend using a bowl of cool water for this purpose, ensuring that the water is not too hot, as excessive heat can be damaging to the topper’s hair and base.

This solution should be enough to ensure the topper gets evenly saturated during the washing process. The soapy solution sets the foundation for an effective cleanse and prepares your hair topper for the next steps in the care routine.

3. Soaking and Gentle Scrubbing of Hairpieces

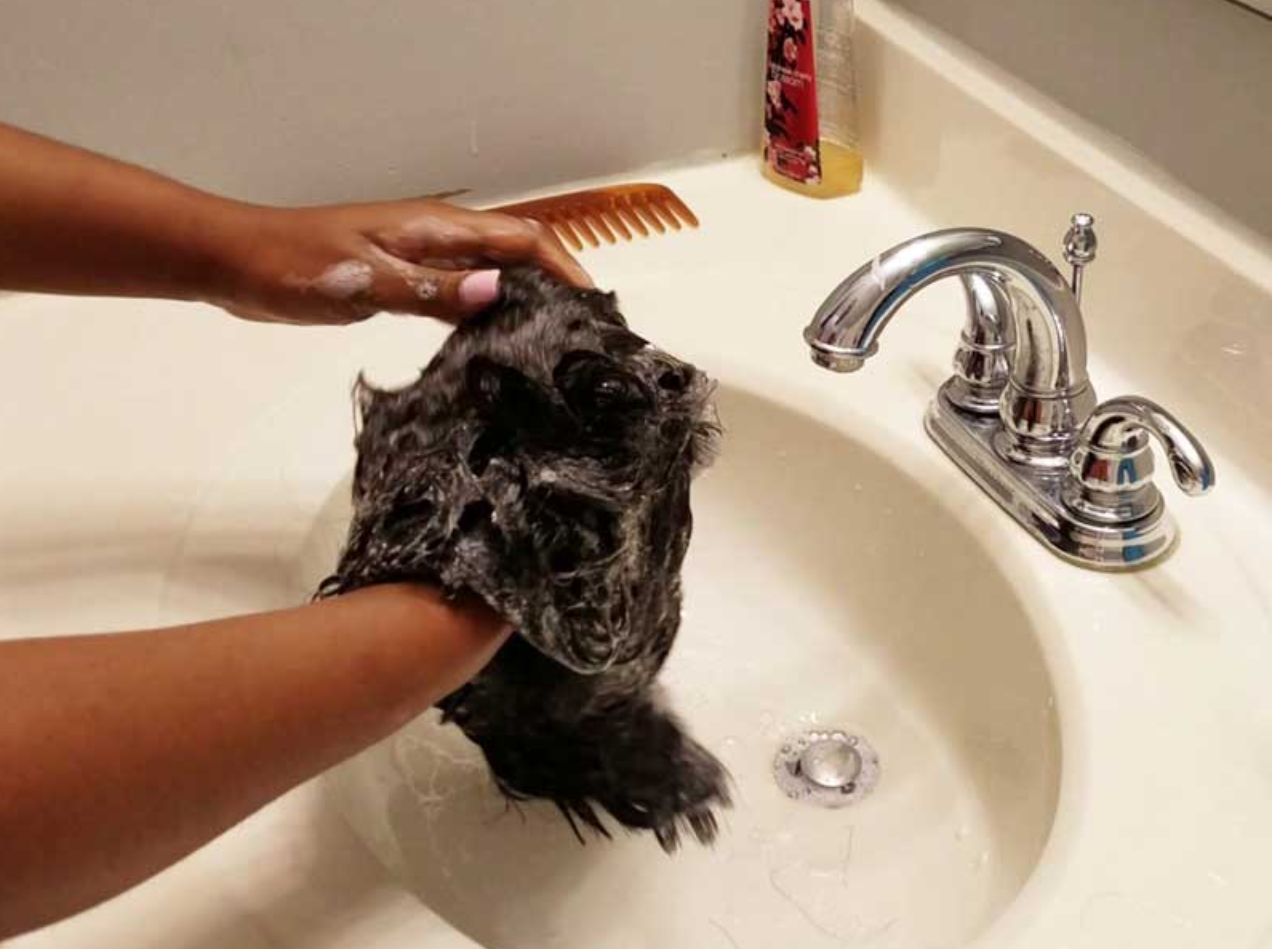
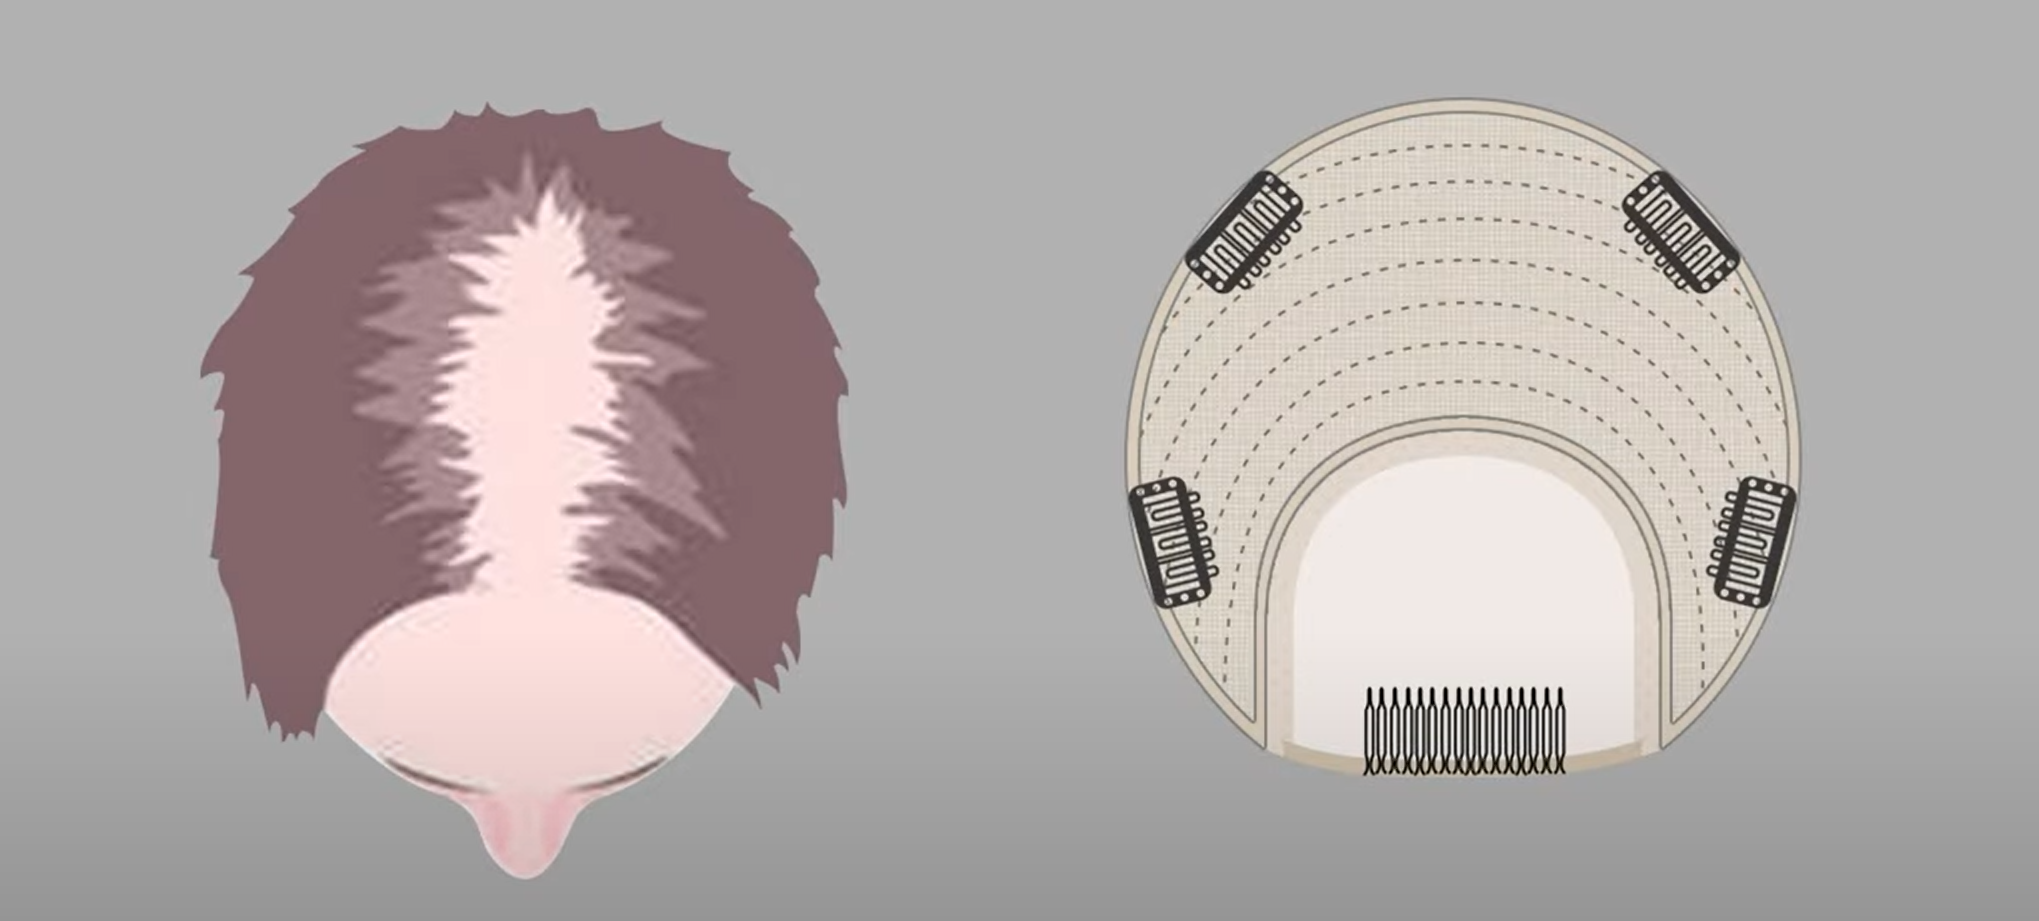
This step helps to remove accumulated dirt, oils, and styling products from the topper. Following the initial soak, you can use a small amount of shampoo to gently scrub the mono top, lace top, and wafting areas. It’s essential to be gentle during this process, as excessive rubbing or aggressive handling can lead to damage. Notice how to use your thumb to hold the part in place, ensuring the part line stays intact.

4. Rinsing and Part Preservation of Hairpieces

Rinsing your topper thoroughly is vital to remove all shampoo residues and ensure that it’s clean and fresh. While rinsing, you should continue to keep your thumb over the part line to maintain its position. Preserving the part line is essential, as it helps the topper maintain its natural appearance and prevents any shifting of the base.

5. Conditioning with Care

Avoid applying conditioner to the monotop, lace top, or hand-tied area, as these parts are more delicate and don’t require conditioning. Conditioning the ends helps keep the hair soft, smooth, and manageable. Allow the conditioner to set for about 5 minutes before gently rinsing it out.

Conditioning your hair topper with care is a crucial step in the maintenance process. As demonstrated in the video, it’s essential to apply conditioner only to the ends of the topper’s hair. Avoiding the monotop, lace top, or hand-tied areas during conditioning is essential, as these parts are more delicate and do not require the same level of moisture as the hair itself. By limiting conditioner application to the ends, you prevent any potential buildup or residue on the delicate base, ensuring it remains in excellent condition and ready to perform as intended.

Allow the conditioner to set for about 5 minutes. This short waiting period allows the conditioner to work its magic, softening the hair and making it more manageable. After this brief interval, proceed to gently rinse out the conditioner thoroughly. This ensures that your topper retains its silky, smooth texture without any excess product that might weigh it down. By following these conditioning guidelines, you help your topper maintain its quality and appearance, making it an elegant and long-lasting addition to your hair routine.

6. Drying and Styling of Hairpieces

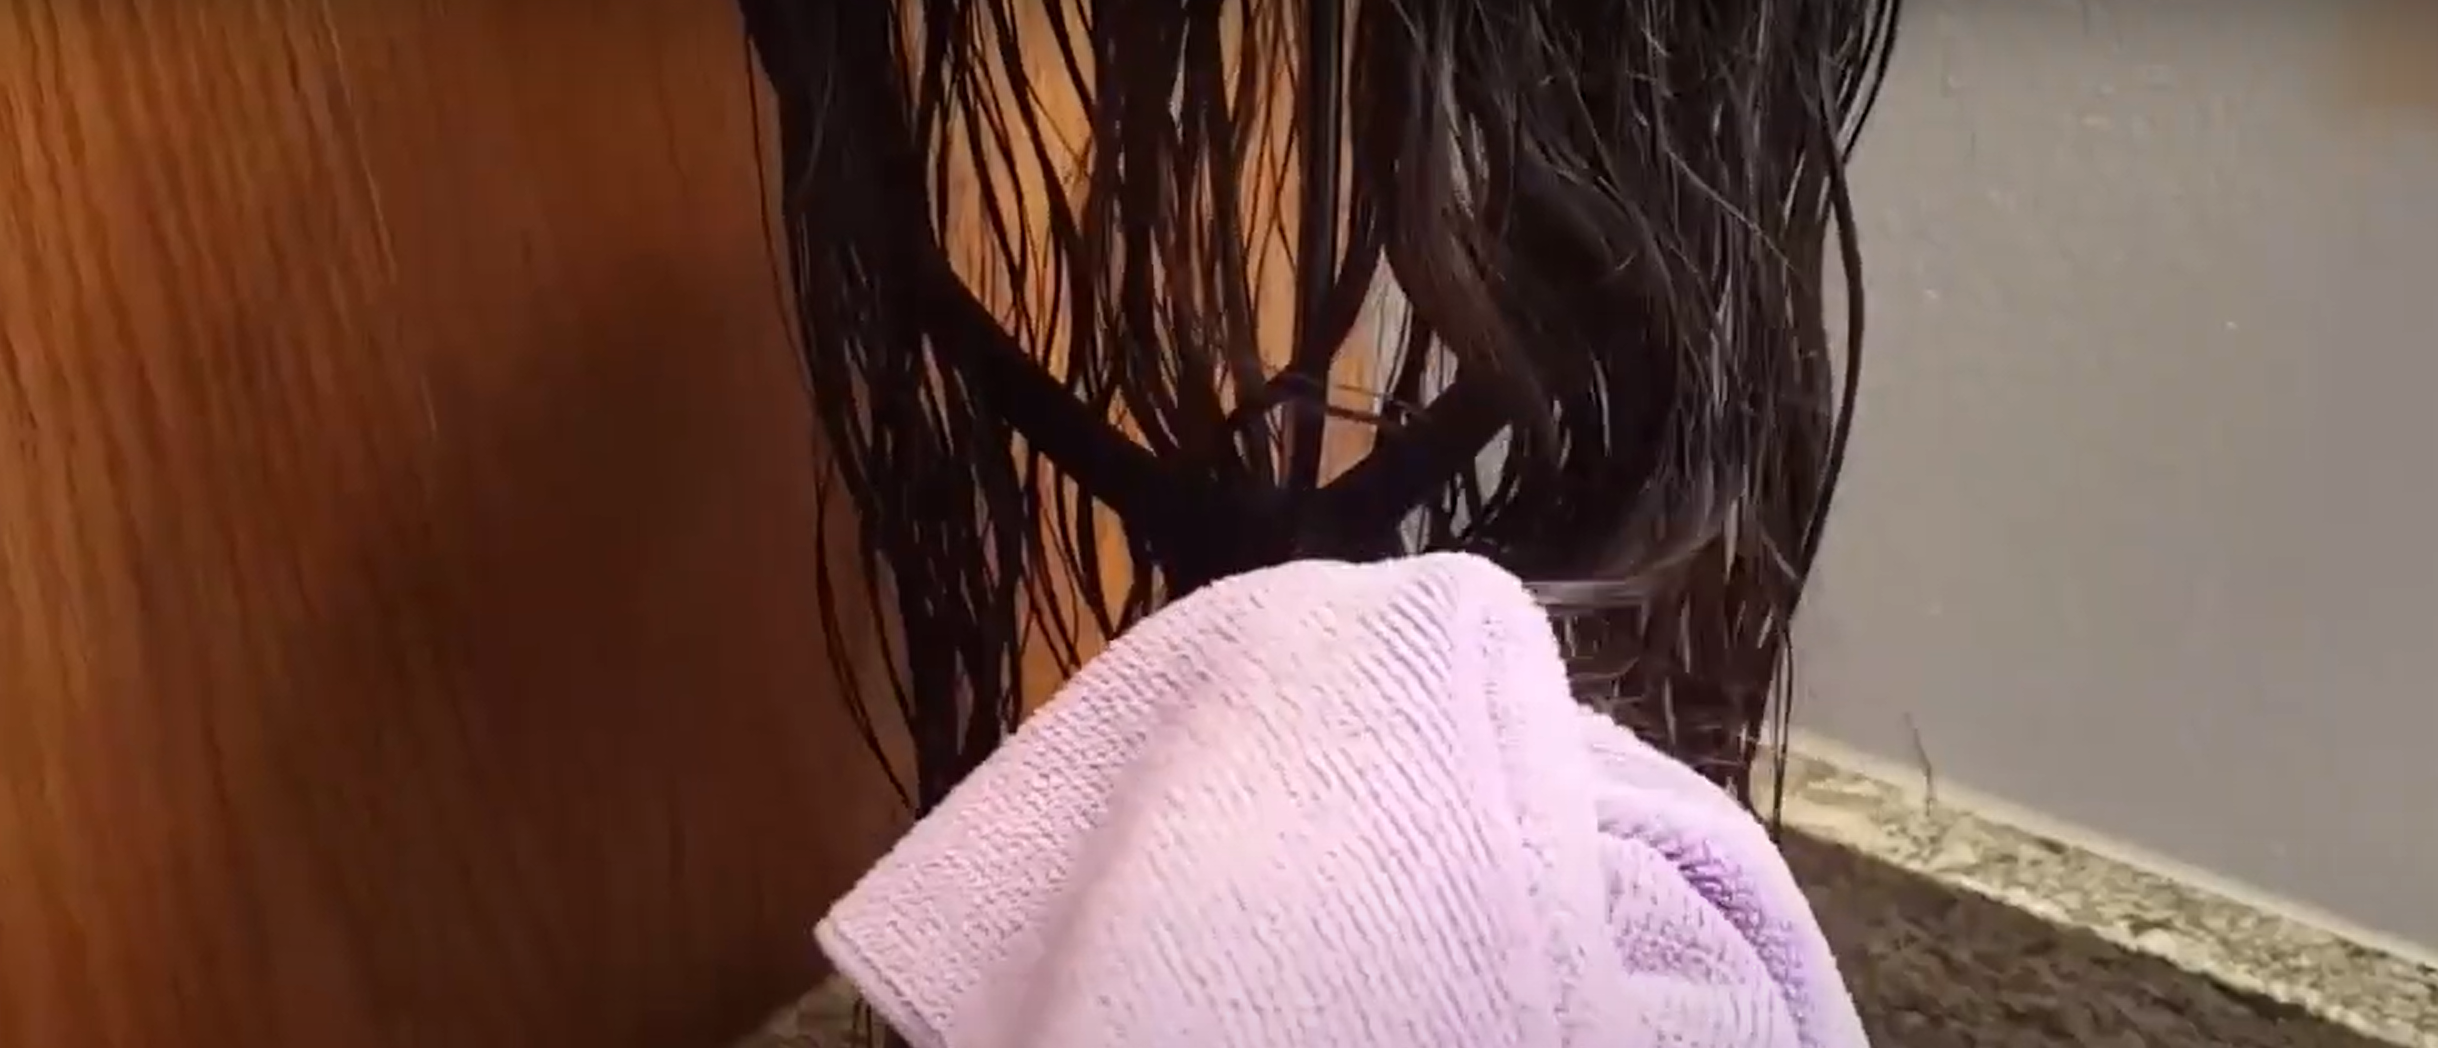
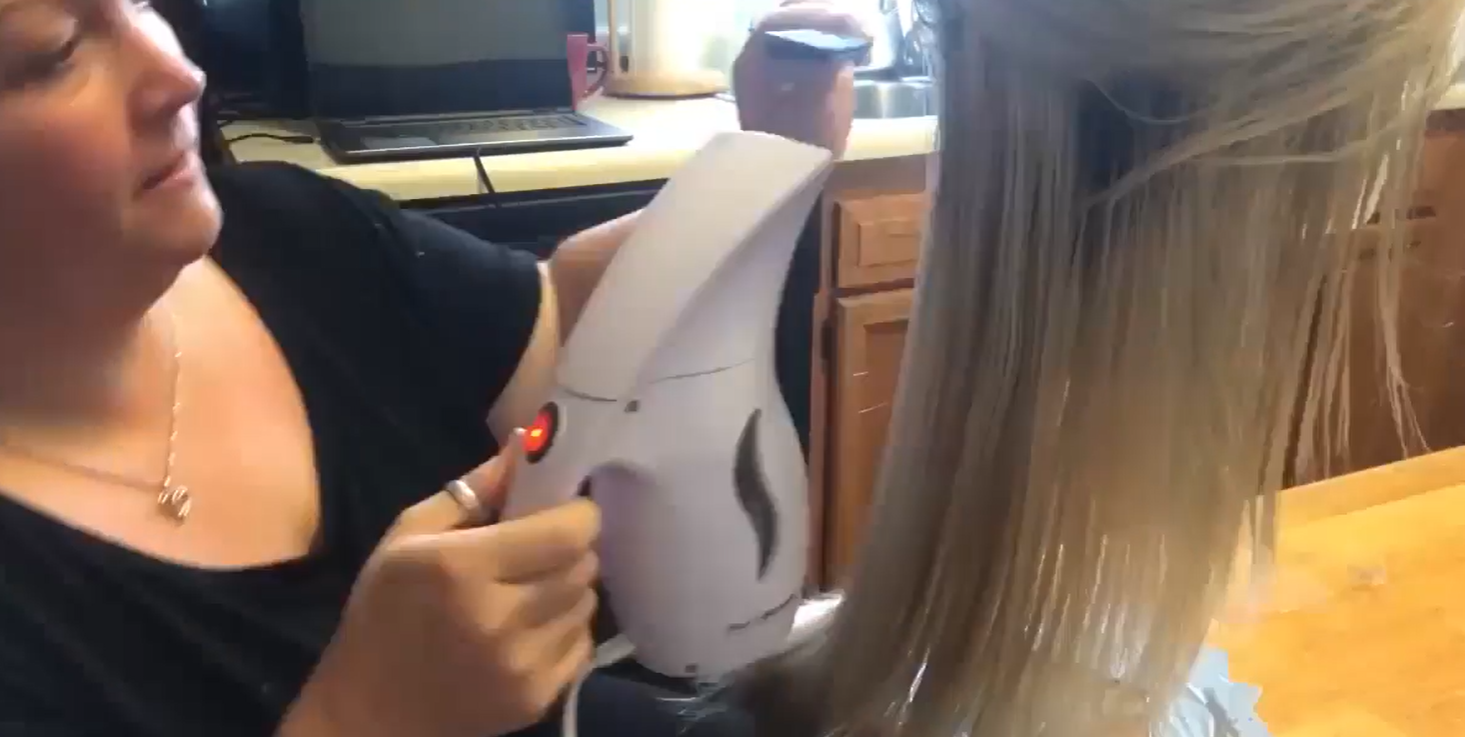
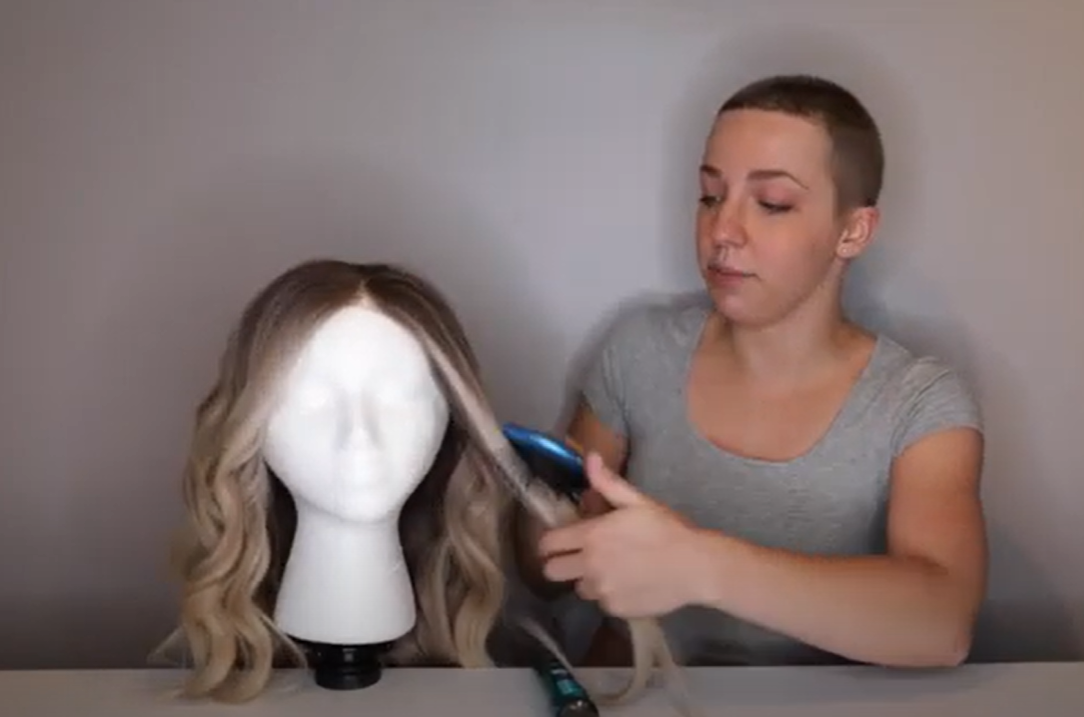
Once your topper is thoroughly rinsed, gently squeeze out excess water. We suggest towel-drying the topper to remove as much moisture as possible. A portable wig stand is then recommended to allow your topper to air dry for the next 12 hours. The choice of a wig stand is practical, as it helps the topper maintain its shape and allows for even drying.

Drying and styling your hairpieces, including wigs, toppers, and extensions, is a crucial step in the overall maintenance routine. After washing, gently squeeze out excess water using a towel, being careful not to wring or twist the hair, which can lead to damage or tangling. To facilitate even drying and maintain the shape, it’s advisable to place your hairpiece on a wig stand. A wig stand is particularly useful as it allows proper air circulation, ensuring that your hairpiece dries more quickly and evenly.

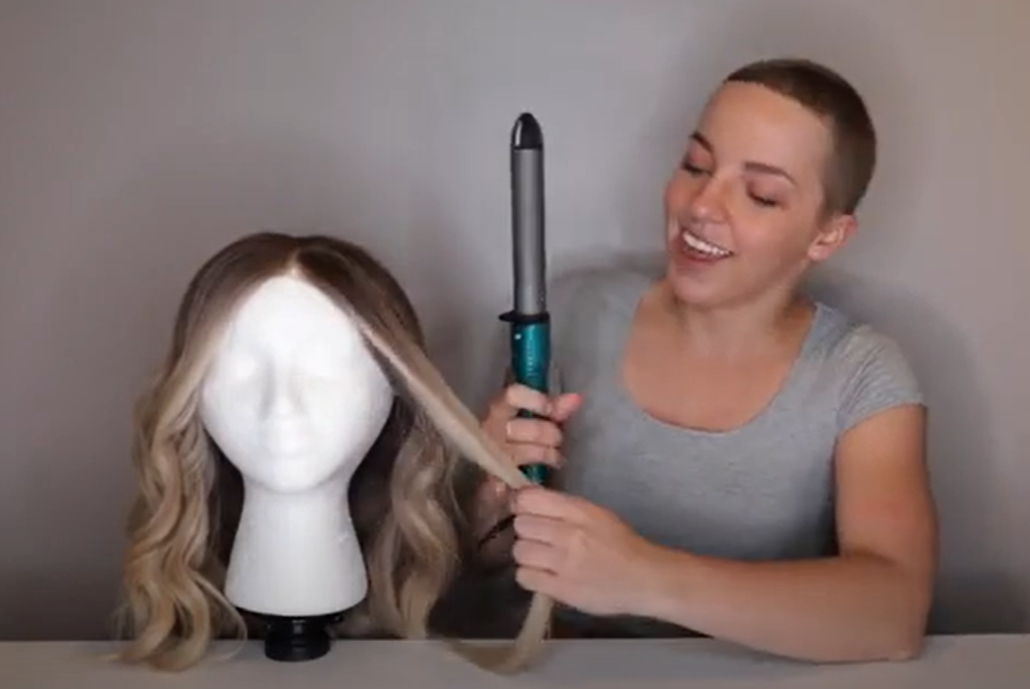
When it comes to styling, remember that many hairpieces come pre-styled, but you can make adjustments if needed. You can use low-heat styling tools like curling irons or straighteners, but be cautious and avoid high temperatures that might damage synthetic hair. For heat-friendly synthetic or human hair pieces, you have more flexibility in styling, but it’s still recommended to use heat-protectant products. Consider using wig-specific styling products and avoid heavy or oily styling products that can weigh down the hair. Always style your hairpiece when it’s completely dry to achieve the desired look and don’t hesitate to consult with a professional stylist for more intricate styling needs. Proper drying and styling are essential for maintaining the longevity and appearance of your toppers.

By following these instructions and using high-quality products, you can ensure that your topper remains in excellent condition, ready to enhance your hair’s appearance for a long time.

VIEW MORE FAQ ABOUT HAIRPIECES

How to Dye a Lace Base Human Hair Topper or Wig

Are you nervous about dyeing a lace base human hair topper or a wig? It does require some careful steps to protect the delicate lace from staining. In this guide, we’ll take you through the process of dyeing a lace base hair product step-by-step, ensuring beautiful results without compromising the lace’s integrity.

View Lace base hair toppers at UniWigs

View Wigs with lace caps at UniWigs

Step 1: Gather your materials

Before diving into the dyeing process, assemble all the necessary materials. You will need a hair dye of your choice. Additionally, grab a plastic or glass bowl for mixing the dye, a hair dye brush or applicator, hair clips, a wide-tooth comb, gloves, hair conditioner, and petroleum jelly or clear barrier cream.

Step 2: Protect the lace

To safeguard the lace from potential staining, it’s crucial to create a protective barrier. Apply a thin layer of petroleum jelly or clear barrier cream around the edges of the lace and any other areas where the dye might come into contact with the lace. This will help prevent the dye from seeping through and staining the lace.

Step 3: Section and secure the hair

Using hair clips, divide the hair into manageable sections. Clip away the hair that you do not wish to dye, exposing only the hair strands that you want to color. This step will make the dyeing process more organized and efficient.

Step 4: Prepare and apply the dye

Follow the instructions on the hair dye packaging to mix the dye in a plastic or glass bowl. If the dye requires a developer or any other mixing agent, ensure you follow the instructions carefully. With gloves on, take the hair dye brush or applicator and evenly apply the dye to the exposed hair strands, making sure to cover all the desired areas. Avoid applying excessive dye, as it may seep through the lace.

Step 5: Comb the dye through

To ensure even distribution of the dye, use a wide-tooth comb to gently comb the dye through the hair strands. This step helps prevent clumps and ensures a consistent color. Be careful not to disturb or tangle the lace during this process.

Step 6: Let the dye sit

Refer to the instructions provided with the hair dye to determine the recommended processing time. Allow the dye to sit on the hair strands for the specified duration to achieve the desired color. It’s essential to follow the suggested time frame to avoid over-processing the hair.

Step 7: Rinse and condition

Once the processing time is complete, rinse the hair under cool water until the water runs clear. Be cautious while rinsing to avoid rubbing or scrubbing the lace, as it may cause damage. After rinsing, apply a small amount of hair conditioner to the hair strands to restore moisture and promote softness.

Step 8: Dry the topper or wig

Gently pat the topper or wig dry with a towel or allow it to air dry. Avoid using excessive heat, such as a blow dryer, as it may damage the synthetic hair fibers or deform the lace. Give the topper or wig ample time to dry completely before styling.

Step 9: Style and finalize

Once the topper or wig is dry, style it as desired. You can use heat styling tools or other accessories to achieve your preferred look. If necessary, you can trim or shape the hair topper or wig to suit your desired style and blend seamlessly with your natural hair.

We hope these guidelines help you dye the lace base hair topper or the wig successfully! Get a brand new desired color safely!

How to Choose the Perfect Human hair Wig Color for Your Skin Tone

Choosing a perfect wig color can boost your look and confidence. This guide helps you select the best color for your skin tone, with essential factors to consider and useful tips. Find your perfect human hair wigs, whether you have warm, cool, or neutral undertones.

Understanding Skin Undertones

To fully explore perfect wigs color options, it’s important to first determine your skin undertones. These are generally categorized as warm, cool, or neutral.

Warm undertones typically have yellow, peachy, or golden hues. For warm undertones, gold jewelry works better than silver. Choose wig colors that enhance warmth, like deep browns, golden blondes, and copper reds. These colors will blend with your skin tone and give a sun-kissed look.

For cool undertones, choose silver jewelry and cool wig shades like ashy blondes, cool browns, or jet blacks to enhance your complexion.

Neutral undertones are a balance of warm and cool tones. If you have neutral undertones, you have the flexibility to experiment with a wide range of wig colors. Consider yourself lucky, as both warm and cool shades will suit you. Classic shades like chocolate brown, soft caramel, and natural black can beautifully complement neutral undertones and provide a versatile and timeless look.

Determining your skin undertone is a process that involves observing the subtle hues in your skin, examining the colors that flatter you the most, and considering how different metals (gold and silver) look against your complexion. Taking the time to understand your undertones will empower you to choose wig colors that enhance your natural beauty and bring out the best in your skin tone, helping you achieve a seamless and stunning transformation. Determining your undertone is crucial in selecting a wig color that will harmonize with your complexion and enhance your natural features.

Matching Warm Undertones of the Perfect wig

When it comes to selecting the perfect wig color for warm undertones, it’s all about embracing and enhancing your natural warmth. Warm undertones typically have yellow, peachy, or golden hues, and you want to choose wig colors that harmonize with these tones. One excellent option for warm skin tones is rich browns. Shades like chestnut, chocolate, or caramel can add depth and dimension to your overall look. Another great choice for warm undertones is golden blonde. Opt for shades with hints of honey or golden tones, such as golden blonde or honey blonde.

It’s important to steer clear of cool-toned colors when you have warm undertones. Shades like platinum blonde or ash brown can create a stark contrast with your warm complexion and may result in an unnatural or unflattering appearance. Stick to warm colors that enhance your natural warmth, allowing your skin tone to glow and your features to shine.

Suiting Cool Undertones of Perfect Wig

For individuals with cool undertones, wig colors that complement the coolness of their complexion are ideal. Ashy blondes, cool browns, and jet blacks are excellent choices for cool skin tones. Silver, platinum, and icy shades can also create a striking contrast against cool undertones. Avoid warm colors with orange or golden undertones, as they may create a mismatched look when paired with your cool complexion.

Cool undertones are characterized by pink, blue, or red hues in the skin. If you have cool undertones, selecting wig colors that complement and enhance these cool tones will create a harmonious and balanced look. Opting for wig colors with ashy or cool undertones is the key to achieving a flattering and natural appearance.

When selecting wig colors for cool undertones, it’s important to avoid warm colors with orange or golden undertones. These warm tones can clash with the coolness in your skin, creating an unflattering and mismatched look. By opting for ashy blondes, cool browns, jet blacks, or icy shades, you can ensure that your wig color harmonizes with your cool undertones, resulting in a stunning and cohesive overall aesthetic.

Finding the Perfect Wig Color for Neutral Undertones

1. Classic Shades: If you have neutral undertones, classic shades like chocolate brown, soft caramel, and natural black are excellent choices. These colors provide a harmonious balance and complement your complexion without overpowering it. They can add depth and dimension to your look while maintaining a natural appearance.

2. Highlights and Lowlights: Another way to find perfect wig colors for neutral undertones is by incorporating highlights or lowlights. By adding subtle pops of color that are slightly warmer or cooler than your natural hair color, you can create visual interest and enhance your overall look. For instance, if you have a darker hair color, consider adding caramel or honey-colored highlights to add warmth and dimension.

3. Considering Eye Color: When selecting a perfect wig color for neutral undertones, consider your eye color as well. Certain shades can make your eyes pop and create a captivating look. For example, if you have neutral undertones and blue eyes, a wig color with warm golden tones can beautifully enhance the blue hues of your eyes and create a striking contrast.

In conclusion, individuals with neutral undertones have the flexibility to experiment with a wide range of wig colors. Classic shades, highlights, and lowlights, considering eye color, and personal style should all be taken into account when selecting the wig color for neutral undertones. Embrace the opportunity to explore different colors and find the one that best complements your skin tone and expresses your unique style.

Determining Your Skin Tone

To choose the perfect wig color, consider your skin tone – fair, medium, or deep. Three factors help determine it.

1. Undertones: Understanding your undertones, as discussed earlier, is an essential aspect of determining your skin tone. Identifying whether you have warm, cool, or neutral undertones will help you narrow down the range of wig colors that will harmonize with your complexion.

2. Vein Color: Take a close look at the veins on the underside of your wrist. If the veins on your skin look bluish or purple, it is an indication that you have cool undertones. Conversely, if your veins appear greenish, then you likely have warm undertones. If you can’t identify either of these colors, you may have neutral undertones.

3. Sun Reaction: Consider how your skin reacts to sun exposure. Fair skin tends to burn easily and rarely tans, indicating a cool undertone. Medium skin may burn initially but can eventually develop a tan, indicating a mix of warm and cool undertones. Deep skin tones usually tan easily without burning, suggesting warm undertones.

4. Jewelry Preference: Pay attention to whether silver or gold jewelry complements your skin better. If silver jewelry flatters you more, you likely have cool undertones. If gold jewelry enhances your complexion, you likely have warm undertones. If both silver and gold suit you equally well, you may have neutral undertones.

Considering Perfect Wig Lets about Your Style

1. Reflecting Your Personality:

If you have a vibrant and outgoing personality, you might gravitate towards bold and adventurous wig colors like vibrant reds, electric blues, or playful pastels. On the other hand, if you have a more subdued and elegant style, you might prefer classic and natural-looking shades that enhance your features without drawing too much attention.

2. Matching Your Fashion Preferences:

Your fashion preferences play a significant role in determining the perfect wig color for you. Consider the colors and styles of clothing you typically wear. If you lean towards earthy tones and neutral colors in your wardrobe, wig colors like warm browns, caramel highlights, or soft blondes can complement your overall aesthetic. For those who enjoy experimenting with trends and vibrant fashion choices, you might opt for unconventional wig colors like lavender, rose gold, or even bold multi-tonal styles to create a striking fashion statement.

3. Lifestyle Considerations:

Consider your daily routine, work setting, and recurring events. If your workplace has a more conservative dress code or demands a professional appearance, it may be best to use natural-looking colors that blend nicely with your hair’s natural shade or accentuate it. If you have an active lifestyle that involves sports or outdoor activities, consider a wig color that is low maintenance and can withstand the elements.

4. The Image You Want to Project:

Your hairstyle can significantly impact the image you project to the world. Consider the impression you want to make and how your wig color can contribute to that image. If you’re aiming for a youthful and energetic vibe, opting for brighter and bolder wig colors can help you achieve that look. Conversely, if you want to project a more sophisticated and elegant image, consider sleek and polished wig colors like rich browns or dark chocolates. Your wig color should align with the image you want to portray and make you feel confident in your skin.

Remember, ultimately, the decision of choosing a wig color that matches your style lies in your hands. Explore different wig options and seek advice from professionals who can guide you based on your style preferences. By considering your personality, fashion choices, lifestyle, and desired image, you can confidently choose a wig color that enhances your skin tone and complements your unique style.

Selecting the right wig color for your skin tone is a transformative process that can greatly enhance your overall look. By understanding your undertones, determining your skin tone, and considering your style, you can confidently choose a wig color that accentuates your natural beauty. Remember to embrace experimentation and consult with professionals when needed. Whether you want to go for a dramatic change or simply enhance your existing style, the perfect wig color is waiting to be discovered, allowing you to step out with confidence and radiate beauty that is uniquely you.

5 Must-Know Tips for Choosing Short Hair Toppers for Your Style

Short hair toppers have become a popular choice for individuals looking to enhance their style or address hair loss concerns. Looking to boost your natural hair with more volume, length, or coverage? Consider short hair toppers – they’re practical and versatile. Our blog post offers five essential tips to help you choose the perfect short hair topper that complements your style and fulfills your specific needs.

1. Consider Your Hair Type and Texture

Choosing a short hair topper that matches your natural hair type and texture is crucial for achieving a seamless and natural look. If you have straight hair, opt for a topper with straight strands. Similarly, if you have curly hair, choose a topper that replicates your curl pattern. By selecting a topper that aligns with your natural hair, you ensure a cohesive and realistic appearance.

2. Determine the Right Base Size for Hairpieces

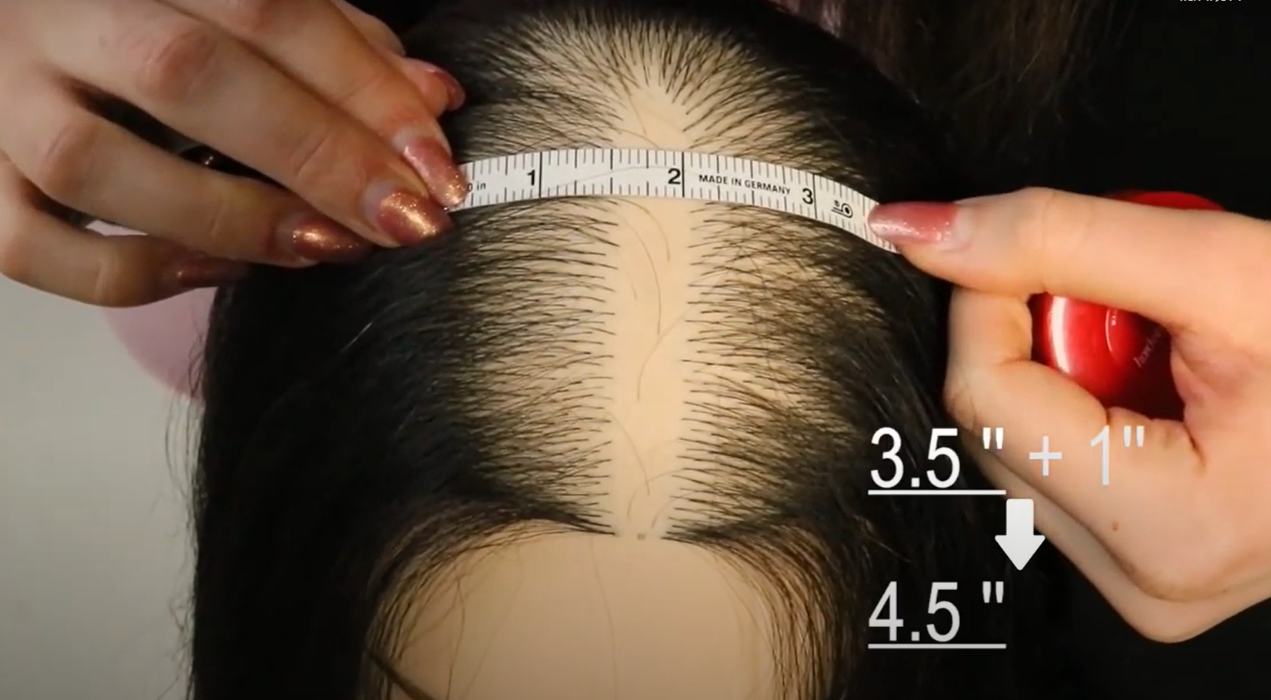
The base size is important for achieving a secure and comfortable fit. Measure the area of your head where the topper will be attached and choose a base size that closely matches it. Additionally, consider the attachment method that suits your lifestyle and comfort level. Options include clips, tapes, and adhesives. Select the method that provides the desired security and ease of use.

3. Assess the Attachment Method

Short hair toppers come with various attachment methods, including clips, tapes, and adhesives. Consider your lifestyle, comfort level, and desired level of security when selecting the attachment method. Clips offer versatility and ease of use, providing a secure grip. Tapes provide a more seamless and natural-looking attachment. Adhesives offer the most secure and long-lasting hold, ideal for those with an active lifestyle. Assessing the attachment method will help you find a short hair topper that suits your preferences and lifestyle. Here are four key factors to consider when evaluating the attachment method:

Lifestyle and activity level: Consider your daily activities and lifestyle. If you lead an active lifestyle or engage in physical activities, you may require a more secure attachment method. Opt for options such as adhesive bonding, which provides a long-lasting hold and can withstand rigorous movements. On the other hand, if you prefer a removable option or have a less active lifestyle, clips or tapes may be more suitable.

Comfort: Assess the comfort level of the attachment method. Some individuals may find clips or tapes more comfortable as they offer a less restrictive feel. Adhesive bonding, while providing excellent security, may feel slightly more constricting. Consider your personal preference and comfort when selecting the attachment method for your short hair topper.

Ease of application and removal: Assess the simplicity of applying and detaching the attachment technique. Generally, clips are easy to use, enabling a swift and trouble-free process of attachment and removal. Tapes require a bit more precision but offer a seamless and natural look. Adhesive bonding may require more time and expertise for application and removal, so consider your comfort level and willingness to invest time in maintenance.

Damage to natural hair: Take into account the potential impact of the attachment method on your natural hair. Clips and tapes are generally considered gentle and unlikely to cause damage when used correctly. Adhesive bonding may require more care and proper removal techniques to minimize any potential damage. Consider the health and condition of your natural hair and choose an attachment method that aligns with your hair care goals.

4. Pay Attention to Hair Color and Shade of Hairpieces

Matching the hair color and shade with your natural hair is crucial for a seamless and natural look.

Match your natural hair color: You should also take into account elements like warmth or coolness, as well as any highlights or lowlights. Look for a topper that closely resembles your natural hair color to ensure a seamless blend.

Consider undertones and highlights: Take into account the undertones present in your natural hair. Does it have warm, cool, or neutral undertones? Understanding these undertones will help you select a topper that harmonizes with your hair. Additionally, if your natural hair has highlights or lowlights, opt for a topper that incorporates similar shades. This will create a more realistic and blended appearance.

Lighting conditions: Keep in mind that lighting conditions can affect the appearance of hair color. Consider the lighting environments you typically find yourself in, such as natural daylight or indoor lighting. Select a topper that looks natural under those lighting conditions.

Consult with professionals: If you’re unsure about selecting the appropriate hair color and shade, seeking advice from experts like hairstylists or colorists can be beneficial. They have expertise in color matching and can provide valuable guidance based on your specific hair characteristics.

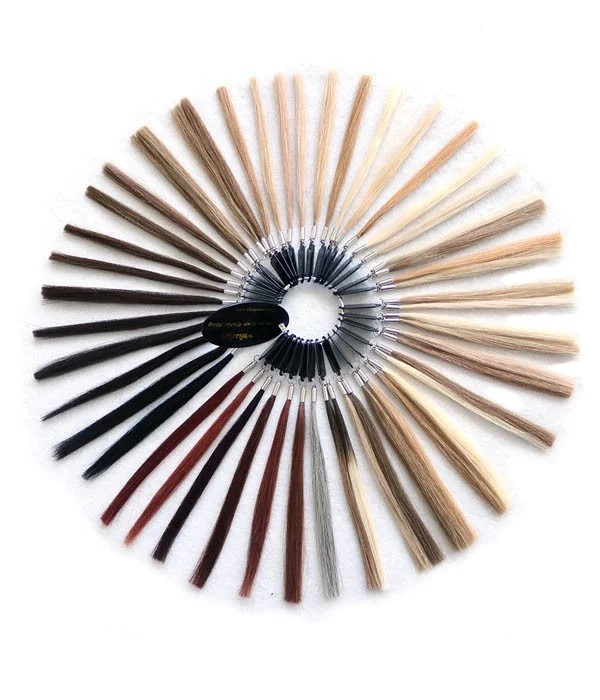
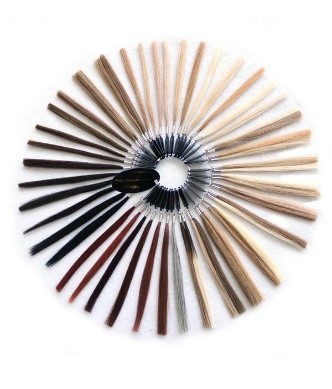
Shop the color ring: UniWigs has made viewing a color ring easy with our “Color Ring Loan Program”. Here is how it works:

  1. Select the right color ring and pay for it.
  2. Once you decide on a color, return the color ring within one month. And your money paid for the color ring will be refunded as loyalty points. You can redeem the loyalty points any time before it expires.
  3. Please be sure that the color ring can be reused before you return it.

5. Prioritize the Quality and Material of Hairpieces

Investing in a high-quality short hair topper is essential for achieving a natural and long-lasting result.

Reputable brands: Look for short hair toppers from reputable brands that have a track record of producing high-quality hairpieces. Established brands often prioritize quality and invest in research and development to provide customers with durable and realistic-looking toppers. Research customer reviews and testimonials to gauge the reputation of the brand and ensure customer satisfaction.

Material options: Short hair toppers are available in two primary material options: human hair and synthetic fibers. Human hair toppers offer the most natural appearance and can be styled and treated like your own hair. They blend seamlessly, providing a realistic look. Synthetic hair toppers are more affordable and require less maintenance but may have limitations in terms of heat styling. Consider your budget, desired level of maintenance, and styling preferences when deciding between human hair and synthetic fiber toppers.

Quality of construction: Assess the construction quality. Look for well-crafted pieces with attention to detail. Check the stitching, density, and overall craftsmanship of the topper. High-quality construction ensures durability and longevity, allowing you to enjoy your topper for an extended period.

Color matching: Pay attention to the color-matching capabilities. Reputable brands provide a wide range of colors and shades to ensure a seamless blend with your natural hair. Look for toppers that offer multi-dimensional and natural-looking colors. Consider consulting with a professional stylist who can assist you in selecting the perfect color match for your hair.

Selecting the perfect short hair topper doesn’t have to be overwhelming. By considering your hair type, determining the right base size, assessing the attachment method, paying attention to hair color and shade, and prioritizing quality and material, you can make an informed decision that complements your style and meets your needs. Remember to consult with professionals or seek guidance from reputable suppliers to ensure you choose a short hair topper that not only enhances your appearance but also boosts your confidence. With these five must-know tips, you’ll be well on your way to finding the perfect short hair topper that suits your style and empowers you to rock any look with confidence.

Important Care Advice for Your Hair Toppers

To keep your hair toppers performing well and extending their lives, you must take care of them. This article will provide efficient ways and useful advice for taking good care of your hair toppers, from regular cleaning to appropriate storage.

Consistently clean your hair topper crown.

It’s essential to keep your hair topper clean to keep it hygienic and fresh. We recommended to use shampoos and conditioners special for alternative hair (wigs, hair toppers, hair extensions), and here are some essential actions to take for routine cleaning:

a. Spot cleaning: To stop spills and stains from soaking into the fabric, deal with them right away. Apply a clean, wet cloth and a little detergent to the afflicted area and gently blot it. Avoid using aggressive cleaners or chemicals that might scratch the hair topper.

b. Deodorizing: Sprinkling baking soda on the surface of the hair topper will help it absorb any scents. To get rid of the baking soda residue, carefully vacuum.

c. Machine Washing: Before attempting to machine wash your hair topper extension, check the manufacturer’s instructions. Some hair topper accessories are not designed to be machine washed and may need to be cleaned by a professional. If the hair topper can be washed in a machine, use a soft cycle and a light detergent, and make sure it is completely dry before using.

Please adhere to the washing directions on this blog:

How To Wash Your Human Hair Topper To Make it Last Longer

Keeping your hair topper free of allergens.

Taking extra measures to safeguard your hair topper is essential when you, a family member, or anyone else in your household has allergies. To reduce your exposure to allergens, remember these tips:

a. Use an allergen-proof cover: Invest in a premium, allergen-proof cover made just for hair topper extensions. These coverings serve as a barrier, avoiding the buildup of dust mites, pet dander, and other allergies on the hair topper.

b. Regularly Wash Bedding: To get rid of allergies, wash your sheets, pillows, and hair topper cover often in hot water. This routine aids in keeping the sleeping area tidy.

A rotating and flipping of the hair topper.

Consider rotating and flipping your hair topper frequently to maintain even use and increase its longevity. Follow these recommendations:

a. Flipping: If the pattern on your hair topper is symmetrical, do so once every several months. This aids in weight distribution and prevents drooping in particular places.

b. Rotating: Rotate your hair topper 180 degrees every few months if it is asymmetrical or has a certain orientation. This process makes sure that the hair topper maintains constant support and wears evenly.

Hair-topper storage advice

Your hair topper must be stored properly while not in use to keep its quality and form. These are some hints for storage:

a. Before putting your hair topper away, make sure it is clean and totally dry. Mold or mildew can grow as a result of moisture.

b. Use a Storage Bag: Spend money on a ventilated storage bag made especially for bedding. Plastic bags should not be used since they might retain moisture.

c. Store in a Cool, Dry Place: Look for a cool, dry location for storage that’s out of the path of the sun and high temperatures. Store your hair topper extension away from moist basements and attics.

Avoid using a heavy hair topper.

Even though the fact that your hair topper is intended to offer additional support, it is crucial to avoid applying too much weight or pressure on it. The hair topper may eventually droop or lose its form if it is very heavy. Be careful while leaping or sitting on the hairpiece because these actions might put excessive strain on your body.

Keep your hair topper extension out of direct sunlight.

The components of your hair topper may eventually decay and fade if exposed to direct sunlight. Keep your hair topper out of direct sunlight while storing or using it, or use window covers to reduce exposure. The integrity and beauty of the hair topper are preserved thanks to this approach.

Observe the hair topper’s temperature guidelines.

The function and lifetime of your hair topper might be impacted by extreme temperatures. Keep the hair topper away from sources of intense heat, such as heaters or heated blankets. The materials in your hair topper may become stiffer and less pleasant if you leave them in excessively cold temperatures. Your hair topper will remain in the best possible condition if you go by the temperature recommendations.

Professional hair topper cleaning.

It could be required to use expert cleaning services for deep cleaning or for removing stubborn stains. Professional cleaners have the knowledge and specific tools necessary to successfully manage fragile hair toppers. Before selecting a cleaning company, make sure they have expertise in cleaning mattress hair toppers and employ techniques that are secure for the particular sort of hair topper you have. You may successfully extend the life and preserve the quality of your hair topper by putting these extra suggestions into practice and combining them with the maintenance techniques already discussed.

Frequently check your hair topper.

Make it a routine to frequently check your hair topper for indications of wear and tear. Look for any rips, loose seams, or cushioning that have fallen flat. Address any problems you find right away to stop future harm. Early repair of minor damage helps sustain the functionality and durability of your hair topper.

Handle and transport the hair topper extension properly.

Handle your hairpiece delicately while moving or transporting it to prevent additional strain or damage. To guarantee safe and secure handling, enlist the assistance of a second person, if at all feasible. The hair topper should not be bent or folded excessively since doing so might lead to severe damage. Instead, roll it up or transport it in the suitable packing advised by the manufacturer.

Comply with the hair topper’s warranty guidelines provided by the manufacturer.

Review the manufacturer’s warranty paperwork and become familiar with the particular maintenance guidelines as well as any terms or restrictions. Following the warranty instructions will help you maintain the hair topper properly and prevent you from mistakenly nullifying the warranty protection.

You can extend its life, maintain its comfort, and make use of its advantages for many years to come. Your hair topper must be properly cared for and maintained to remain in great shape. You can make sure that your hair topper continues to offer the necessary comfort and support by routinely examining, and treating with care, and according to warranty conditions.

View more hair care & advice

Comprehensive Guide for Styling Wigs Like a Pro

Styling Wigs have become increasingly popular as a versatile and convenient way to transform your hairstyle. Whether you wear wigs for fashion, personal preference, or as a solution to hair loss, knowing how to style wigs effectively can make all the difference. In this comprehensive guide, we will share expert tips and techniques to help you style your wig like a pro. From basic styling wigs to advanced techniques, we’ve got you covered.

Section 1. Choosing the Right Wig

Before diving into styling techniques, it’s crucial to select the right for your needs. Consider factors such as wig type (synthetic or human hair), length, color, and cap construction. Synthetic wigs are low maintenance and retain their style, while human hair wigs offer versatility and a natural look. Consult with specialists or try on different options to find the right fit. Consider factors such as cap size, adjustable straps, and wig density to ensure a comfortable and secure fit. Opt for a wig that suits your desired style and flatters your face shape.

Section 2. Preparing Your Wig for Styling

Proper preparation is essential for the successful styling of wigs. Start by gently detangling the wig using a wide-toothed comb or brush designed for wigs. For synthetic wigs, use products specifically formulated for synthetic hair. For human hair wigs, apply conditioning treatments to keep the hair soft and manageable. Secure the wig on a wig stand or mannequin head to provide stability during the styling process.

Section 3. Basic Wig Styling Techniques

Mastering the basics is key to achieving a polished wig look. Start by creating a natural-looking part using a comb or your fingers. To add volume, gently tease the hair near the roots or use volumizing products. Experiment with different hairstyles, such as updos, ponytails, and braids, to diversify your wig styling options. Use heat styling tools, like curling irons or flat irons, on human hair wigs, but exercise caution and avoid excessive heat to prevent damage.

Here are a few essential techniques to enhance your wig’s look:

Brushing and Detangling: Use a wide-tooth comb or a wig brush designed specifically for wigs to gently brush your wig. Start from the ends and work your way up, gradually removing any tangles or knots. Avoid excessive pulling or tugging, as it can damage the wig fibers.

Parting the Wig: Parting your wig in different directions can change the overall style and create a more natural look. Use a rattail comb to create a parting, starting from the hairline and gently sectioning the hair. Experiment with different parting styles, such as a middle part or a side part, to find the most flattering look for you.

Heat Styling: Heat styling tools like curling irons or flat irons can be used on certain types of wigs, such as heat-friendly synthetic wigs or human hair wigs. Set your tool to the appropriate temperature, and apply a heat protectant spray before styling. Remember to avoid using heat tools on heat-sensitive synthetic wigs, as they can be damaged.

Styling Products: Enhance the look and manageability of your wig with styling products. Use wig-specific styling products like wig mousse, wig spray, or wig gel to add volume, control frizz, or set curls. Apply the product sparingly and distribute it evenly through the hair using your fingers or a comb.

Hair Accessories: Accessories can transform the look of your wig. Experiment with headbands, scarves, clips, or hairpins to add a touch of personal style. They can be used to create updos, secure loose strands, or add a pop of color or sparkle to your wig.

Section 4. Advanced Wig Styling Techniques

Once you’ve mastered the basics, you can explore more advanced wig styling techniques. Try wig cutting and customization to achieve a personalized look. Layering the wig can add dimension and movement to the hairstyle. Experiment with different hair accessories, such as headbands, scarves, or clips, to enhance the overall look. Additionally, consider consulting a professional wig stylist for intricate wig styling, especially for complex updos or intricate braided styles.

Here are some advanced styling techniques to explore:

Customizing the Wig: Customization involves altering the wig to better fit your desired style. This can include trimming the wig to achieve a specific length, adding layers for more dimension, or thinning the wig to reduce bulkiness. With careful precision and the right tools, you can create a wig that suits your unique preferences.

Ventilating: Ventilating refers to the process of adding individual hair strands to the wig cap, creating a more realistic and natural-looking hairline or part. This technique is commonly used for lace front wigs or hand-tied wigs. It requires patience and skill, as each hair strand needs to be carefully knotted into the cap.

Wig Sewing Techniques: Wig sewing techniques involve sewing wefts of hair into the wig cap to add volume, and length, or create specific hairstyles. This technique is commonly used for creating updos, braids, or intricate styles that require additional hair. Sewing techniques can also be used to attach hair extensions or hairpieces to the wig for added versatility.

Heat Styling: Advanced heat styling techniques can help you achieve a wide range of hairstyles with your wig. Using a heat-friendly wig or protecting the wig with heat-protectant sprays, you can experiment with curling, straightening, or creating waves. Advanced heat styling techniques require careful control of temperature and timing to prevent damage to the wig fibers.

Section 5. Creative Styling Ideas

Wig styling offers endless creative possibilities. Experiment with various styles, such as updos, braids, ponytails, and half-up, half-down hairstyles. Use accessories like headbands, scarves, or hair clips to add flair to your wig. For added volume, consider teasing or backcombing the hair near the roots. Don’t be afraid to mix and match styles, textures, and colors to express your unique personality and create head-turning looks.

Section 6. Wig Care and Maintenance

Maintaining your wig is crucial to preserve its longevity and keep it looking its best. It’s important to adhere to the manufacturer’s instructions when it comes to washing and conditioning your wig. Avoid excessive heat exposure, such as using hot water or blow-drying on high heat, as it can damage the wig fibers. Store your wig on a wig stand or in a wig box when not in use to prevent tangling and maintain its shape. Regularly brush or comb your wig to keep it free of tangles and knots.

Styling your wig like a pro is an art that requires practice and knowledge. By following the expert tips and techniques outlined in this comprehensive guide, you’ll be well-equipped to achieve stunning hairstyles with your wig. Remember to choose the right wig, prepare it properly, and master the basics. Explore different curling and straightening methods to achieve the desired look, and let your creativity shine through various styling ideas. Finally, practice good wig care and maintenance to ensure your wig stays in top-notch condition. So go ahead, embrace the world of wig styling, and unveil a world of endless possibilities and impeccable style!

Expert Tips for Your Wig Like a Pro

Wigs have become increasingly popular as a practical and versatile option for changing your hairstyle. Mastering the art of wig styling can greatly enhance your overall appearance, whether you use wigs for fashion, health reasons, or simply to experiment with different looks. With a few expert tips and techniques, you can style your wig like a pro, achieving natural-looking results that seamlessly blend with your own hair. The degree of naturalness and versatility will depend on the type of wig you have, such as lace front, full lace, or monofilament, as well as its construction, whether it’s hand-tied, or machine-made. It’s also important to choose a wig color that complements your skin tone and a texture (straight, wavy, or curly) that suits your desired look. By selecting a wig that matches your skin tone and face shape, you can achieve a cohesive and attractive appearance. Let’s explore the world of wig styling and discover how to achieve a professional look.

  1. Selecting the Right Wig

Choosing the appropriate wig is crucial for achieving a professional-looking style. Consider the following key aspects when selecting a wig:

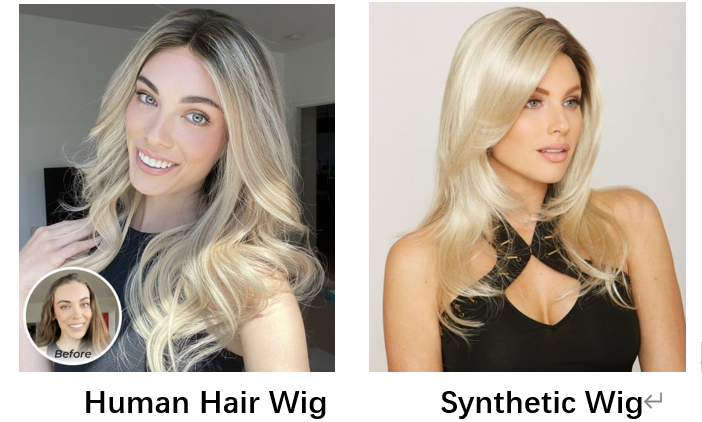
a) Wig Type: Before delving into wig styling, it’s important to understand the different types and construction methods available. Wigs come in various types, including synthetic and human hair wigs. Synthetic wigs are affordable and low-maintenance, while human hair wigs offer a more natural look and greater styling versatility. Additionally, wigs can be constructed using different methods, such as machine-made, or hand-tied. Each construction method has unique characteristics, which will influence how you style and wear your wig. Familiarize yourself with the type and construction of your wig to ensure you style it appropriately. Choose between synthetic or human hair based on your preferences and budget.

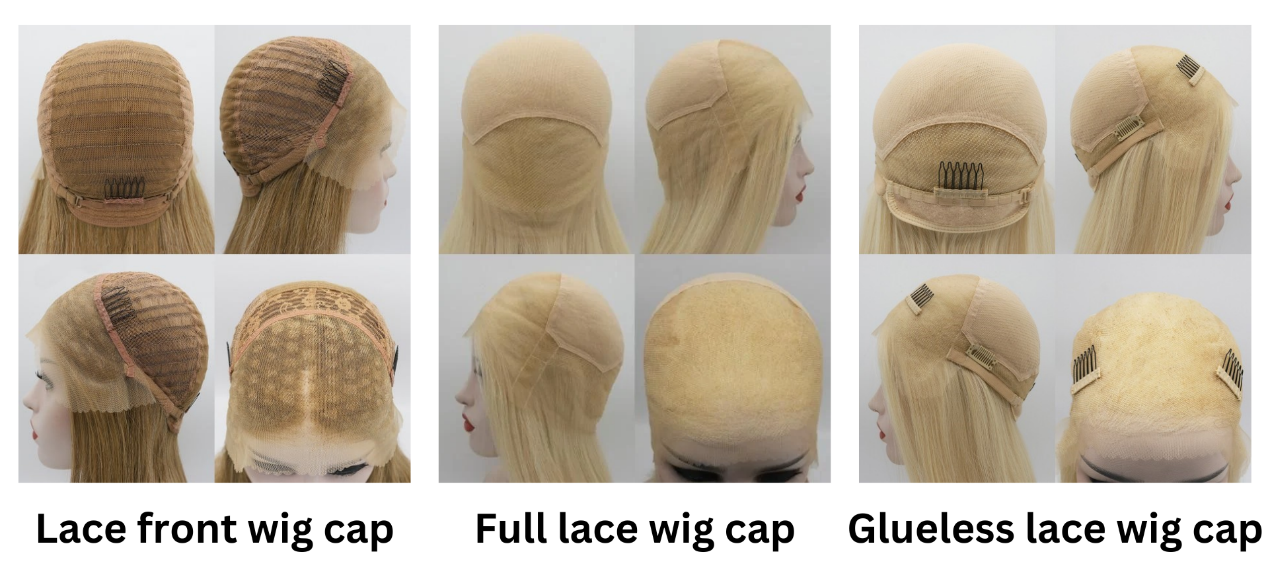
b) Wig Cap Construction: When shopping for a wig, understanding the different cap constructions is essential for achieving a comfortable and natural-looking fit. The cap construction determines the overall comfort, breathability, and realism of the wig, especially in terms of the hairline. There are various cap constructions available, including lace front, full lace, and glueless lace, each with its own features and benefits. By familiarizing yourself with these options, you can choose the cap construction that best suits your needs and preferences.

c) Wig Color and Texture: Select a wig color and texture that complements your skin tone and desired hairstyle. Experiment with different shades and textures to find the perfect match. The color of your wig has a significant impact on your overall attractiveness. Consider your skin tone, eye color, and personal fashion sense when selecting the color. Choose hues that accentuate your features and blend naturally with your hairline. While experimenting with color can be enjoyable, it’s important to choose shades that complement your skin tone. If you’re unsure, seek the advice of a hairstylist or try on a few color samples.

d) Wigs Customization: To achieve a truly personalized look, consider customizing your wig. Consult a wig specialist or professional stylist who can assist you in trimming it to the length and style you choose. They can also help to thin the hair or add layers to give the appearance of greater naturalness. If you’re unsure about customization, seek professional guidance from UiWigs to ensure the best outcome.

2. Maintaining Your Wig

Before styling your hairpiece, it’s essential to properly prepare it to ensure optimal results. Follow these tips:

a) Detangling Your Wig: Proper detangling is crucial for maintaining the longevity and appearance of your wig. Use a wide-tooth comb or a brush specifically designed for wigs to gently remove tangles and knots. Start detangling from the ends and work your way up to the roots. Avoid using excessive force, as this can damage the fibers. For synthetic wigs, use a detangling spray or conditioner formulated for synthetic hair. For human hair wigs, use a lightweight, leave-in conditioner to facilitate the detangling process. Detangle your wig regularly to prevent matting and tangling.

b) Washing and Conditioning Your Wig: Regular washing is crucial for keeping your wig clean and fresh. Follow the manufacturer’s guidelines for washing your wig, as specific instructions may vary based on its type and construction. Avoid using regular hair products, as they may contain harsh chemicals. Generally, you’ll need a wig shampoo that is gentle and sulfate-free. Fill a basin with lukewarm water and immerse your wig, gently swirling it around. Rinse thoroughly and apply wig conditioner for added softness. Pat it dry with a towel and let it air dry on a wig stand or foam head. Avoid rubbing or wringing the wig, as this can cause damage.

c) Drying Your Wig Carefully: When drying your wig, handle it with care to prevent damage. After washing, gently squeeze out excess water without twisting or wringing. Place it on a towel and gently blot to remove additional moisture. Allow your wig to air dry on a stand or mannequin head to maintain its shape. Avoid using heat tools such as hair dryers, as excessive heat can damage synthetic fibers or human hair. Instead, allow the wig to air dry naturally. For synthetic wigs, avoid direct sunlight or heat sources, as these can cause color fading or melting. Human hair wigs can be dried on a low-heat setting using a diffuser. Be patient during the drying process to ensure the best results.

d) Proper maintenance is key to prolonging the lifespan of your wig. Store it on a stand or a foam head to maintain its shape and prevent tangling. Avoid exposing it to harsh weather conditions, excessive heat, or humidity. Use wig-specific products for washing, conditioning, and styling to ensure optimal care. Regularly inspect your wig for any signs of damage or wear and tear. If necessary, seek professional repair services to fix any issues promptly.

3. Styling Your Wig

a) Heat Styling Your Wig: If your wig allows for heat styling, such as human hair wigs, it opens up a world of possibilities. However, it’s crucial to exercise caution and use the correct tools and techniques to prevent heat damage. Before heat styling, ensure that your wig is completely dry. Apply a heat-protectant spray to minimize damage. Use a low or medium heat setting on your styling tools and avoid prolonged exposure to heat. For curls or waves, use a curling iron or hot rollers. For straightening or smoothing, use a flat iron or a blow dryer with a comb attachment. Remember to work in small sections and avoid applying excessive heat to a single area. After heat styling, allow your wig to cool before brushing or combing.

b) Creating Updos and Ponytails: Creating updos and ponytails with wigs offers endless styling options. Use a hairnet to create a smooth and natural-looking base. To create an updo, gather the wig’s hair and secure it with bobby pins or hair ties. Use a cap or a thin hairnet to keep your natural hair in place and ensure a seamless look. For ponytails, use a hair tie or a clip to gather the hair at the desired height. Avoid pulling the hair too tightly, as this can strain the wig cap or cause discomfort. Secure any loose strands with bobby pins for a polished look.

c) Wig Accessories: Accessories can add flair and personality to your wig. Experiment with headbands, scarves, hats, or clips to enhance your look. Ensure that the accessories are wig-friendly and won’t damage or snag the fibers. Choose accessories that complement your wig’s color and style, allowing you to express your individuality and creativity.

By understanding the type, construction, and color selection of your wig and following proper detangling, washing, and drying techniques, you can achieve a polished and professional look. Heat styling, creating updos and ponytails, and accessorizing further enhance its versatility. With patience, practice, and attention to detail, you’ll be able to harness the transformative power of wigs and achieve head-turning styles that elevate your confidence and individuality. Remember to seek professional assistance for customization and prioritize regular maintenance to ensure your wig stays in top condition. With these expert tips, you’ll be able to confidently style your wig and embrace endless possibilities for your hair transformation.

How to keep your wig feeling super soft this season

So, it’s still a little chilly outside, and all we want to do is cosy up indoors under snuggly blankets until the sun properly returns. When we do have to leave the comfort of home and brave the outdoors, cold weather, harsh winds and snow can be damaging to our skin, our hair… and our cherished wigs! Until Spring arrives, protect your investment by considering these methods.

Use a pH Balanced Shampoo
Our skin and hair’s natural pH balance is on the acidic side, so acidic based shampoos are very good for hair! (these shampoos are the opposite to regular alkaline based shampoos which can be very drying to hair). Acidic based shampoos close the cuticle shaft of hair and keep moisture in the hair, as well as not stripping off all of the hair’s oils. Any shampoo bottle that says it is pH balanced is going to be acidic based. So, wash your wig with a pH balanced shampoo to protect it from drying out.

human hair wig
human hair wig

Condition
This may sound obvious, but conditioner makes hair soft! It protects hair from dryness. If you want to protect your investment apply a generous amount of conditioner to your wig after washing. Let the conditioner sit for 15 minutes to an hour before rinsing in mild water for a deeper condition. A hair serum applied after styling or leave-in conditioner will also give your wig long-lasting protection and shine.

uniwigs human hair wigs

It’s how you brush
Brush through your wig gently to avoid the hair becoming frizzy or ripping the hair from the wig tracks. Start brushing from the ends of the hair and work your way up. If possible, try and separate the tangles with your fingers as this is very gentle. After brushing, a light oil sheen can be sprayed onto the wig to restore lustre, this can be done on synthetic and human hair wigs.

blonde wigs
blonde wigs

Dry naturally
To let your wig air dry after a wash rather than blow drying is much better for your wig’s condition. Also make sure that the hair is completely dry before going outside in cold weather or it could freeze! Wigs are more suspectable to freezing and this can cause brittle hair and breakage. Make sure you allow plenty of time for your wig to dry, letting it air dry over night is always a good way to know it will be dry in time.

hairstyles
hairstyles

Limit heat
Heat tool styling depletes your hair of moisture. We know, we know, heat tool styling provides hair with the most sleek and flawless looks! But consider cutting down during the cooler months to notice a difference in the softness of your wig. Of course, many synthetic wigs are not able to withstand any heat styling, so be sure to double check if yours is heat-friendly.

Cover up
Cover up and protect your wig! Always check the weather before you head out the door, and if there’s any chance of rain, snow, or generally bad weather, wrap your hair or wear a hat (silk lined is best to retain the hairs moisture) or grab an umbrella.

So that is how you keep your wig protected from the cold weather until the sun returns for spring! We can’t wait!

UniWigs New Credit Policy

In order to provide a better and more friendly shopping experience, UniWigs has just renewed our store credit policy below:

1. What is loyalty point?

Loyalty point equals store credit. It can be applied as cash at Uniwigs.com and be combined with any discount that is active on the website. There will be no limit on how many points can be applied on each order.

100 Points=1 USD.

2. How to obtain loyalty points ?

A. Every dollar spent at UniWigs.com will generate One point. For example, If your order payment is $99.89, you will obtain 99 loyalty points for this order.

B. You can also get loyalty points by posting your product review. A valid, positive product review in forms of photo plus at least 10 words comment will add 1000 loyalty points; 500 points for those with comments only.

C. If you are not satisfied with your purchase, in 10 days, as long as the product is still in its original conditions, we offer Store Credit Refund in full amount.(Customers are responsible for shipping cost.)

3. How to apply loyalty points ?

Loyalty points can be easily applied as the model picture below:

How to apply loyalty points

* Expiration date of all store credit is PST 11:59pm December 31st of each year.