How to Install Lace Frontal?

Understanding the proper application of a lace frontal is essential to aesthetics and safety. Otherwise, the process may lead to hair loss and skin and/or wig damage. Unlike traditional wigs a lace frontal, commonly referred to as a “lace front wig,” features a mesh of Swiss or French lace constructed along its front perimeter. The hair along the perimeter of the wig is hand-tied onto the lace, allowing it to emulate a natural hairline. In addition, specially made adhesives are applied directly beneath the hairline of the wig in order to secure the lace frontal closure along the scalp.

lace frontal
lace frontal

1. Secure your hair so it lies flat underneath the wig. This can be achieved by two methods:
Cornrow braid your hair. Take the tooth end of your rat tail comb and part your hair into vertical sections one by one. Part in a straight line beginning from the middle of your hairline on back to the nape of your neck (how small you want your braids is determined by the width or amount of hair in between each part). Take three sections of hair left in between these parts and braid the hair into a cornrow. Repeat the process until all your hair is securely braided. Place the wig cap over your hair.
Tightly gather your loose hair. Comb or brush the hair back flat and away from your face. Pin the hair as you see fit. Place the wig cap over your hair. Tuck any loose strands of hair underneath the wig cap.

2. Wet a gauze pad generously with rubbing alcohol. Rub it along your hairline wherever adhesive will be applied so as to cleanse away dirt, oil and debris that may be on your skin. Allow the skin to air dry completely.

3. Apply scalp protectant as directed along your hairline wherever hair adhesive will be applied on the skin. Allow it to air dry completely.

4. Trace lightly where you would like the lace front wig to rest, using a makeup pencil, as you do not want the edge of the human hair lace front wig to lie directly over the hair at the hairline. To reasonably recreate the appearance of a natural hairline, trace no further than 1/2 inch away from your actual hairline.

5. Trim off any excess lace left around the hairline of the lace front wig carefully, using scissors. Cut all the lace off directly up to the hairline of the lace frontal.

6. Apply a thin coat of adhesive bond along the edge of the wig cap (this prevents wig cap from slipping backward while underneath the wig), in between the actual and traced hairlines, and along the nape of the neck. Do not apply the lace front on wet glue or it won’t secure properly. Allow “soft bond” adhesives to set or get “tacky” to the touch. However, “hard bond” adhesives do not require drying time as they dry immediately upon application.
To use adhesive tape cut the tape to the desired length. Firmly press the tape directly beneath the hairline of the lace front wig along your forehead and the nape of your neck. Allow small gaps in between the strips of tape so moisture can escape. Allow the tape to set for 5 to 10 minutes. Peel off the back of the tape to expose the adhesive.

7. Position the lace front wigs human hair on your head starting from the back and it lifting forward over your head. Keep the wig slightly elevated over the scalp so the wig won’t slide down onto the adhesive once you’ve reached your forehead. Line up the perimeter edge of the wig over the desired hairline or tape. Glue users press down along the entire perimeter of the lace frontal so as to secure it in place. Tape users press and hold the entire perimeter of the lace frontal for up to one minute.

8. Tie the scarf securely around your hairline to allow the wig to thoroughly bond to the adhesive on your skin. If the lace front is made of human or heat resistant hair you may sit under a dryer as long as needed to assist the bonding process — this is optional. Do not wash or vigorously manipulate the lace front wig for 24 hours.

Uniwigs FAQ (1)

How long can I wear my wig at a time?
Your extended wear will depend on what adhesives you use, your body chemistry and how your skin responds to the adhesives, and how frequently you wish to re-apply. We stress that it is important for you to be mindful of your hair and scalp condition underneath during extended wear. Most clients achieve a 1-4 week hold with the right adhesive, washing and nurturing their own hair in between applications. If you are bald or have significant hair loss, you are likely to achieve a much longer hold.

What density should I order and why does it matter?
The density refers to how thick the hair is and what density you order is really based on personal choice. Most women achieve a natural appearance with light to medium or medium density; however, your choice will depend on your styling preferences and individual profile.

2016-back-school
2016-back-school

Can the hair be flat ironed or curled?
The hair is 100% human hair that can withstand household styling tools such as curling irons and flat irons. You can wash, set, and style the wig as you would your own hair. But like your natural hair, the hair can get damaged with the misuse and overuse of products.

Can I have a style or color made that is not currently shown in your gallery?
Yes, our catalog is being continually updated so not every available style is represented on the site. We offer customization at reasonable prices. Please send us your photos and detailed information on how you would like your wig made and we will provide you with a quote.

Can I dye the hair?
The technical answer is yes, but we do not recommend any further processing of the hair if it has already been dyed and processed. Further, only experienced colorists should attempt to color the hair. Remember that though the hair is 100% human hair, it is just as prone to damage from excessive processing as your own hair. We cannot and will not be responsible for the results.

Can I wear my lace wig in a high ponytail?
Yes, you can wear your wig in a high ponytail once you apply around your full perimeter with adhesives. You will need a cap construction that is made with lace around the perimeter.

Can I part my lace wig and where can lace wigs be parted?
Our lace wigs can be parted anywhere on the cap. If you are covering your hair, the trick is to have your parts look natural by either wearing a stocking or wig cap that is close to your skin’s color. Some clients can even get a natural looking part without wearing a wig cap. Even better than using a wig cap, you can order a silk base wig where the knots are completely hidden with the silk mimicking a natural scalp.

MUST-KNOW INFO—HAIRPIECES

As a Customer Service on www.uniwigs.com, so many questions has been asked. So today I am gonna summarize and offer you guys the necessary information at “Question & Answer”:

hair toppers
hair toppers

Q: What should I buy to cover my head, I have thinning hair on top and crown.
A: Dear Madam, we highly recommend you to order the hairpieces for the hair loss.
Totally there are lace closures and mono toppers. Lace closure will be more popular for the brown or darker skin. But mono toppers are more for white or pale skin.

Q: I wanna the lace closures but not the toppers. But there is no blonde or light shade color I can choose.
A: We are sorry for the inconvenience. Madam, please note that we can make the custom color for you, which the extra cost will be $30-$50 more.

Q: Can I ask to sew clips on it so that I can clip in?
A: There is the “Clip in” selection on the product page which you can choose. The price will be $5 more.

Q: But I need help for how to choose the right hairpiece.
A: Please measure the front hairline to back and side to side you need to cover. That will be the right dimension you need to order.

Q: The hair topper I ordered is kind of too small and thin, people can see my bald crown.
A: Hair toppers aim to cover the top of our head, and the mono top will give you the more natural parting line on the front. If you want to cover the crown part, you may need to order the bigger dimension which can across your crown or you can ask the higher density for the topper which will be the custom product.

Uniwigs Customer Show From Alisa Sia

Alisa Sia is one of our girls just like you all, she is really a beauty and love our wigs! And can’t resist repeating two post feedback to our wigs, here you can see them all and amazing pictures with Uniwigs Grey Wigs are included too.

Alisa Sia with Uniwigs

“Got my first lace front wig from Uniwigs and I love it! It looks so realistic, and everyone who has seen me wearing it asked me if I have dyed my hair. Even though it is made out of synthetic hair, it doesn’t get tangled as much as any of the other wigs I have tried. And trust me, I’ve tried a lot! I have a full drawer of different colors of hair extensions and wigs. The hair is really soft and smooth, and all you have to do before wearing is brush it with the brush they send you together with the wig. It also comes with a cap to put your own hair away. The wig is really a perfect solution to when you want to color your hair, but don’t want those grown out roots, and don’t want to damage it. I would even wear it when I go out. The only reason I’ve worn it for pictures only so far is because it’s really hot right now in LA, but I would definitely wear it out in fall or winter. The main reason I love this wig so much is because of how perfect its hairline is. If you scroll down you can see a closeup picture of it. You can’t even tell that I’m wearing a wig! Since I’m really into changing my hair, but I haven’t done it recently because I don’t want my hair damaged, I would be very happy to get more colorful lace wigs from Uniwigs and style different looks with them.” — Alisa Sia

Uniwigs hairline
Uniwigs hairline
Slisa Sia
Slisa Sia

“Another post with me wearing the same gray lace front wig from Uniwigs. They have so many cute colorful wigs available that I would be really excited to style! In this look I wasn’t really going for Ariana Grande style at first, but once I tried this wig on a couple of people were like “OMG you look so much like her in her Focus music video!” So since I already wore it with a white crop top and white skirt, I decided to add these over the knee boots to make it kind of similar in style to what she was wearing in Focus. By the way, this wig came just in time – exactly while I was decorating my new room in all light gray, light pink, and white. My old room had too much bright pink stuff, and I got tired of it. I feel like right now I’m really into these pale neutral colors because it’s so easy to just add any accessories to them to change the look. I even used a pale pink lipstick which I usually don’t, and I think it matched perfectly with this hair color.” — Alisa Sia

Uniwigs Grey Wigs
Uniwigs Grey Wigs

Find the wig here: http://www.uniwigs.com/synthetic-wigs/41055-star-synthetic-lace-front-wig.html

Alisa Sia’s Blog: http://www.alisasia.com/

How much hair weave you need?

Weave are attached to your head by sewing them to a tiny braid made out of your own hair. The track (known to hairdressers as a corn-row) runs horizontally around the back of your head. The tracks are done in the middle of your scalp underneath your hairline so you can’t see them.
The crown area of your own hair covers the top track making the hair extensions seem invisible. The number and size of tracks matches the number and size of wefts. The wefts and tracks ideally should be made in different sizes in order to match exactly the way your hair would look if you had grown it that way yourself.

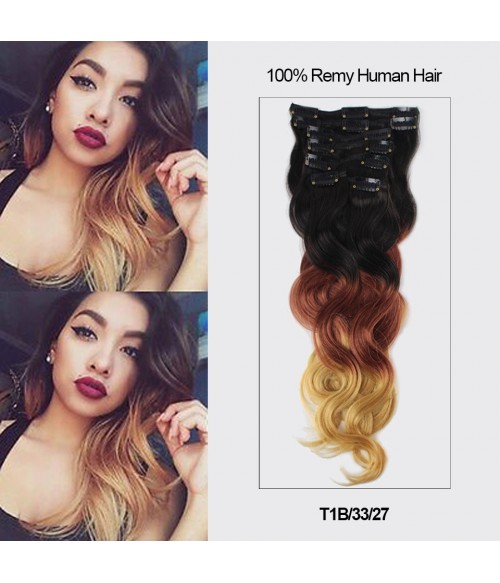
Body Wave Clip In Human Hair Extension

Normally, Weft hair are applied in rows across your head with adhesive or sewed to braids. Some hairdressers prefer shrinkies/shrink-links and micro ring or fusion for pre bonded hair, the hair comes already separated into individual strands ready for application with glue on the tips.
How much hair you need depends on how many tracks you have. For example: If I had hair to my chin and I wanted hair to my bra line (about 18″ long) I might need 5 or 6 tracks/wefts depending upon my current haircut. If I had hair to my shoulders that was thin and stringy and I wanted it thicker and more luscious but the same length I might need 2 or 3 (or more) tracks/wefts. For hair weft under 18 inches, one packet is enough for full head. Over 18 inches, you should need more the one. If a hairdresser is doing your hair it is advisable to check with them as to how much you require for the hairstyle.
For the pre blonded hair, you should need 150-200 strands.Once again this depends on the style. For other methods eg strand by strand you will need to consult with your hair dresser. Once the tracks are done, the wefts are sewn to them and then your own crown area hair is blended with and combed over the extensions.

Sure, the Extensions should not be applied any lower than the base of your scalp (about even with the middle of your ears) and so your hair under this point covers the extensions while you wear it in pigtails, ponytails, french twists, french braids etc。 With proper care, Hair Extensions should last four months.

Hope it helps. Further Reading: Weft Hair Extensions

Closures: Lace vs. Silk Base

When it comes to wearing weaves and hair extensions, the goal should always be to obtain a natural-like appearance. No one deliberately wants their weave to be easily detected, which is why many installations require leaving hair out in the front to cover tracks. But with this weaving method comes the hassle of blending your own hair texture with the hair texture of the extensions—talk about annoying.

Many times in order to be successful at the blending process, constant heat is being applied and the risk of heat damage is high. But thanks to closures–a small hair unit used to cover the front of the hair where you would normally leave hair out to give your install a natural hairline appearance–wearing a believable weave without causing any damage to your hair doesn’t have to be unbelievable. (Or should I say unbeweavable?)

Closures come in two different bases–lace and silk–and can be glued, taped, or sewn down. Although they are both applied the same and used to achieve the same overall result, they are quite different. Not sure which closure would work best for you? Here are a few pros and cons to help guide you in your lace or silk-based closure journey.

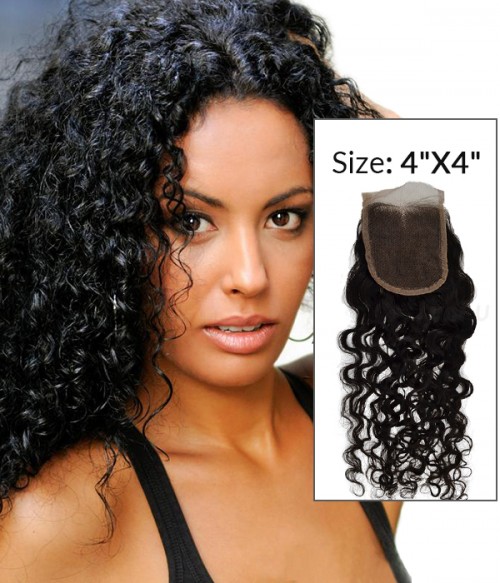
Curly Human Hair Lace Closure

LACE CLOSURES are made with a lace-like foundation with hair strands embedded into the tiny holes.
Pros: It gives a scalp-like appearance when placed against your skin or natural scalp. It also allows for a very flat and easy application that will make your install look very real.
Cons: You’ll need to do some tweaking to lace closures to achieve the best results. Because the hair strands are directly embedded into the sheer lace, tiny black knots where the hair and lace meet are visible when placed against your skin, which means you’ll have to bleach the knots to get rid of the grid-like effect the dots create. And if not bleached correctly, you risk ruining your closure and the hair attached—and wasting your money. Alternatively, you may add concealer or foundation to the lace for an easy route to achieve a natural appearance.
SILK BASE CLOSURES are made with hair strands embedded into a nude, skin-like silk material that is reinforced with lace.

Pros: Silk base closures hair tend to last longer and generally don’t require any bleaching like lace closures. Because of the silk material backing on the closure, the knots are not visible and mimic the scalp without much alteration.

Cons: While the silk material helps to conceal the knots to create the appearance of a real scalp, every scalp isn’t created equal so if you are of darker complexion and have a much darker scalp, you will need to alter and tint your silk base. Also, this type of closure tends to be a little thicker, which can pose as a challenge with getting a super flat install.