The Ultimate Guide to Washing and Caring for Your Hair Toppers: A Step-By-Step Tutorial

Maintaining your hair toppers is essential to keep it looking its best and ensure its longevity. In this comprehensive guide, we’ll walk you through a step-by-step tutorial to help you wash and care for your hair topper with ease and expertise.

1. Brushing and Preparation of Hairpieces

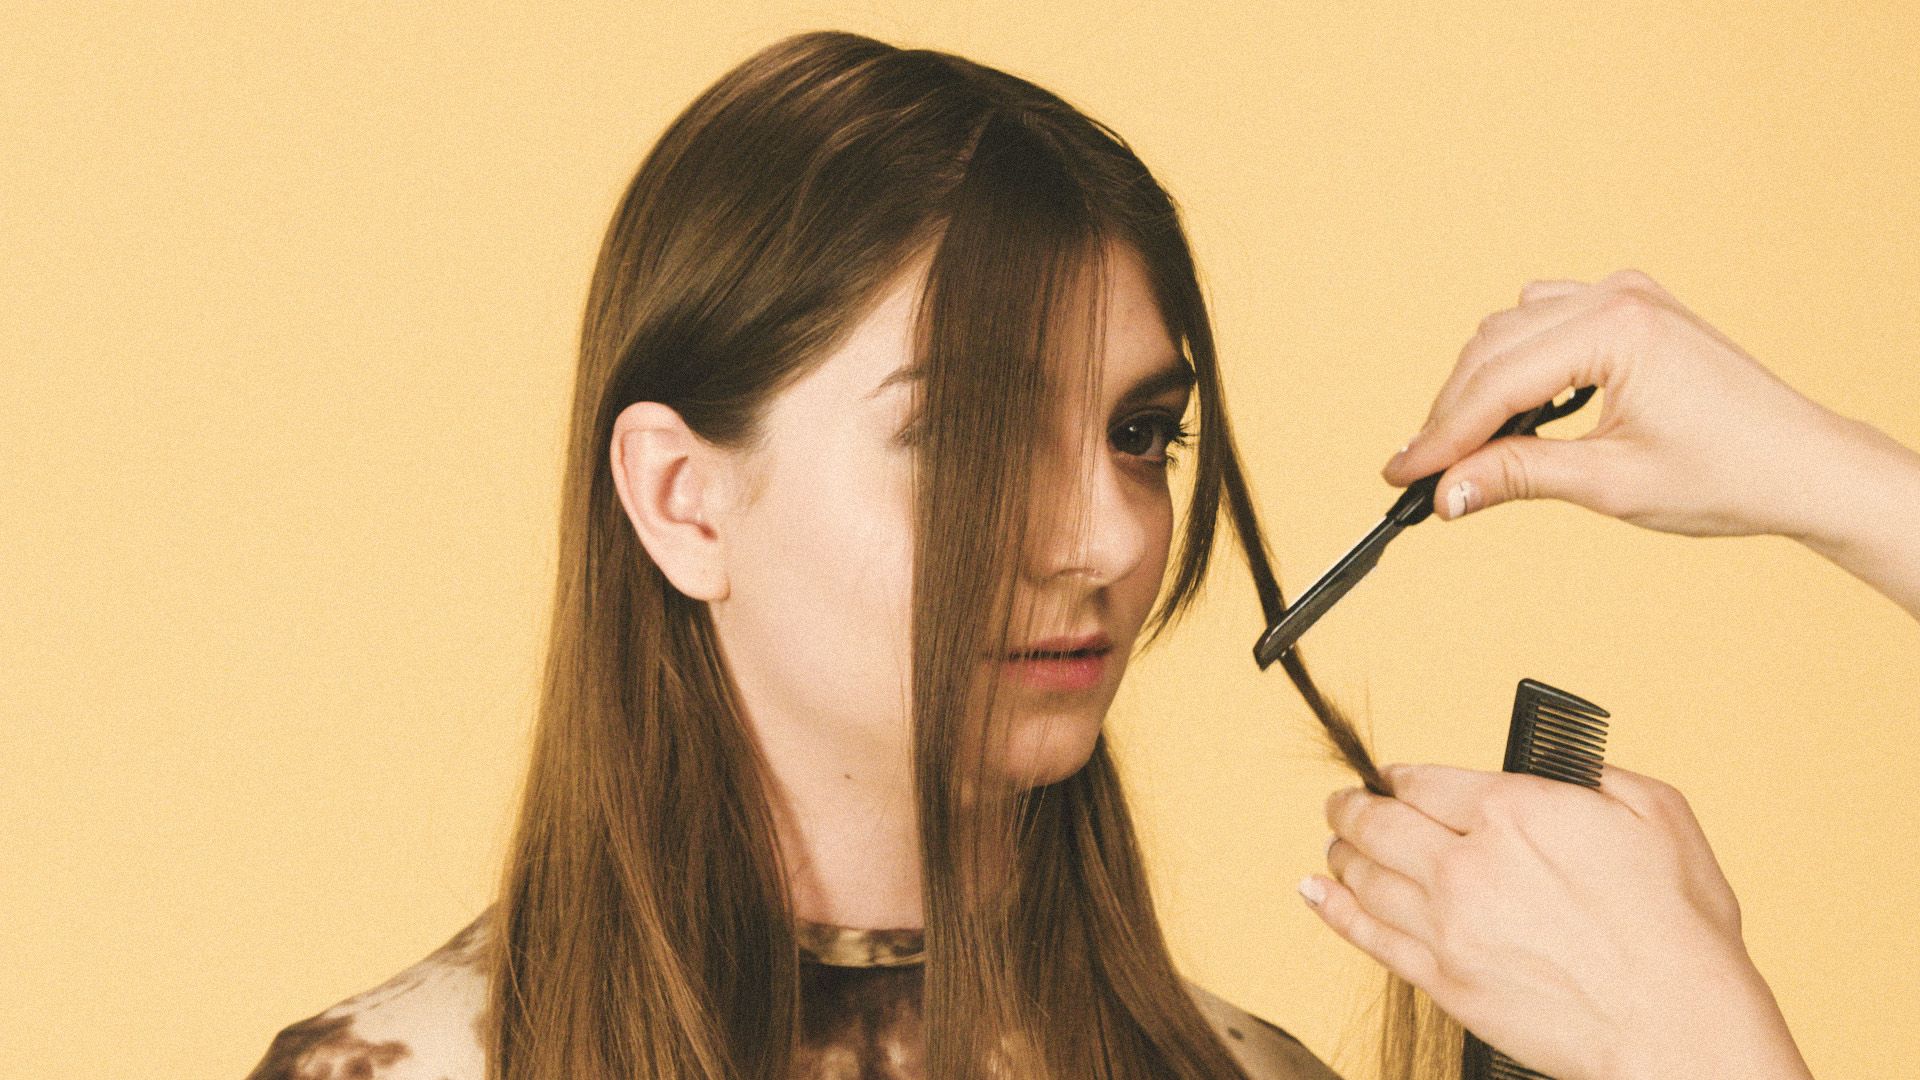
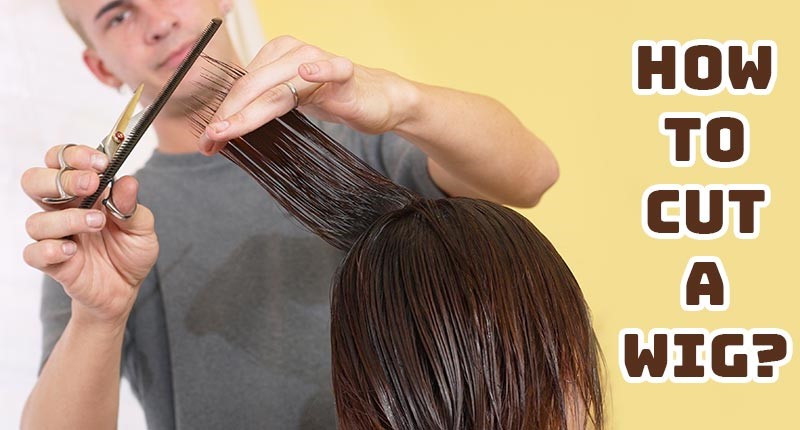
Before embarking on the washing process, it’s crucial to give your hair topper a good brush. We advise brushing through the topper to remove any tangles or knots. This initial step helps prevent further tangling during the washing process.

Brushing and preparation are fundamental steps in the care and maintenance of hairpieces, ensuring they look their best and remain tangle-free. Begin by gently brushing through your hairpiece using a brush with soft bristles. Start from the ends and work your way up to the roots, being cautious not to pull or snag the hair fibers. This helps in removing any knots, tangles, or loose hairs, making the rest of the maintenance process more manageable.

Brushing your hairpiece is not only about detangling but also about evenly distributing the hair’s natural oils and preventing matting. It’s essential to perform this step regularly, especially before washing or styling your hairpiece. By taking the time to prep and brush your hairpiece, you’ll ensure that it not only looks its best but also remains in optimal condition for longer, ultimately saving you time and effort in the long run.

2. Creating a Soapy Solution

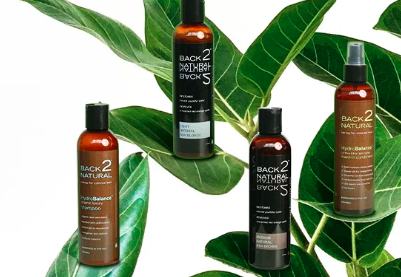
The next step involves creating a soapy solution for washing your hair topper. We recommend using a bowl of cool water and adding two squirts of high-quality shampoo. The choice of shampoo can significantly impact the outcome of your topper’s wash. Opt for a gentle, sulfate-free, and pH-balanced shampoo to prevent any damage to the hair fibers or the base of the topper. You can choose a brand called UniWigs, but feel free to choose a shampoo that suits your preferences and needs.

Creating a soapy solution is a crucial step in the process of washing and caring for your hair topper. This solution serves as the cleansing agent that will help remove accumulated dirt, oils, and styling products from the topper. We recommend using a bowl of cool water for this purpose, ensuring that the water is not too hot, as excessive heat can be damaging to the topper’s hair and base.

This solution should be enough to ensure the topper gets evenly saturated during the washing process. The soapy solution sets the foundation for an effective cleanse and prepares your hair topper for the next steps in the care routine.

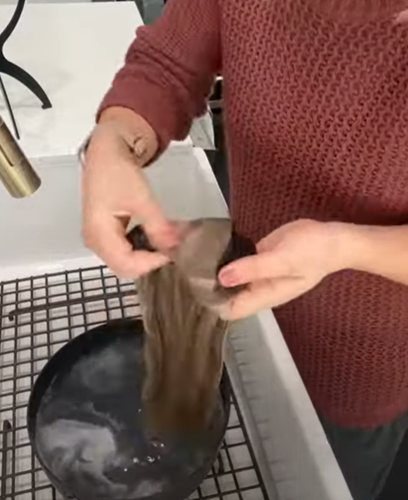
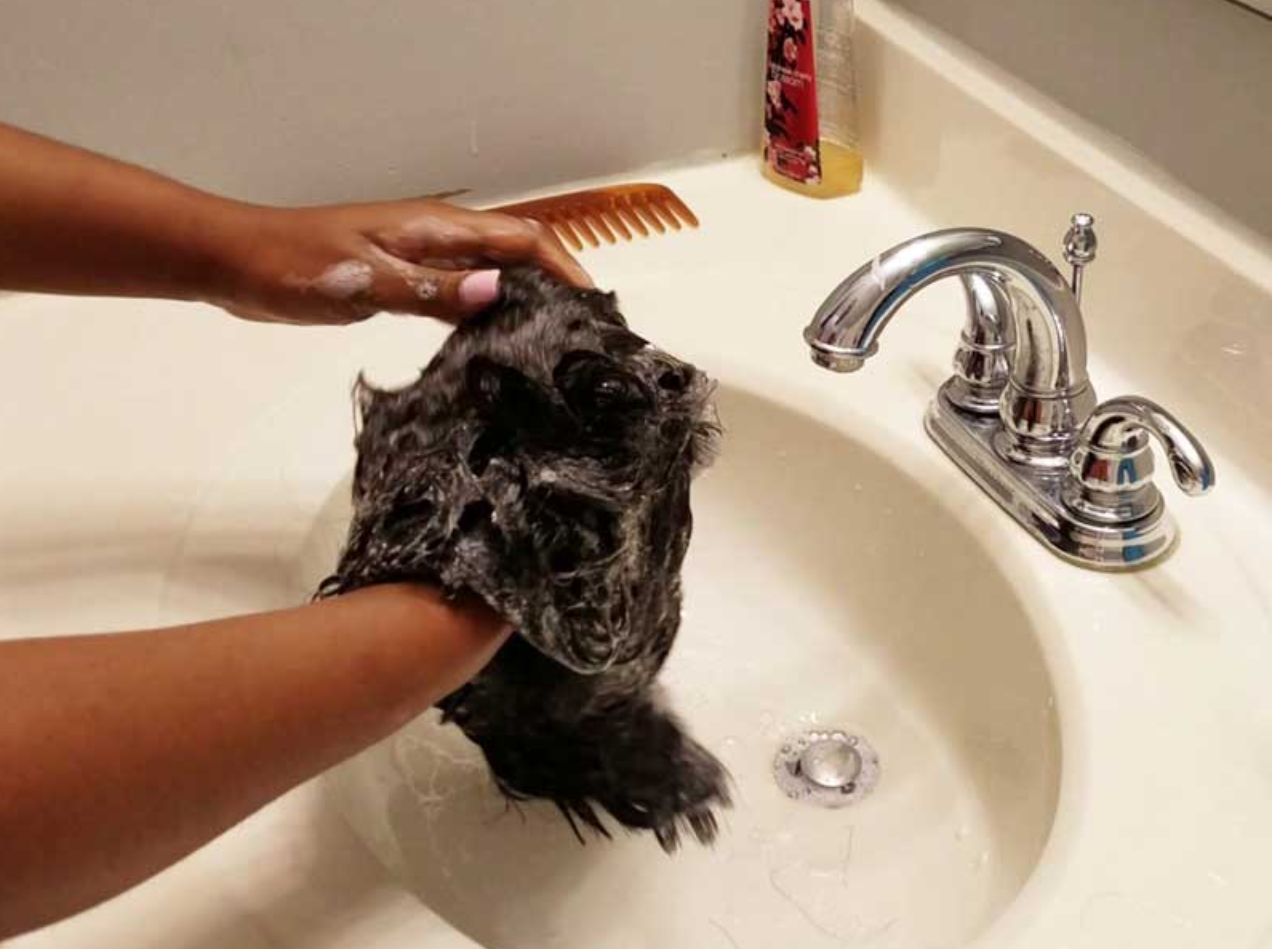
3. Soaking and Gentle Scrubbing of Hairpieces

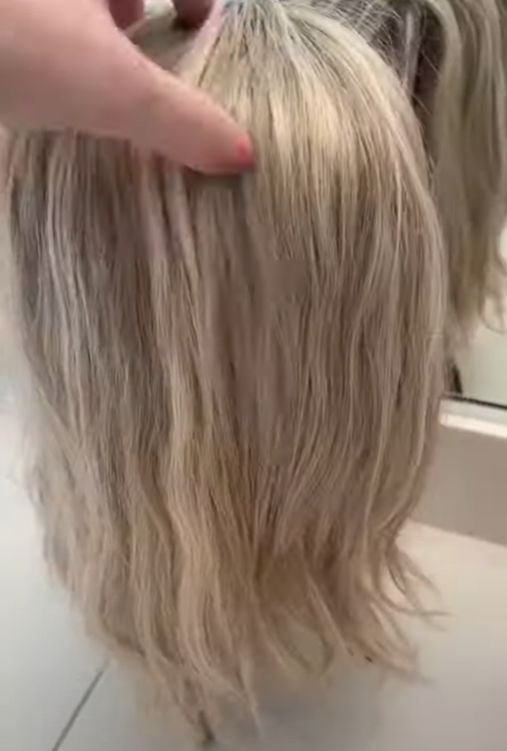
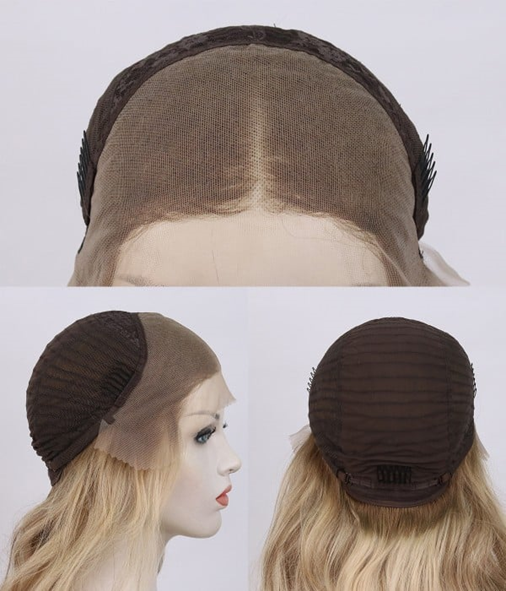
This step helps to remove accumulated dirt, oils, and styling products from the topper. Following the initial soak, you can use a small amount of shampoo to gently scrub the mono top, lace top, and wafting areas. It’s essential to be gentle during this process, as excessive rubbing or aggressive handling can lead to damage. Notice how to use your thumb to hold the part in place, ensuring the part line stays intact.

4. Rinsing and Part Preservation of Hairpieces

Rinsing your topper thoroughly is vital to remove all shampoo residues and ensure that it’s clean and fresh. While rinsing, you should continue to keep your thumb over the part line to maintain its position. Preserving the part line is essential, as it helps the topper maintain its natural appearance and prevents any shifting of the base.

5. Conditioning with Care

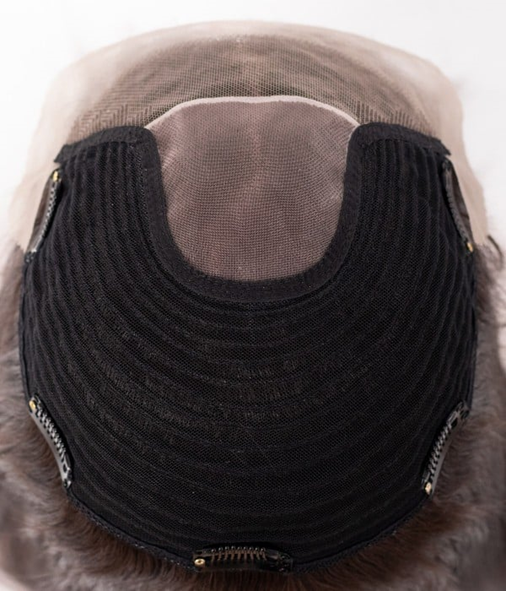
Avoid applying conditioner to the monotop, lace top, or hand-tied area, as these parts are more delicate and don’t require conditioning. Conditioning the ends helps keep the hair soft, smooth, and manageable. Allow the conditioner to set for about 5 minutes before gently rinsing it out.

Conditioning your hair topper with care is a crucial step in the maintenance process. As demonstrated in the video, it’s essential to apply conditioner only to the ends of the topper’s hair. Avoiding the monotop, lace top, or hand-tied areas during conditioning is essential, as these parts are more delicate and do not require the same level of moisture as the hair itself. By limiting conditioner application to the ends, you prevent any potential buildup or residue on the delicate base, ensuring it remains in excellent condition and ready to perform as intended.

Allow the conditioner to set for about 5 minutes. This short waiting period allows the conditioner to work its magic, softening the hair and making it more manageable. After this brief interval, proceed to gently rinse out the conditioner thoroughly. This ensures that your topper retains its silky, smooth texture without any excess product that might weigh it down. By following these conditioning guidelines, you help your topper maintain its quality and appearance, making it an elegant and long-lasting addition to your hair routine.

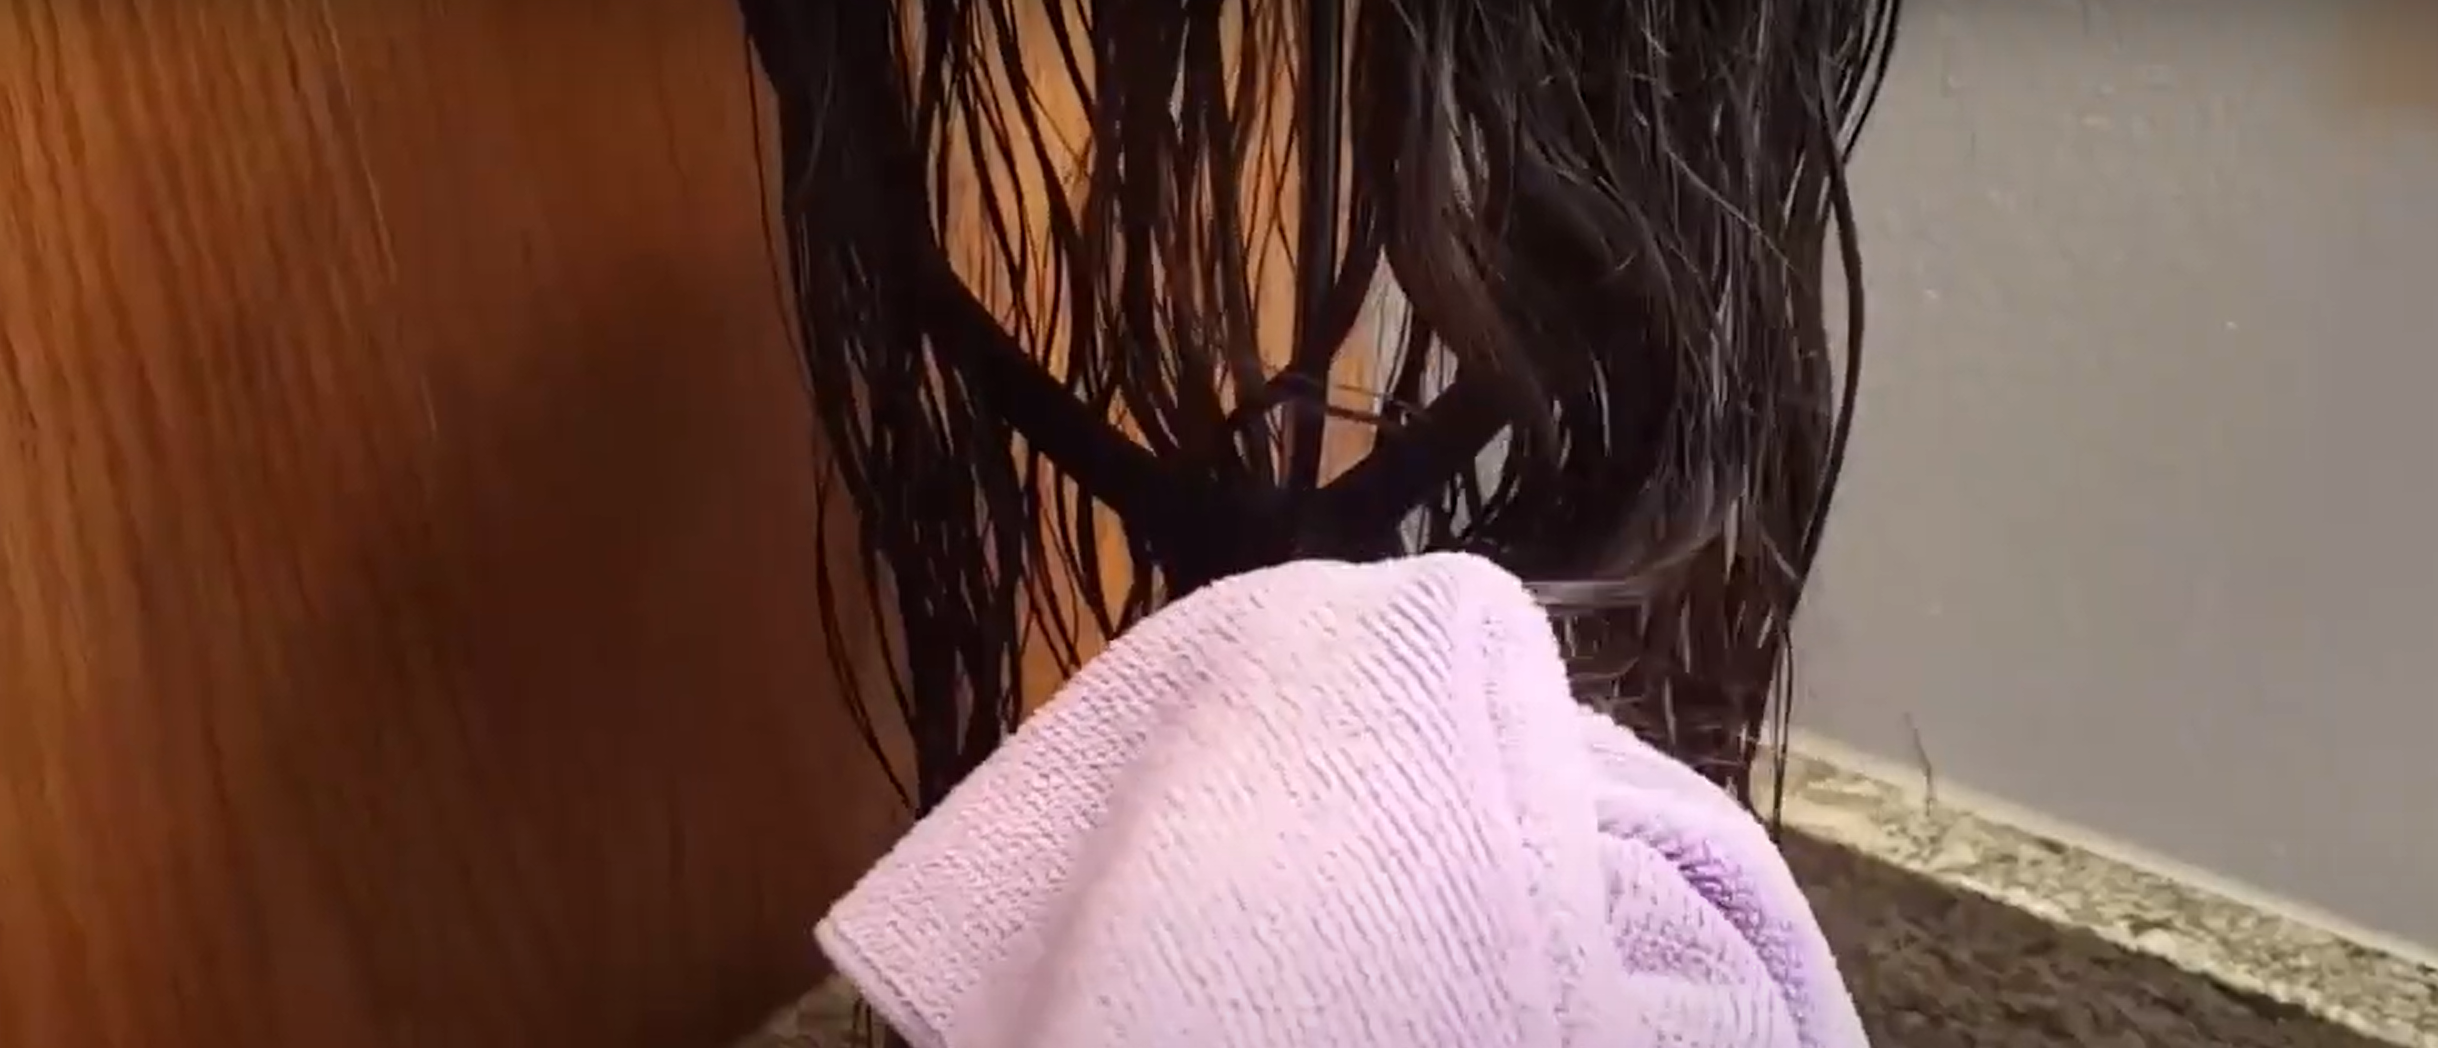
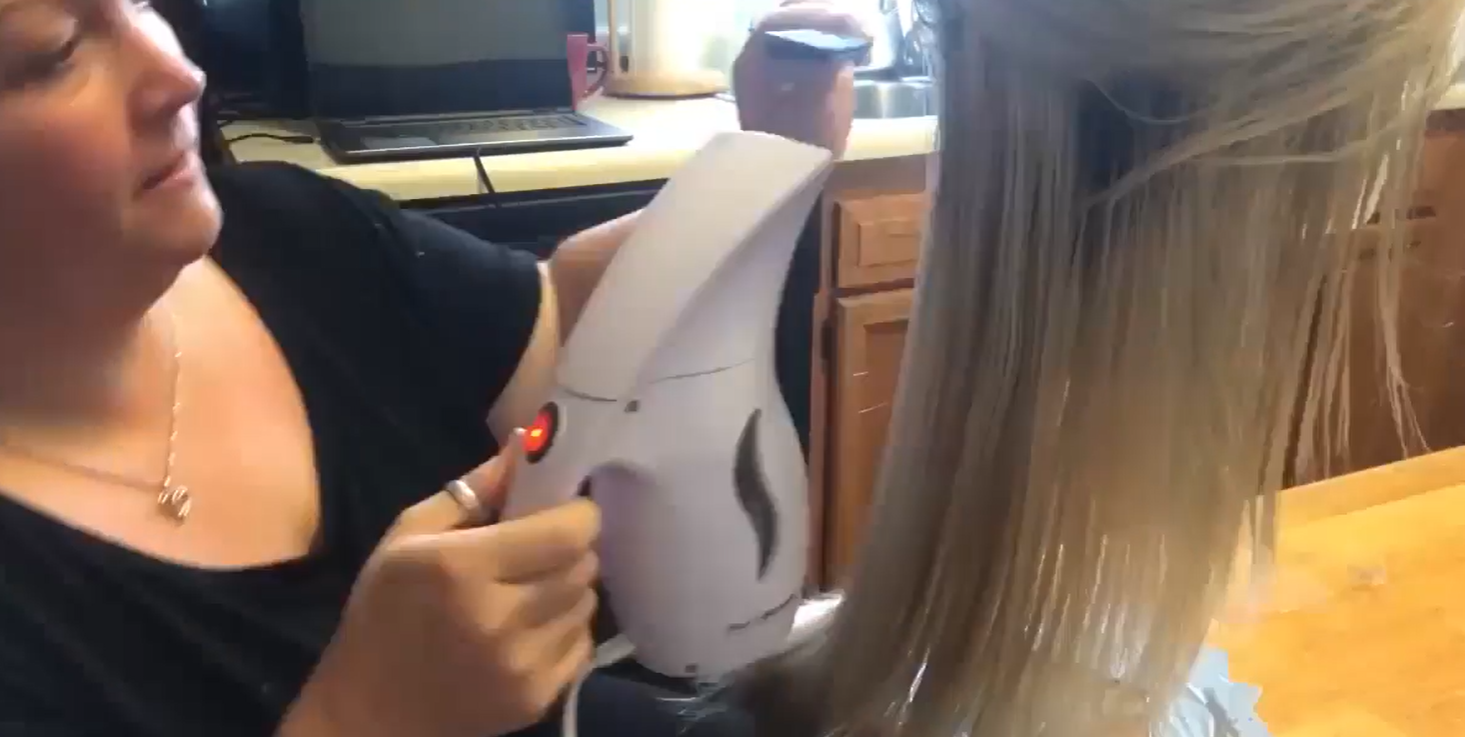
6. Drying and Styling of Hairpieces

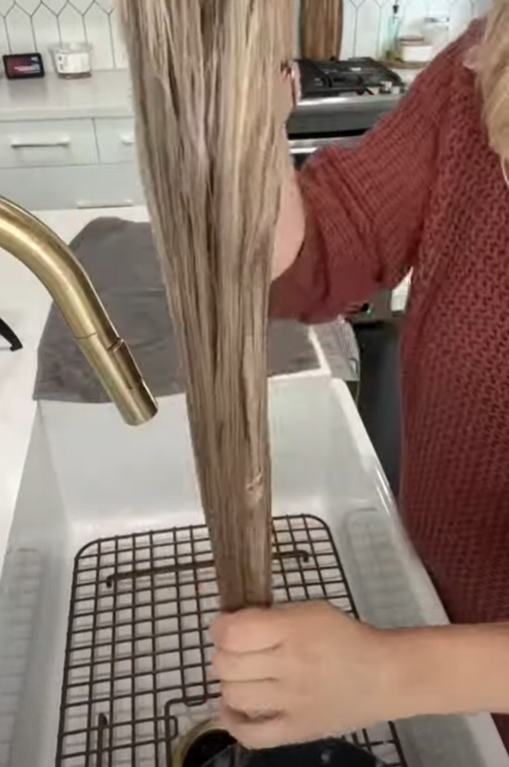
Once your topper is thoroughly rinsed, gently squeeze out excess water. We suggest towel-drying the topper to remove as much moisture as possible. A portable wig stand is then recommended to allow your topper to air dry for the next 12 hours. The choice of a wig stand is practical, as it helps the topper maintain its shape and allows for even drying.

Drying and styling your hairpieces, including wigs, toppers, and extensions, is a crucial step in the overall maintenance routine. After washing, gently squeeze out excess water using a towel, being careful not to wring or twist the hair, which can lead to damage or tangling. To facilitate even drying and maintain the shape, it’s advisable to place your hairpiece on a wig stand. A wig stand is particularly useful as it allows proper air circulation, ensuring that your hairpiece dries more quickly and evenly.

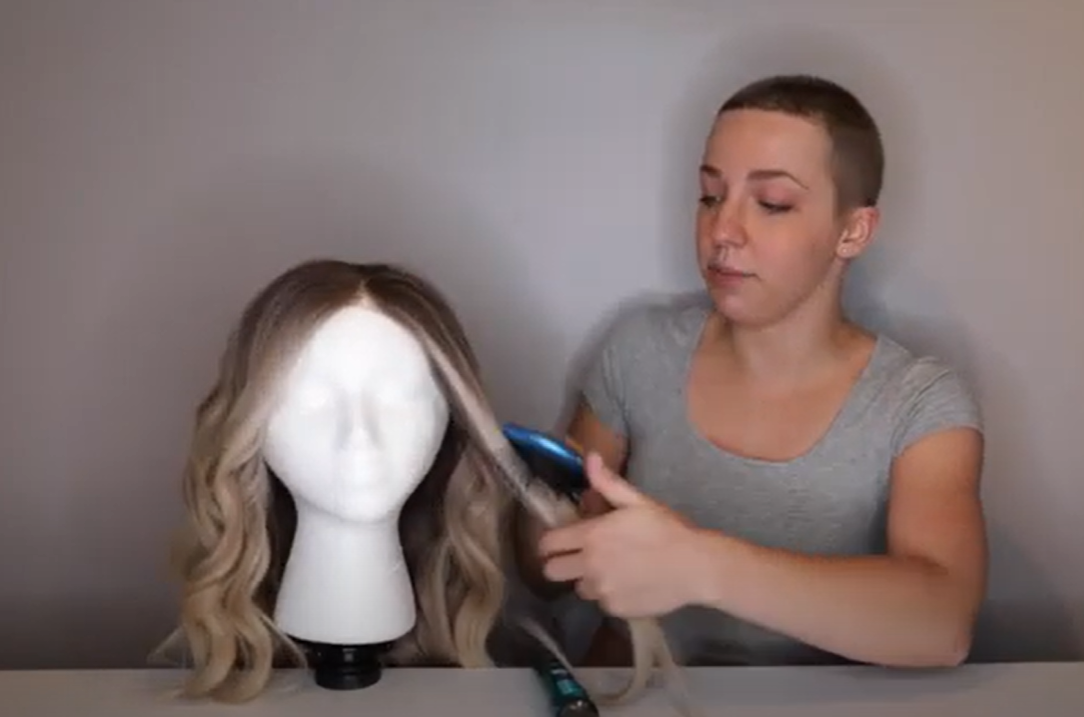
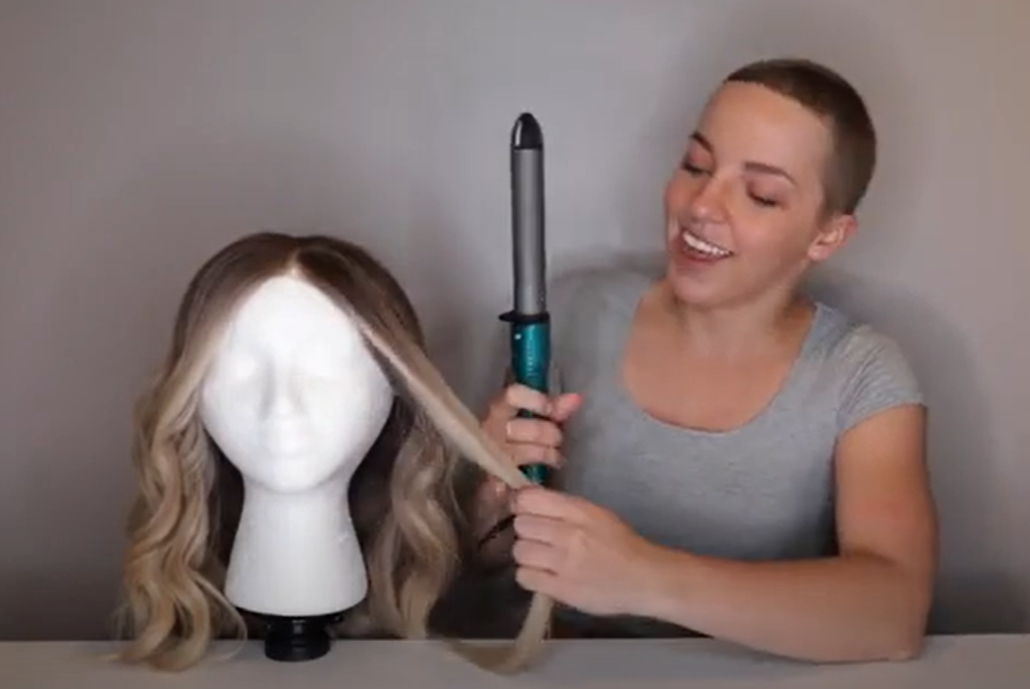
When it comes to styling, remember that many hairpieces come pre-styled, but you can make adjustments if needed. You can use low-heat styling tools like curling irons or straighteners, but be cautious and avoid high temperatures that might damage synthetic hair. For heat-friendly synthetic or human hair pieces, you have more flexibility in styling, but it’s still recommended to use heat-protectant products. Consider using wig-specific styling products and avoid heavy or oily styling products that can weigh down the hair. Always style your hairpiece when it’s completely dry to achieve the desired look and don’t hesitate to consult with a professional stylist for more intricate styling needs. Proper drying and styling are essential for maintaining the longevity and appearance of your toppers.

By following these instructions and using high-quality products, you can ensure that your topper remains in excellent condition, ready to enhance your hair’s appearance for a long time.

VIEW MORE FAQ ABOUT HAIRPIECES

How to Dye a Lace Base Human Hair Topper or Wig

Are you nervous about dyeing a lace base human hair topper or a wig? It does require some careful steps to protect the delicate lace from staining. In this guide, we’ll take you through the process of dyeing a lace base hair product step-by-step, ensuring beautiful results without compromising the lace’s integrity.

View Lace base hair toppers at UniWigs

View Wigs with lace caps at UniWigs

Step 1: Gather your materials

Before diving into the dyeing process, assemble all the necessary materials. You will need a hair dye of your choice. Additionally, grab a plastic or glass bowl for mixing the dye, a hair dye brush or applicator, hair clips, a wide-tooth comb, gloves, hair conditioner, and petroleum jelly or clear barrier cream.

Step 2: Protect the lace

To safeguard the lace from potential staining, it’s crucial to create a protective barrier. Apply a thin layer of petroleum jelly or clear barrier cream around the edges of the lace and any other areas where the dye might come into contact with the lace. This will help prevent the dye from seeping through and staining the lace.

Step 3: Section and secure the hair

Using hair clips, divide the hair into manageable sections. Clip away the hair that you do not wish to dye, exposing only the hair strands that you want to color. This step will make the dyeing process more organized and efficient.

Step 4: Prepare and apply the dye

Follow the instructions on the hair dye packaging to mix the dye in a plastic or glass bowl. If the dye requires a developer or any other mixing agent, ensure you follow the instructions carefully. With gloves on, take the hair dye brush or applicator and evenly apply the dye to the exposed hair strands, making sure to cover all the desired areas. Avoid applying excessive dye, as it may seep through the lace.

Step 5: Comb the dye through

To ensure even distribution of the dye, use a wide-tooth comb to gently comb the dye through the hair strands. This step helps prevent clumps and ensures a consistent color. Be careful not to disturb or tangle the lace during this process.

Step 6: Let the dye sit

Refer to the instructions provided with the hair dye to determine the recommended processing time. Allow the dye to sit on the hair strands for the specified duration to achieve the desired color. It’s essential to follow the suggested time frame to avoid over-processing the hair.

Step 7: Rinse and condition

Once the processing time is complete, rinse the hair under cool water until the water runs clear. Be cautious while rinsing to avoid rubbing or scrubbing the lace, as it may cause damage. After rinsing, apply a small amount of hair conditioner to the hair strands to restore moisture and promote softness.

Step 8: Dry the topper or wig

Gently pat the topper or wig dry with a towel or allow it to air dry. Avoid using excessive heat, such as a blow dryer, as it may damage the synthetic hair fibers or deform the lace. Give the topper or wig ample time to dry completely before styling.

Step 9: Style and finalize

Once the topper or wig is dry, style it as desired. You can use heat styling tools or other accessories to achieve your preferred look. If necessary, you can trim or shape the hair topper or wig to suit your desired style and blend seamlessly with your natural hair.

We hope these guidelines help you dye the lace base hair topper or the wig successfully! Get a brand new desired color safely!

Important Care Advice for Your Hair Toppers

To keep your hair toppers performing well and extending their lives, you must take care of them. This article will provide efficient ways and useful advice for taking good care of your hair toppers, from regular cleaning to appropriate storage.

Consistently clean your hair topper crown.

It’s essential to keep your hair topper clean to keep it hygienic and fresh. We recommended to use shampoos and conditioners special for alternative hair (wigs, hair toppers, hair extensions), and here are some essential actions to take for routine cleaning:

a. Spot cleaning: To stop spills and stains from soaking into the fabric, deal with them right away. Apply a clean, wet cloth and a little detergent to the afflicted area and gently blot it. Avoid using aggressive cleaners or chemicals that might scratch the hair topper.

b. Deodorizing: Sprinkling baking soda on the surface of the hair topper will help it absorb any scents. To get rid of the baking soda residue, carefully vacuum.

c. Machine Washing: Before attempting to machine wash your hair topper extension, check the manufacturer’s instructions. Some hair topper accessories are not designed to be machine washed and may need to be cleaned by a professional. If the hair topper can be washed in a machine, use a soft cycle and a light detergent, and make sure it is completely dry before using.

Please adhere to the washing directions on this blog:

How To Wash Your Human Hair Topper To Make it Last Longer

Keeping your hair topper free of allergens.

Taking extra measures to safeguard your hair topper is essential when you, a family member, or anyone else in your household has allergies. To reduce your exposure to allergens, remember these tips:

a. Use an allergen-proof cover: Invest in a premium, allergen-proof cover made just for hair topper extensions. These coverings serve as a barrier, avoiding the buildup of dust mites, pet dander, and other allergies on the hair topper.

b. Regularly Wash Bedding: To get rid of allergies, wash your sheets, pillows, and hair topper cover often in hot water. This routine aids in keeping the sleeping area tidy.

A rotating and flipping of the hair topper.

Consider rotating and flipping your hair topper frequently to maintain even use and increase its longevity. Follow these recommendations:

a. Flipping: If the pattern on your hair topper is symmetrical, do so once every several months. This aids in weight distribution and prevents drooping in particular places.

b. Rotating: Rotate your hair topper 180 degrees every few months if it is asymmetrical or has a certain orientation. This process makes sure that the hair topper maintains constant support and wears evenly.

Hair-topper storage advice

Your hair topper must be stored properly while not in use to keep its quality and form. These are some hints for storage:

a. Before putting your hair topper away, make sure it is clean and totally dry. Mold or mildew can grow as a result of moisture.

b. Use a Storage Bag: Spend money on a ventilated storage bag made especially for bedding. Plastic bags should not be used since they might retain moisture.

c. Store in a Cool, Dry Place: Look for a cool, dry location for storage that’s out of the path of the sun and high temperatures. Store your hair topper extension away from moist basements and attics.

Avoid using a heavy hair topper.

Even though the fact that your hair topper is intended to offer additional support, it is crucial to avoid applying too much weight or pressure on it. The hair topper may eventually droop or lose its form if it is very heavy. Be careful while leaping or sitting on the hairpiece because these actions might put excessive strain on your body.

Keep your hair topper extension out of direct sunlight.

The components of your hair topper may eventually decay and fade if exposed to direct sunlight. Keep your hair topper out of direct sunlight while storing or using it, or use window covers to reduce exposure. The integrity and beauty of the hair topper are preserved thanks to this approach.

Observe the hair topper’s temperature guidelines.

The function and lifetime of your hair topper might be impacted by extreme temperatures. Keep the hair topper away from sources of intense heat, such as heaters or heated blankets. The materials in your hair topper may become stiffer and less pleasant if you leave them in excessively cold temperatures. Your hair topper will remain in the best possible condition if you go by the temperature recommendations.

Professional hair topper cleaning.

It could be required to use expert cleaning services for deep cleaning or for removing stubborn stains. Professional cleaners have the knowledge and specific tools necessary to successfully manage fragile hair toppers. Before selecting a cleaning company, make sure they have expertise in cleaning mattress hair toppers and employ techniques that are secure for the particular sort of hair topper you have. You may successfully extend the life and preserve the quality of your hair topper by putting these extra suggestions into practice and combining them with the maintenance techniques already discussed.

Frequently check your hair topper.

Make it a routine to frequently check your hair topper for indications of wear and tear. Look for any rips, loose seams, or cushioning that have fallen flat. Address any problems you find right away to stop future harm. Early repair of minor damage helps sustain the functionality and durability of your hair topper.

Handle and transport the hair topper extension properly.

Handle your hairpiece delicately while moving or transporting it to prevent additional strain or damage. To guarantee safe and secure handling, enlist the assistance of a second person, if at all feasible. The hair topper should not be bent or folded excessively since doing so might lead to severe damage. Instead, roll it up or transport it in the suitable packing advised by the manufacturer.

Comply with the hair topper’s warranty guidelines provided by the manufacturer.

Review the manufacturer’s warranty paperwork and become familiar with the particular maintenance guidelines as well as any terms or restrictions. Following the warranty instructions will help you maintain the hair topper properly and prevent you from mistakenly nullifying the warranty protection.

You can extend its life, maintain its comfort, and make use of its advantages for many years to come. Your hair topper must be properly cared for and maintained to remain in great shape. You can make sure that your hair topper continues to offer the necessary comfort and support by routinely examining, and treating with care, and according to warranty conditions.

View more hair care & advice

Comprehensive Guide for Styling Wigs Like a Pro

Styling Wigs have become increasingly popular as a versatile and convenient way to transform your hairstyle. Whether you wear wigs for fashion, personal preference, or as a solution to hair loss, knowing how to style wigs effectively can make all the difference. In this comprehensive guide, we will share expert tips and techniques to help you style your wig like a pro. From basic styling wigs to advanced techniques, we’ve got you covered.

Section 1. Choosing the Right Wig

Before diving into styling techniques, it’s crucial to select the right for your needs. Consider factors such as wig type (synthetic or human hair), length, color, and cap construction. Synthetic wigs are low maintenance and retain their style, while human hair wigs offer versatility and a natural look. Consult with specialists or try on different options to find the right fit. Consider factors such as cap size, adjustable straps, and wig density to ensure a comfortable and secure fit. Opt for a wig that suits your desired style and flatters your face shape.

Section 2. Preparing Your Wig for Styling

Proper preparation is essential for the successful styling of wigs. Start by gently detangling the wig using a wide-toothed comb or brush designed for wigs. For synthetic wigs, use products specifically formulated for synthetic hair. For human hair wigs, apply conditioning treatments to keep the hair soft and manageable. Secure the wig on a wig stand or mannequin head to provide stability during the styling process.

Section 3. Basic Wig Styling Techniques

Mastering the basics is key to achieving a polished wig look. Start by creating a natural-looking part using a comb or your fingers. To add volume, gently tease the hair near the roots or use volumizing products. Experiment with different hairstyles, such as updos, ponytails, and braids, to diversify your wig styling options. Use heat styling tools, like curling irons or flat irons, on human hair wigs, but exercise caution and avoid excessive heat to prevent damage.

Here are a few essential techniques to enhance your wig’s look:

Brushing and Detangling: Use a wide-tooth comb or a wig brush designed specifically for wigs to gently brush your wig. Start from the ends and work your way up, gradually removing any tangles or knots. Avoid excessive pulling or tugging, as it can damage the wig fibers.

Parting the Wig: Parting your wig in different directions can change the overall style and create a more natural look. Use a rattail comb to create a parting, starting from the hairline and gently sectioning the hair. Experiment with different parting styles, such as a middle part or a side part, to find the most flattering look for you.

Heat Styling: Heat styling tools like curling irons or flat irons can be used on certain types of wigs, such as heat-friendly synthetic wigs or human hair wigs. Set your tool to the appropriate temperature, and apply a heat protectant spray before styling. Remember to avoid using heat tools on heat-sensitive synthetic wigs, as they can be damaged.

Styling Products: Enhance the look and manageability of your wig with styling products. Use wig-specific styling products like wig mousse, wig spray, or wig gel to add volume, control frizz, or set curls. Apply the product sparingly and distribute it evenly through the hair using your fingers or a comb.

Hair Accessories: Accessories can transform the look of your wig. Experiment with headbands, scarves, clips, or hairpins to add a touch of personal style. They can be used to create updos, secure loose strands, or add a pop of color or sparkle to your wig.

Section 4. Advanced Wig Styling Techniques

Once you’ve mastered the basics, you can explore more advanced wig styling techniques. Try wig cutting and customization to achieve a personalized look. Layering the wig can add dimension and movement to the hairstyle. Experiment with different hair accessories, such as headbands, scarves, or clips, to enhance the overall look. Additionally, consider consulting a professional wig stylist for intricate wig styling, especially for complex updos or intricate braided styles.

Here are some advanced styling techniques to explore:

Customizing the Wig: Customization involves altering the wig to better fit your desired style. This can include trimming the wig to achieve a specific length, adding layers for more dimension, or thinning the wig to reduce bulkiness. With careful precision and the right tools, you can create a wig that suits your unique preferences.

Ventilating: Ventilating refers to the process of adding individual hair strands to the wig cap, creating a more realistic and natural-looking hairline or part. This technique is commonly used for lace front wigs or hand-tied wigs. It requires patience and skill, as each hair strand needs to be carefully knotted into the cap.

Wig Sewing Techniques: Wig sewing techniques involve sewing wefts of hair into the wig cap to add volume, and length, or create specific hairstyles. This technique is commonly used for creating updos, braids, or intricate styles that require additional hair. Sewing techniques can also be used to attach hair extensions or hairpieces to the wig for added versatility.

Heat Styling: Advanced heat styling techniques can help you achieve a wide range of hairstyles with your wig. Using a heat-friendly wig or protecting the wig with heat-protectant sprays, you can experiment with curling, straightening, or creating waves. Advanced heat styling techniques require careful control of temperature and timing to prevent damage to the wig fibers.

Section 5. Creative Styling Ideas

Wig styling offers endless creative possibilities. Experiment with various styles, such as updos, braids, ponytails, and half-up, half-down hairstyles. Use accessories like headbands, scarves, or hair clips to add flair to your wig. For added volume, consider teasing or backcombing the hair near the roots. Don’t be afraid to mix and match styles, textures, and colors to express your unique personality and create head-turning looks.

Section 6. Wig Care and Maintenance

Maintaining your wig is crucial to preserve its longevity and keep it looking its best. It’s important to adhere to the manufacturer’s instructions when it comes to washing and conditioning your wig. Avoid excessive heat exposure, such as using hot water or blow-drying on high heat, as it can damage the wig fibers. Store your wig on a wig stand or in a wig box when not in use to prevent tangling and maintain its shape. Regularly brush or comb your wig to keep it free of tangles and knots.

Styling your wig like a pro is an art that requires practice and knowledge. By following the expert tips and techniques outlined in this comprehensive guide, you’ll be well-equipped to achieve stunning hairstyles with your wig. Remember to choose the right wig, prepare it properly, and master the basics. Explore different curling and straightening methods to achieve the desired look, and let your creativity shine through various styling ideas. Finally, practice good wig care and maintenance to ensure your wig stays in top-notch condition. So go ahead, embrace the world of wig styling, and unveil a world of endless possibilities and impeccable style!

How to Level-up Brown Wigs

Selecting your natural hair color is always recommended when choosing a wig or topper. However, choosing isn’t always as easy as it sounds. There’s literally thousands of shades of all different colors to choose from, and while most wig companies select the most common, it’s still hard and a little risky when trying to match your exact tone. That’s why at Uniwigs we want to help solve the mystery of choosing the best color options by showing you what works and how colors are graded based on natural tone.

One thing you have to know is that not all hair manufacturers are the same. Lower grade hair is always more difficult to process and in turn, more difficult to turn into the right color. At Uniwigs, we use the highest grade natural human hair available to get the perfect shade every time. Even with our advanced manufacturing techniques, one thing to point out is that brown hair will always carry a reddish hue across the color spectrum. The reason for this is because the base color for manufacturing is a natural black. Turning black into a brown is a delicate process, which is why you should always choose Uniwigs for your wigs and toppers. Our shades of brown have the most natural look while retaining all of the quality and elements you expect in natural human hair.

G-2
Our G-2 shade of brown human hair is the closest shade to natural dark brown hair available on the market. If you prefer a slightly darker-muted look, we also offer 211 expresso brown. Now you’re asking yourself “Aren’t these two colors the same?”. The answer might surprise you. While it’s safe to say that to an untrained eye, these two colors are very similar in appearance, there’s just one detail that goes completely unnoticed and that’s the reddish hue we mentioned earlier in this article. Both colors offer the natural advantage of helping to blend in with your natural hair, but you’ll also want to consider your complexion combined with the “warmth” of your own hair tone before choosing between these two shades.

G-4 or 210?

Medium brown or Truffle Brown? They’re both the same right? Not exactly. As we mentioned before with our darker browns, it’s easier to see the different warmer and colder tones between these two brown’s. Medium brown is your typical cool tone brown that also happens to be the most common among buyers. From the pictures though, it’s easier to see as the tone of natural brown hair lightens, you’ll also find reddish hues within. Which brings us to our Truffle brown and how to decide between the two. Truffle Brown simply has warmer tone infused into the shade, which is a better option for those with a warmer complexion as well. You can see the difference side-by-side, but it’s even more important when wearing the hairpiece as the difference will help bring out your natural complexion.

At Uniwigs.com we have several options when it comes to choosing your perfect wig or topper. You can always speak to one of our helpful customer service agents as well. Our goal is to help you get your confidence back and there’s no better way than with a new wig or topper. We can also offer samples if you’re trying to get the exact match, or you can send us a sample of your hair and we can offer our professional recommendation and make sure you get exactly what you want and need.

Cutting Your Wig Like a Stylist

Wigs can be a lot of fun. You can add instant length to your hair or change your hair color temporarily all by putting on a wig. Most wigs come pre-styled so it’s often necessary to do a little restyling to get a look that suits your face. You may even need to trim your wig to get the right look. Of course, you can always hit up your favorite stylist for customizations, but when that’s not an option, there’s a few simple ways to update your wig from the comfort of your own home.

Here are some of our favorite tips for changing up your wigs including bang trims, texturizing, and even cutting the hair into a sassy, long bob. You don’t have to be a professional stylist to make some simple snips that transform your wig into a whole new look. Moreover, remember to always use good quality hair scissors and to take your time! With a little bit of patience, you can cut and style your own wig at home. Now refer to some popular ways on how to trim your wig!

uniwigs cut wig

  1. Place your wig on a wig stand and pin it into place. Put several T-pins in the hair line and in front of the ears to secure the wig to the stand. Check that the wig stand is straight, too! If you don’t have T-pins, you could also use basic sewing pins.
  2. Comb or brush the hair to remove any tangles. Spend a few minutes gently brushing out your wig. You want to ensure that there are no tangles or sections of hair that aren’t falling where they should. Since your wig doesn’t grow back, you need to be patient when preparing to cut it. This is a great time to think about what length you want your wig to be if you don’t already know.
  3. Start with the back of the wig and work in small sections. Move your fingers down the hair until they are at the length where you want to wig to be. Try to hold the hair so that it’s flat between your middle and index fingers, rather than bunched together. If you want to make a drastic change and go from long hair to medium-length or short hair, just adjust where you’re going to make the cuts to get the length you desire.
  4. Cut the hair at a 45-degree angle, taking care to not cut your fingers. Use your hair-cutting scissors and cut up into the hair, trimming it across the entire length of your fingers. Make small, even snips to prevent any accidents. You could cut straight across rather than at a 45-degree angle, but the angle helps the hair look more natural than a straight, blunt cut would.
  5. Trim the entirety of your wig until all the ends are the same length. When moving on to a new section, use some of the hair from an already-cut area to guide the trimming so everything ends up being the same length. Keep in mind that you can always trim or cut your wig shorter if you want to in the future, but you can’t make it longer!
  6. Snip off any loose, long hairs that you missed in the trimming process. Walk all around the wig, checking the ends for any long, scraggly hairs you might have missed in the trimming process. Snip them off to clean up your wig. Also check the length of the hairs on either side of the wig to make sure they are even.

After following these six steps, you will find out a whole new wig with the style you want! If you are trying to find the best wig, Uniwigs is always here to help!

How to Wear Hair Extensions for Thick Hair?

When choosing hair extensions, you have to consider the hair volume and grams. Different grams for different hair volumes you have. Usually, we define three types of hair volume we have: thin, medium, and thick. Today, we will talk about how to choose and wear hair extensions for people with thick hair.
Usually, the hair extensions glam between 180g and 220g will be enough. Just think, how to weigh it would be if you wear an extension above 250g. That’s why we don’t recommend that kind of hair extensions.

220g 5 Pieces Classic Clip-In Synthetic Wavy Hair Extensions

So what to do if it’s thin for me?

That depends on the tips on how you wear the hair extensions.
The key is to hide away some of your own hair! This will eliminate some of the bulkiness and help to blend your own hair with the extensions.

120g 7 Pieces Invisible Clip-in Remy Human Hair Extensions

How to wear it?

Normally if you put your extensions in according to the instructions, you would section the bottom half of your hair and then put in your extensions. If you already have thick hair that bottom layer is going to be pretty heavy and when you lift up your extensions you are going to see just this row of really short hair.

160G 20
160G 20″ Invisible Clip-in Remy Human Hair Extensions

So what I’m going to show you is how you can get your extensions without that bottom layer.

First, you have to make a section at the back and braid the bottom hair. When you make the section, the position is very important: at the nape of the neck? Ear to ear? Or at the crown? That depends on how thick your hair, grasp the hair extension with one hand, and grasp your hair with another hand, compare the thickness of them, then estimate the extra hair volume of your hair compared with the hair extensions, section the extra hair with the right place.
Then make two braids for the extra hair.

Ruby 24
Ruby 24″ Ribbon Bow Synthetic Ponytail Extension

Then pin both braids together. That’s good for hiding the extra hair, and also works for clipping the hair extension.

After that, you will find that your hair is not so thick.
Then you can add hair extensions as usual. If you are a perfectionist you can always straighten your hair to match the texture. But don’t forget it’s going to be super noticeable to you and not so noticeable to people who have never seen you before. So we suggest doing some curls, which would be much undetectable than straight hair.

4 Synthetic Wigs for Your Daily Wear!!

Many people like to wear wigs, especially those who want to change their hairstyles but do not want to toss their hair. Wearing wigs is a very convenient and direct method. Wigs are now well made, with good air permeability and hair quality. So many wigs suitable for daily wear are beautiful and convenient.

1. This wig is your new radiant style. Natural blonde hair, a natural dark root, and warm honey blonde tones, it will have you wanting to wear her again and again. And it is the staple blonde wig everyone needs in their wardrobe! Wear it to work or school, dress her up for a night out, or wear her to the movies with friends.

2. It is a warm style with gorgeous honey tones to brighten up your look and your day! With natural dark roots, it is an extremely realistic looking wig and a best-seller. It will be your new everyday style that can be dressed up or down for work, to school, to college, to the mall, to an event, or anywhere you want to bring Sunshine!
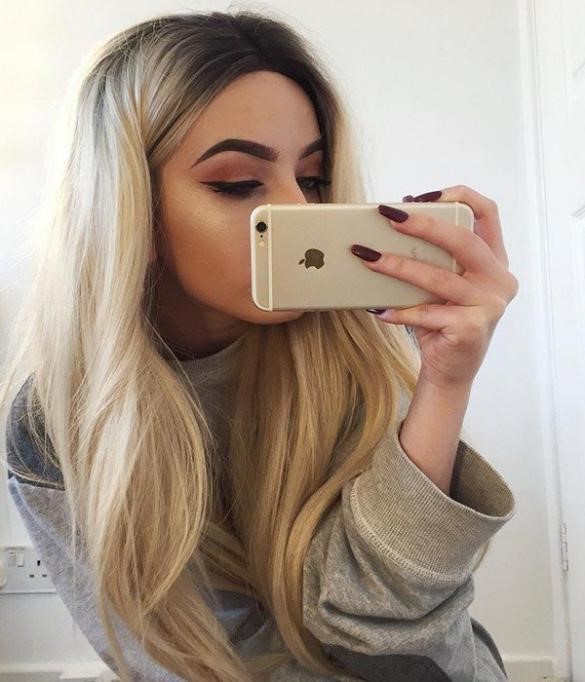
3. It is the sweetest style you need! This wig is a blend of the gorgeous soft colors Platinum Blonde, Strawberry Blonde, and Baby Pink, with a natural dark root for a realistic look. It is perfect for a date at the ice cream parlor, at the movies, or for a festival look. It looks especially sweet when paired with pink, and it can really be worn anywhere with its natural look.

4. The silver and cool-toned beauty to give you the ultimate modern look. She is a bright wig that will make you stand out! It is super versatile and can be worn literally anywhere. Wear her to a festival, a concert, a night out, a party, to work, school, a wedding, cosplay, the world is yours with Star!

Choose your unique wigs→https://www.uniwigs.com/40459-trendy-wigs

How to Care for Synthetic Hair Topper

Synthetic hair toppers are perfect for you if you wish to add volume to your hair, have thinning hair, or are experiencing hair loss on your crown or someplace else. It’s also practical for adding fullness and length to your hair.

Caring for this hair attachment to elongate its life span is easy if you do it right, and I’m here to put you on the right track. Follow the steps judiciously, and your topper will swing and bounce like it is brand new.

One of the ways to care for your hair topper is by washing it. No, you can’t just wash it like it’s your natural hair. I’ll show you how.

Here’s a list of things you’ll need;
• Wide-tooth comb
• A workspace (basin, bowl, or container)
• Coldwater
• Mild shampoo and conditioner
• Towel
• Wig stand

How to Wash Your Synthetic Hair Topper

1. Detangle synthetic hair topper
Start with gently detangling your synthetic hair topper to avoid pulling the strands out.

2. Get a basin/bowl/container
Place the hairpiece in a basin/bowl/container you can wash it in. Just make sure you have enough room to wash correctly.

3. Rinse the hair topper
Place the hair topper under cold running water and rinse it from the roots to the tips.

4. Wash piece with mild shampoo or sulfate-free shampoo
Smooth some shampoo onto the hair from roots to tips. DO NOT twist or rub it as that can tangle it up and mess with its style.
Put some cold water into the basin/bowl/container, place the hair topper in it, and swish it in the suds it creates.

5. Rinse hair topper again
Run the hairpiece under cold running water and gently rinse from roots to tips until the water runs clear.

6. Get rid of excess water.
Squeeze excess water down the piece. DO NOT wring it.
Hold the hair in your fist and gently squeeze the water from the roots down to the tips. Don’t pull on it. You have to be gentle.

7. Condition the hair
Spread some mild hair conditioner onto your palms and work it into the hair evenly. Smooth the topper out as you do this.
Leave for 15 minutes.

8. Rinse one last time
Thoroughly rinse the conditioner out under cold water.

9. Get rid of excess water once more.
Gently squeeze out excess water. Always remember; DO NOT wring it.

10. Blot out water from hair
Place your washed synthetic hair topper in between a folded towel and apply pressure, so it absorbs excess water. This works well in place of wringing as it’s safer for your hair and you retain its style. DO NOT wring or twist.

11. Hang hair up
Place damp hair on a wig stand to hang and part to the desired position with a tail comb.

12. Let hair air dry
Air drying synthetic hair is much faster than a human hair. It takes at most three hours to dry completely.

13. Style hair topper
Once it’s dry, you can style the hairpiece.
Check the instructions your wig came in and adhere to the heating and styling rules stated. For some, the maximum temperature for styling synthetic hair toppers is 180F unless it’s stated by the manufacturers that you can apply more heat.
Applying too much heat while styling might lead to melting of the hair as it’s synthetic and that’s some severe irreparable damage you don’t want.

Styling Your Synthetic Hair Topper

If you feel the need to alter the style in which your topper came, I would advise you to take it to a professional hairstylist. Attempting to make modifications to the hairpiece on your own is terrible for your hair’s shelf life.
A professional will make the changes you want without causing damage to your hairpiece.

Do’s and Don’ts of Synthetic Hair Topper Care

Do’s
Some maintenance tips include:
Wash your hair topper every two weeks or whenever it’s getting visibly dirty, depending on how often and how long you wear it at a time.

• While washing your hairpiece, make sure you’re doing it in a downward motion in the direction the hair falls to.

• Water used to wash it rinse synthetic hair should always be cold. Hot water can permanently damage the hair.

• When not in use, hang on a wig stand and cover it up with a hairnet, so dust doesn’t settle on it.
For short-term storage, please keep it in the box it came in. For long-term storage, please keep it in your closet.

• Use products suited for synthetic hair topper use only.

• Apply some leave-in conditioner now and then to hydrate your hairpiece.

• Take care of your hair underneath it to prevent grease, dirt or product buildup from taking a toll on your topper.

Don’ts

• Don’t wash it too often. Take care of your topper but don’t wash it every chance you get. Doing this will shorten your hair’s lifespan.

• Don’t apply oil to your topper as this could wreak some havoc on the hair. It’ll get clumped up and tangled and might begin to look somewhat ratty and challenging to manage.
Also, it will degrade the synthetic strands over time.

• Don’t shower with it. Seriously, just don’t.

• Don’t comb or style it when it’s wet. You could also damage it if you do and you don’t want that. If you care enough about your topper, that is.

• Don’t expose it to heat, especially when it’s extreme. It could cause severe fiber damage and make your hair frizzy.

• As tempting as going to bed with your topper on might seem, don’t do it. You run the risk of matting and breaking your synthetic hair, and it’s more awful to see than your usual bedhead.

• Don’t go swimming with your hairpiece. Pools have chlorine, and synthetic hair doesn’t do so well with chemicals. Give your topper a fair chance at life and remove it before going for a dive.
There you have it; a complete guide to caring for and maintaining your synthetic hair topper to retain its sway and luster.

SHOULD I GET BANGS?

A good number of women love bangs. Bangs do not just make you younger, it accentuates the fashion-inclined part of you. So it is not out of place if you want to get one. Bangs are lovely especially when you want to go for a new look. You are at the salon or maybe at home browsing ideas to change your hairstyle and suddenly something strikes you, “should I get a bang?” If this scene is familiar, this piece is for you. We will help guide you through the things you should consider before you go for bangs.

Unlike some other hairstyles, bangs require a lot of commitment. It is not like a beautiful dress you can try on to check the fitting and drop back later if you are not satisfied. Therefore you must be sure of your choice and decision before going for bangs.

There are so many things you need to know and other things you must consider, questions you need to ask yourself before you touch that your hair. When you ask yourself these questions and your answers tilt towards the positive bearing then, yes, you should go get a bang; if otherwise, do well to find another pretty hairstyle.

Are bangs trendy in 2020?
We wouldn’t want to appear on any occasion looking like an antique. We all want to look fashionable and appealing. Now, you want to know if bangs are in line with the trending fashions in 2020. A celebrity and hair ambassador, Laura Polko explains that bangs are always in style. She also emphasized the need to also consider other factors before going for bangs. If being fashionable is your priority, you may want to rock bangs. Bangs tell so much about the person wearing them. Bangs also make you look classy.

What kind of activities do you do?
While bangs are beautiful, you will need to answer this question to decide whether bangs are for you. Bangs have a way of getting in the way while carrying out our daily activities. If your daily routine requires you to be physically active such as working out, cleaning, and lots more, you should consider if you can manage the discomfort that may come from the bangs. But if your routine is physical-activity free, bangs will give you no extra discomfort. Go for it.

Why do you need to change?
Answering this question can help you make a better choice. Even when you have adorned your bangs with different color and suitable bang swag, your outfit is almost incomplete. The best accessory to go with your bangs is your confidence. The onlookers don’t only see the beauty of the hairstyle but the attitude of the wearer. You can only have this confidence when you have crossed all your Ts and dotted all your Is but still maintain that bangs are the best fit for you. Do not go for bangs because you saw in on someone and you think it will sit well on you. Sincerely admit to yourself why you need a change. Examine if the bangs will align with the reason for the change. If yes, you should get your bangs.

Are you ready for the commitment?
Bangs are beautiful, yes. But you have a role to play to maintain that beauty. You need to get trims every two or three weeks to maintain the length. Also, you must dedicate extra time to the bangs to keep them in good condition before stepping out for the day. In other words, if you have 15 minutes to brush/comb your hair in the morning, you have to give at least 10 minutes to the bangs before going over to the rest of the hair. Furthermore, bangs are not the kind of hairstyle you can switch to another style within weeks. Depending on the length, it can take them six months to grow out. You will need to carry the hair for a long time to grow out the hair that will enable you to change your hairstyle. If you are ready for the commitment, go ahead with your choice of getting a bang.

You should have a special stylist.
Don’t try to cut the bangs yourself. Visit a professional to do so. Even when you need trims, you have to engage the services of a stylist. This is because bangs are in the front of the hair and even the slightest of mistakes can easily be spotted. If the cuts are uneven, anyone that sees you can easily notice the unevenness which doesn’t tell well about you. On the other hand, if you must experiment or you have no access to a hairstylist, ensure to use a pair of good styling shears. They make a neater cut compared to the regular kitchen scissors. You will also need to wait for the hair to dry before cutting them. Wet hair shrinks; you may not get their actual length if you cut them when wet.

You should know that bangs do not choose a hair type
Bangs works great on every hair type be it curly or fine hair. So many people with curly hair believe that bangs are for the ones with straight hair. That is deceitful. Curls make bang look different and delightful. Just make sure the bangs are longer since the curly tends to shrink. As for fine hair, cutting your hair to bangs does not reduce the volume of the hair in any way. Long bangs actually make the hair thicker.

Will bangs fit my face shape?
Yes and yes. Bangs are for every face shape. And of course, you know there are varieties of bang styles you can choose from to flatter your face shape. Most bangs complement an oval-shaped face. In other words, if your face is oval, you have many options to choose from. Other face shapes like square or oblong can do with long layers of A-shaped bangs. All bangs look good on the heart-shaped faces. Bangs are for everyone.

It can be fun trying out bangs; it takes a different form from other hairstyles. It gives you a picture of a new you. You may do a little warm-up with wigs before cutting your hair.